Highlights
- Size
- 10 × 10 × 10 ft
- Pixels
- 96
- Mirrors
- 192
- Welds
- 158
- Light
- 4 × 50 W, 395 nm UV
- Budget
- $1,670
- Build
- ~3 months
- Setup on playa
- ~1 hour
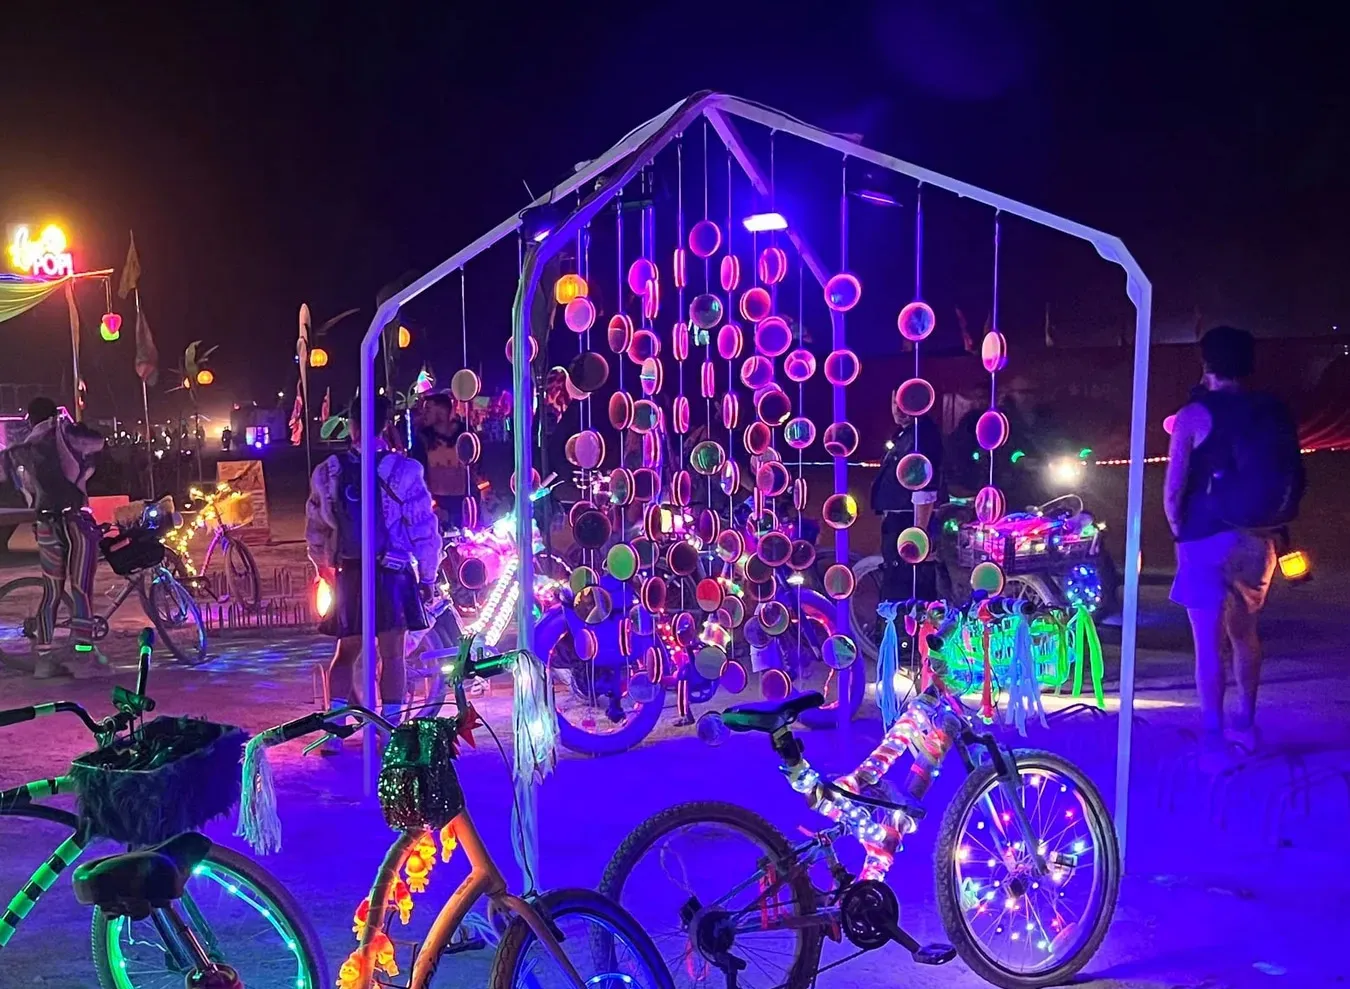
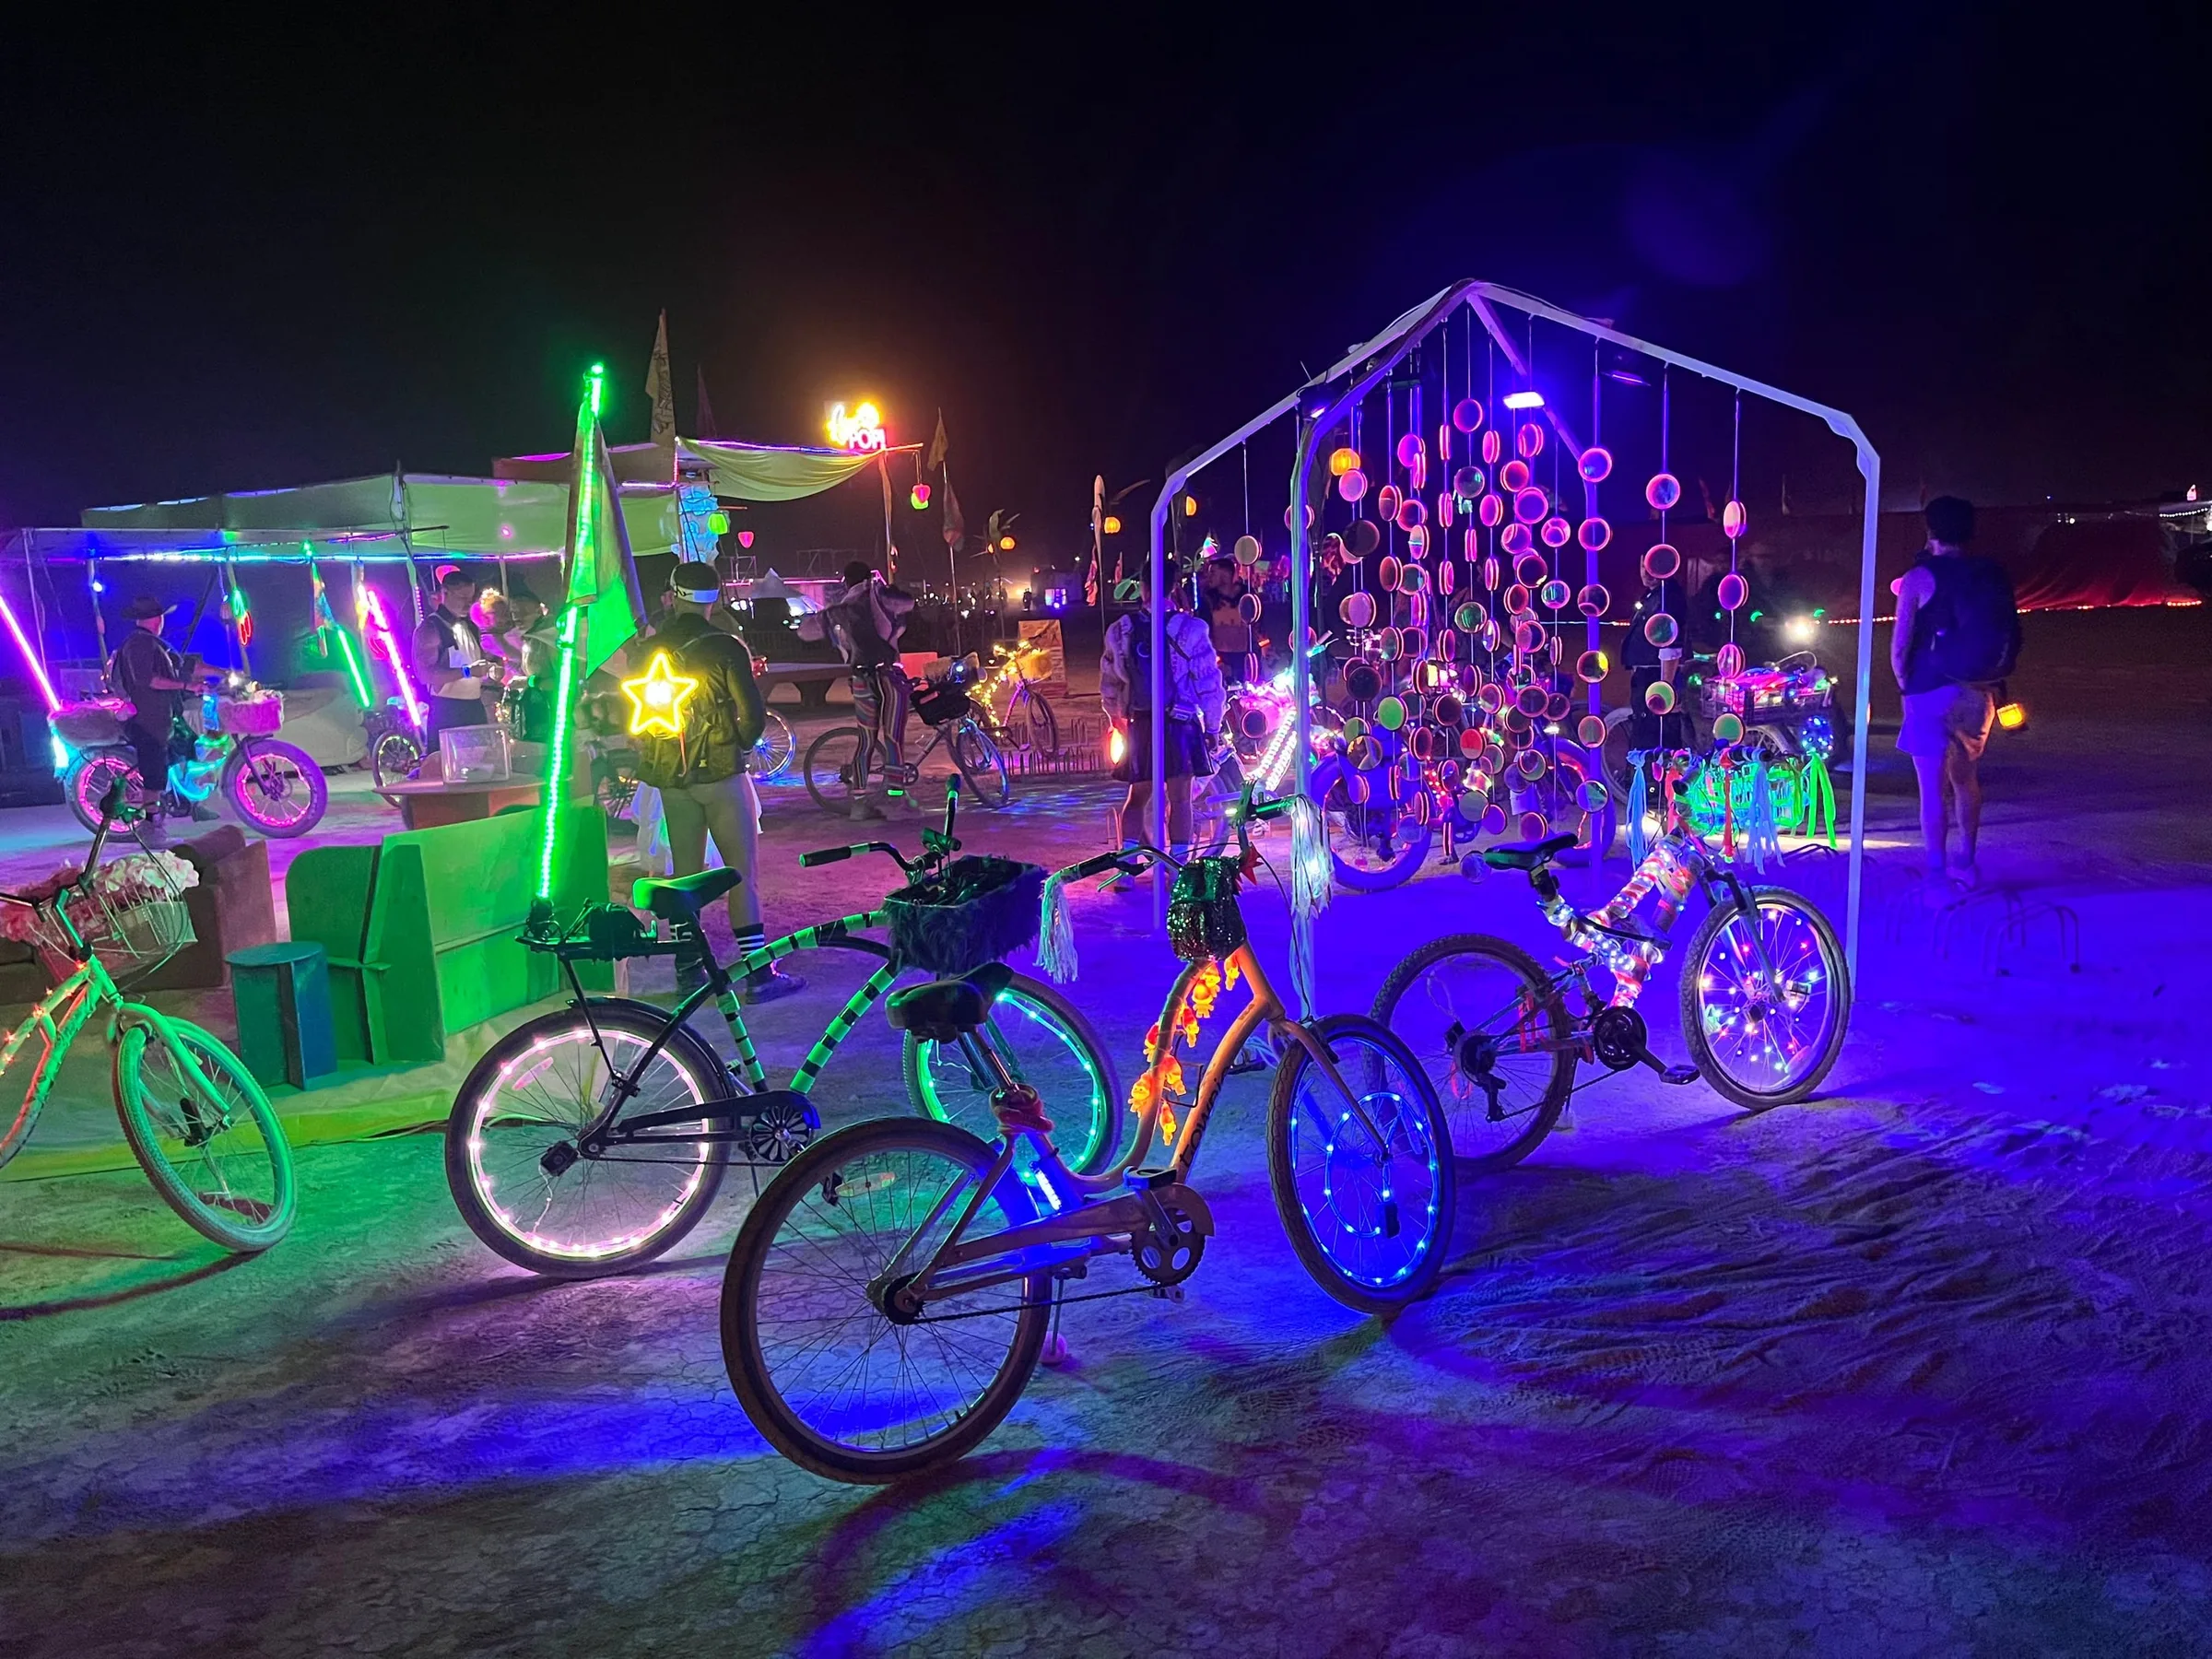
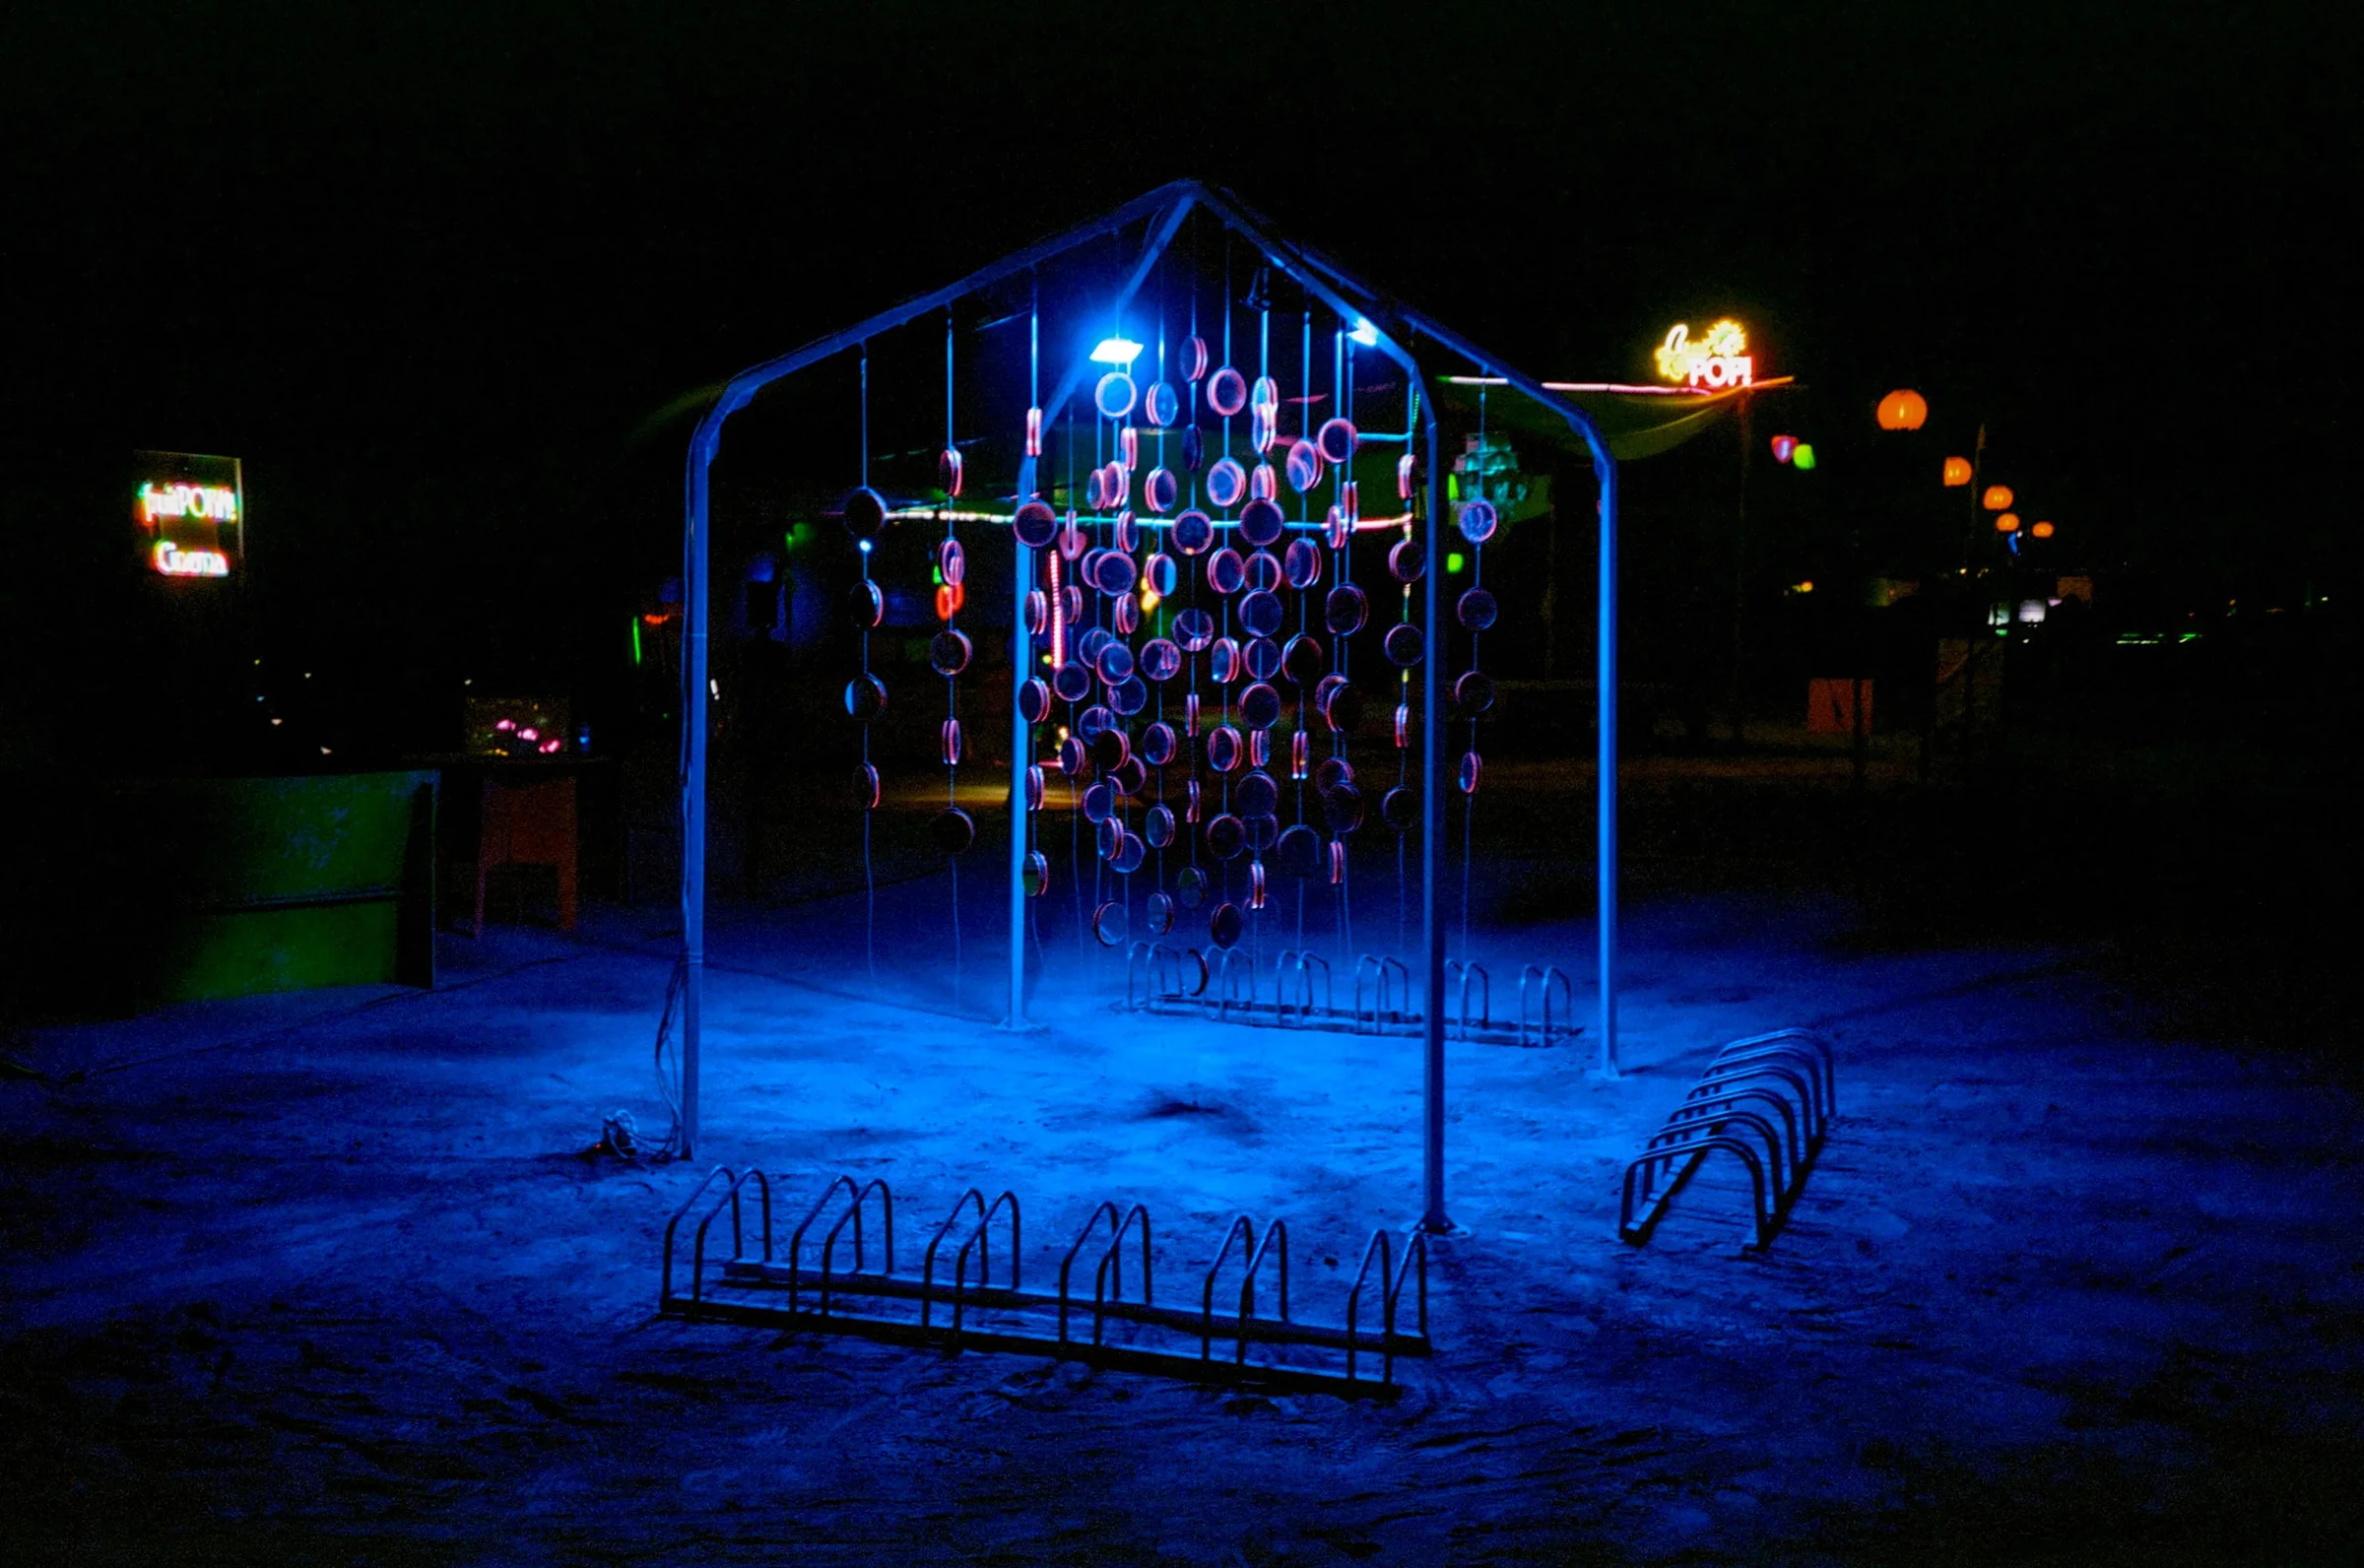
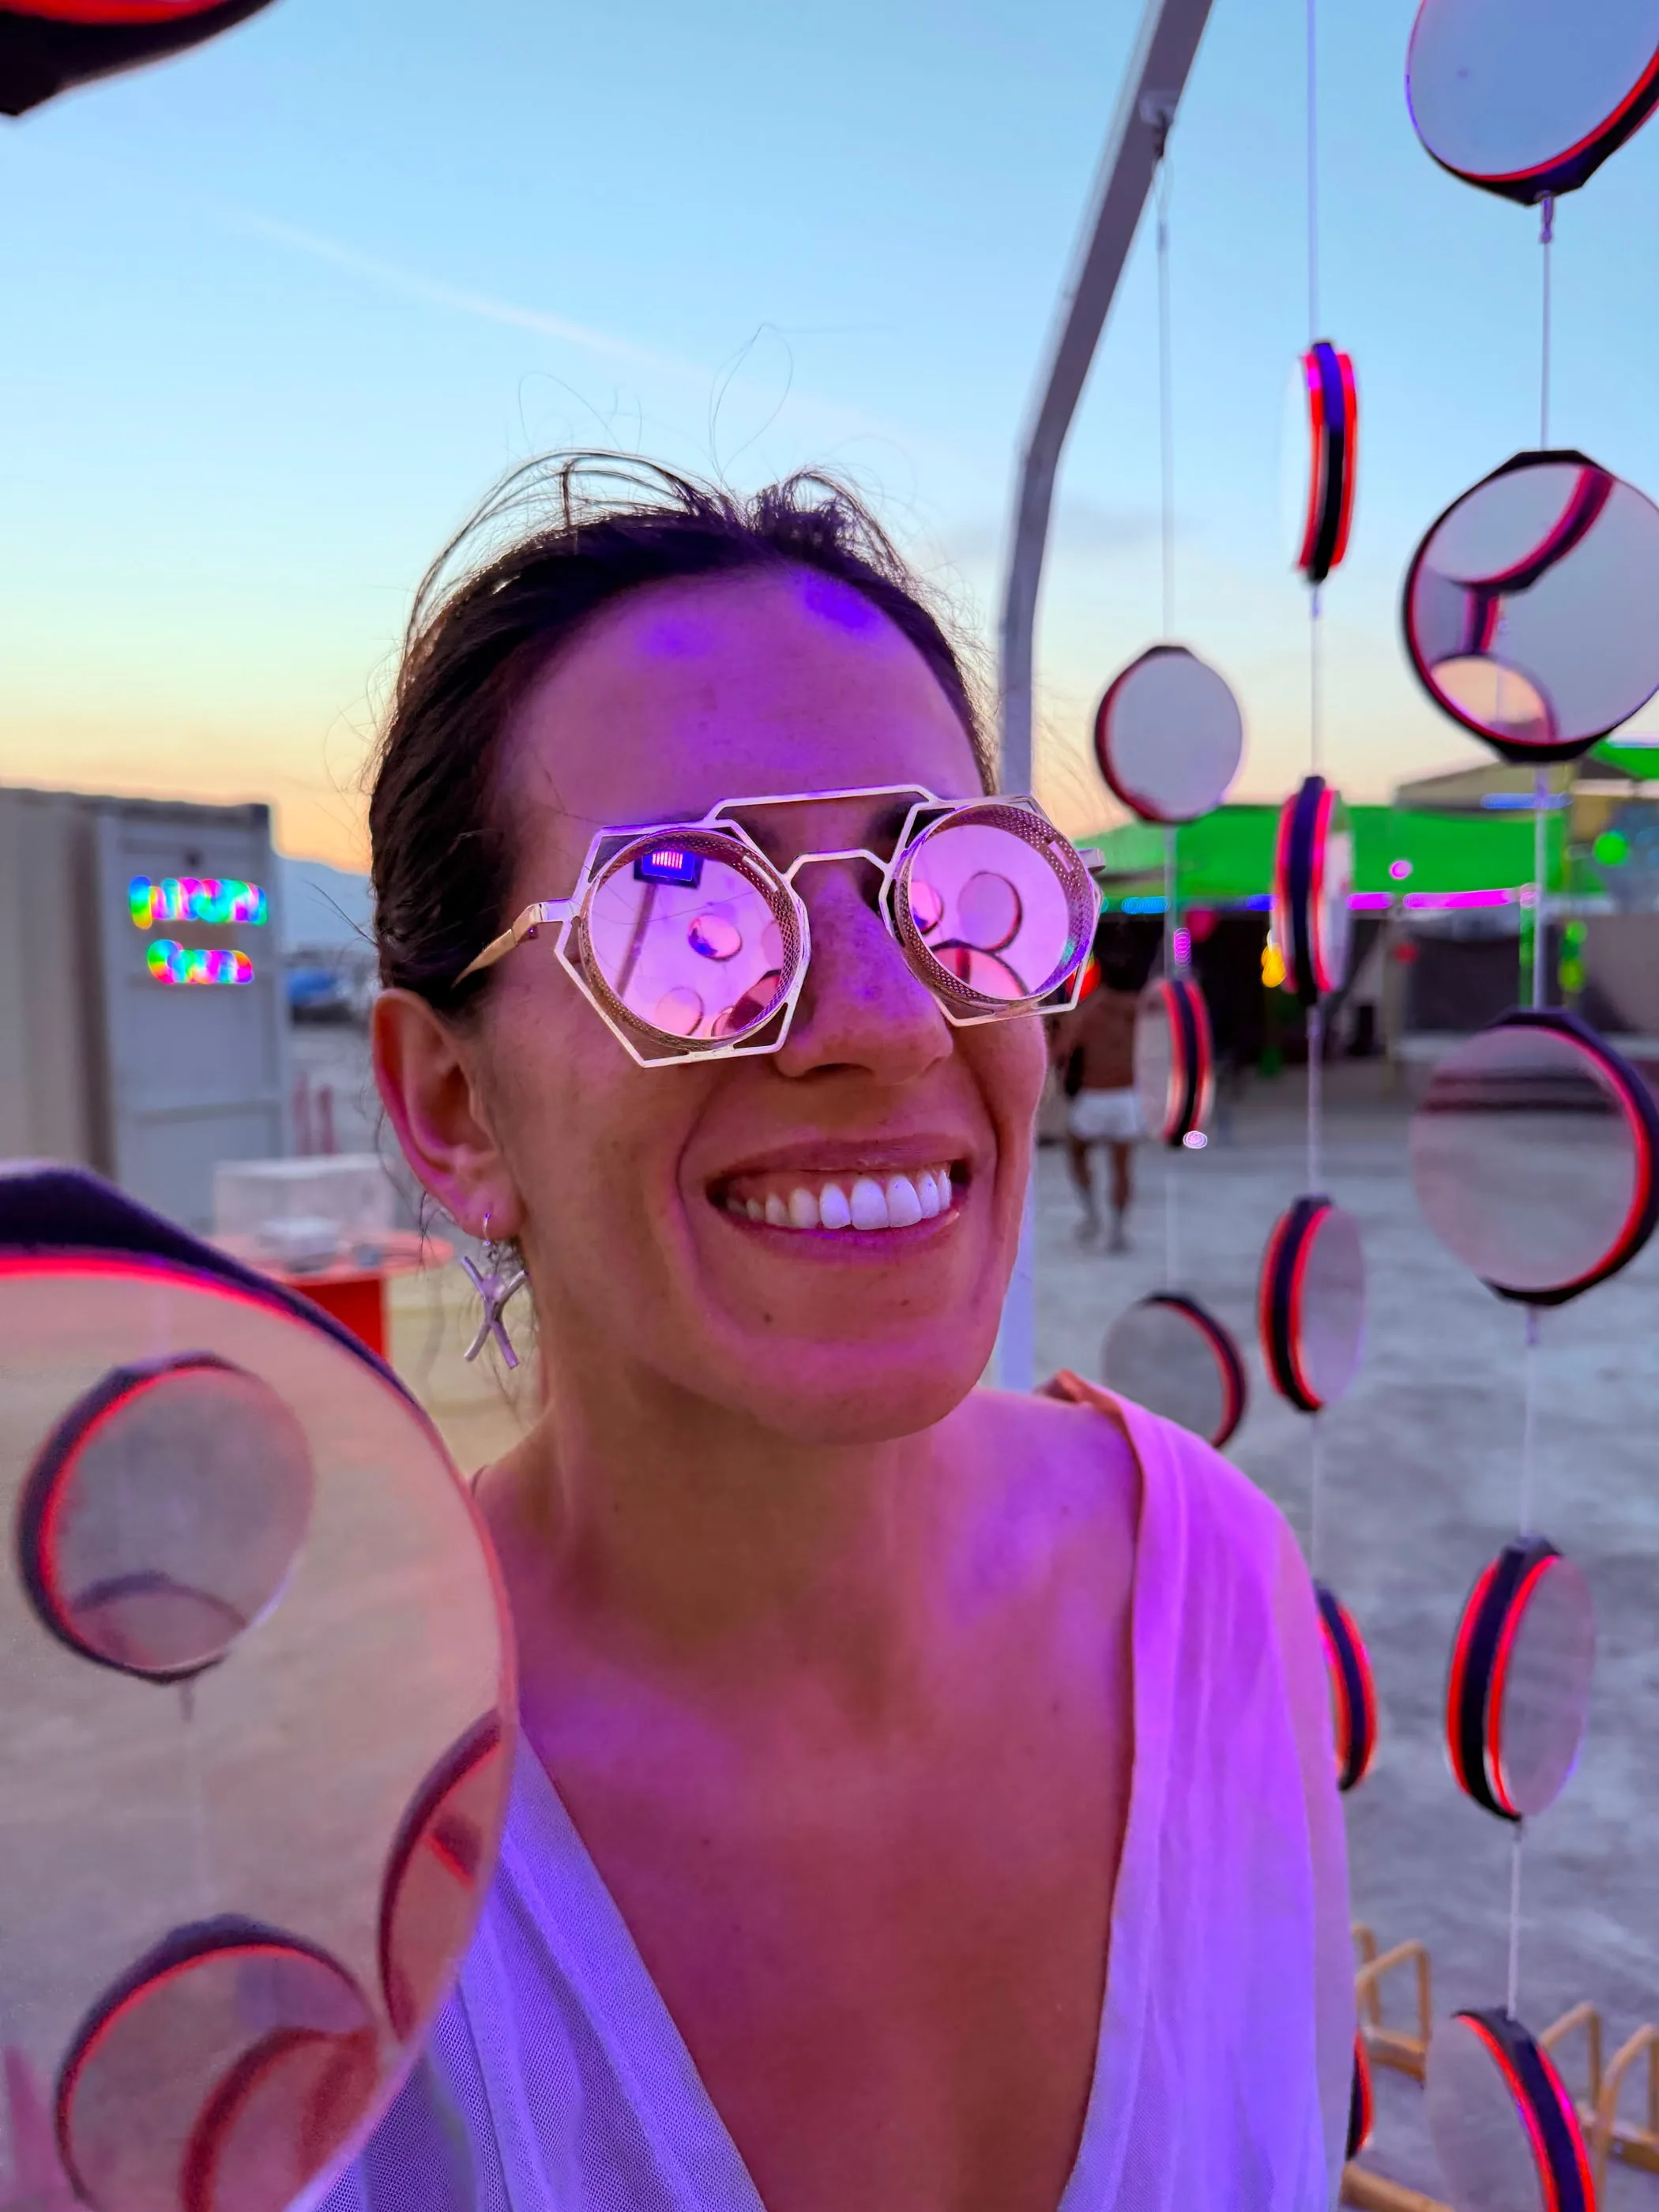
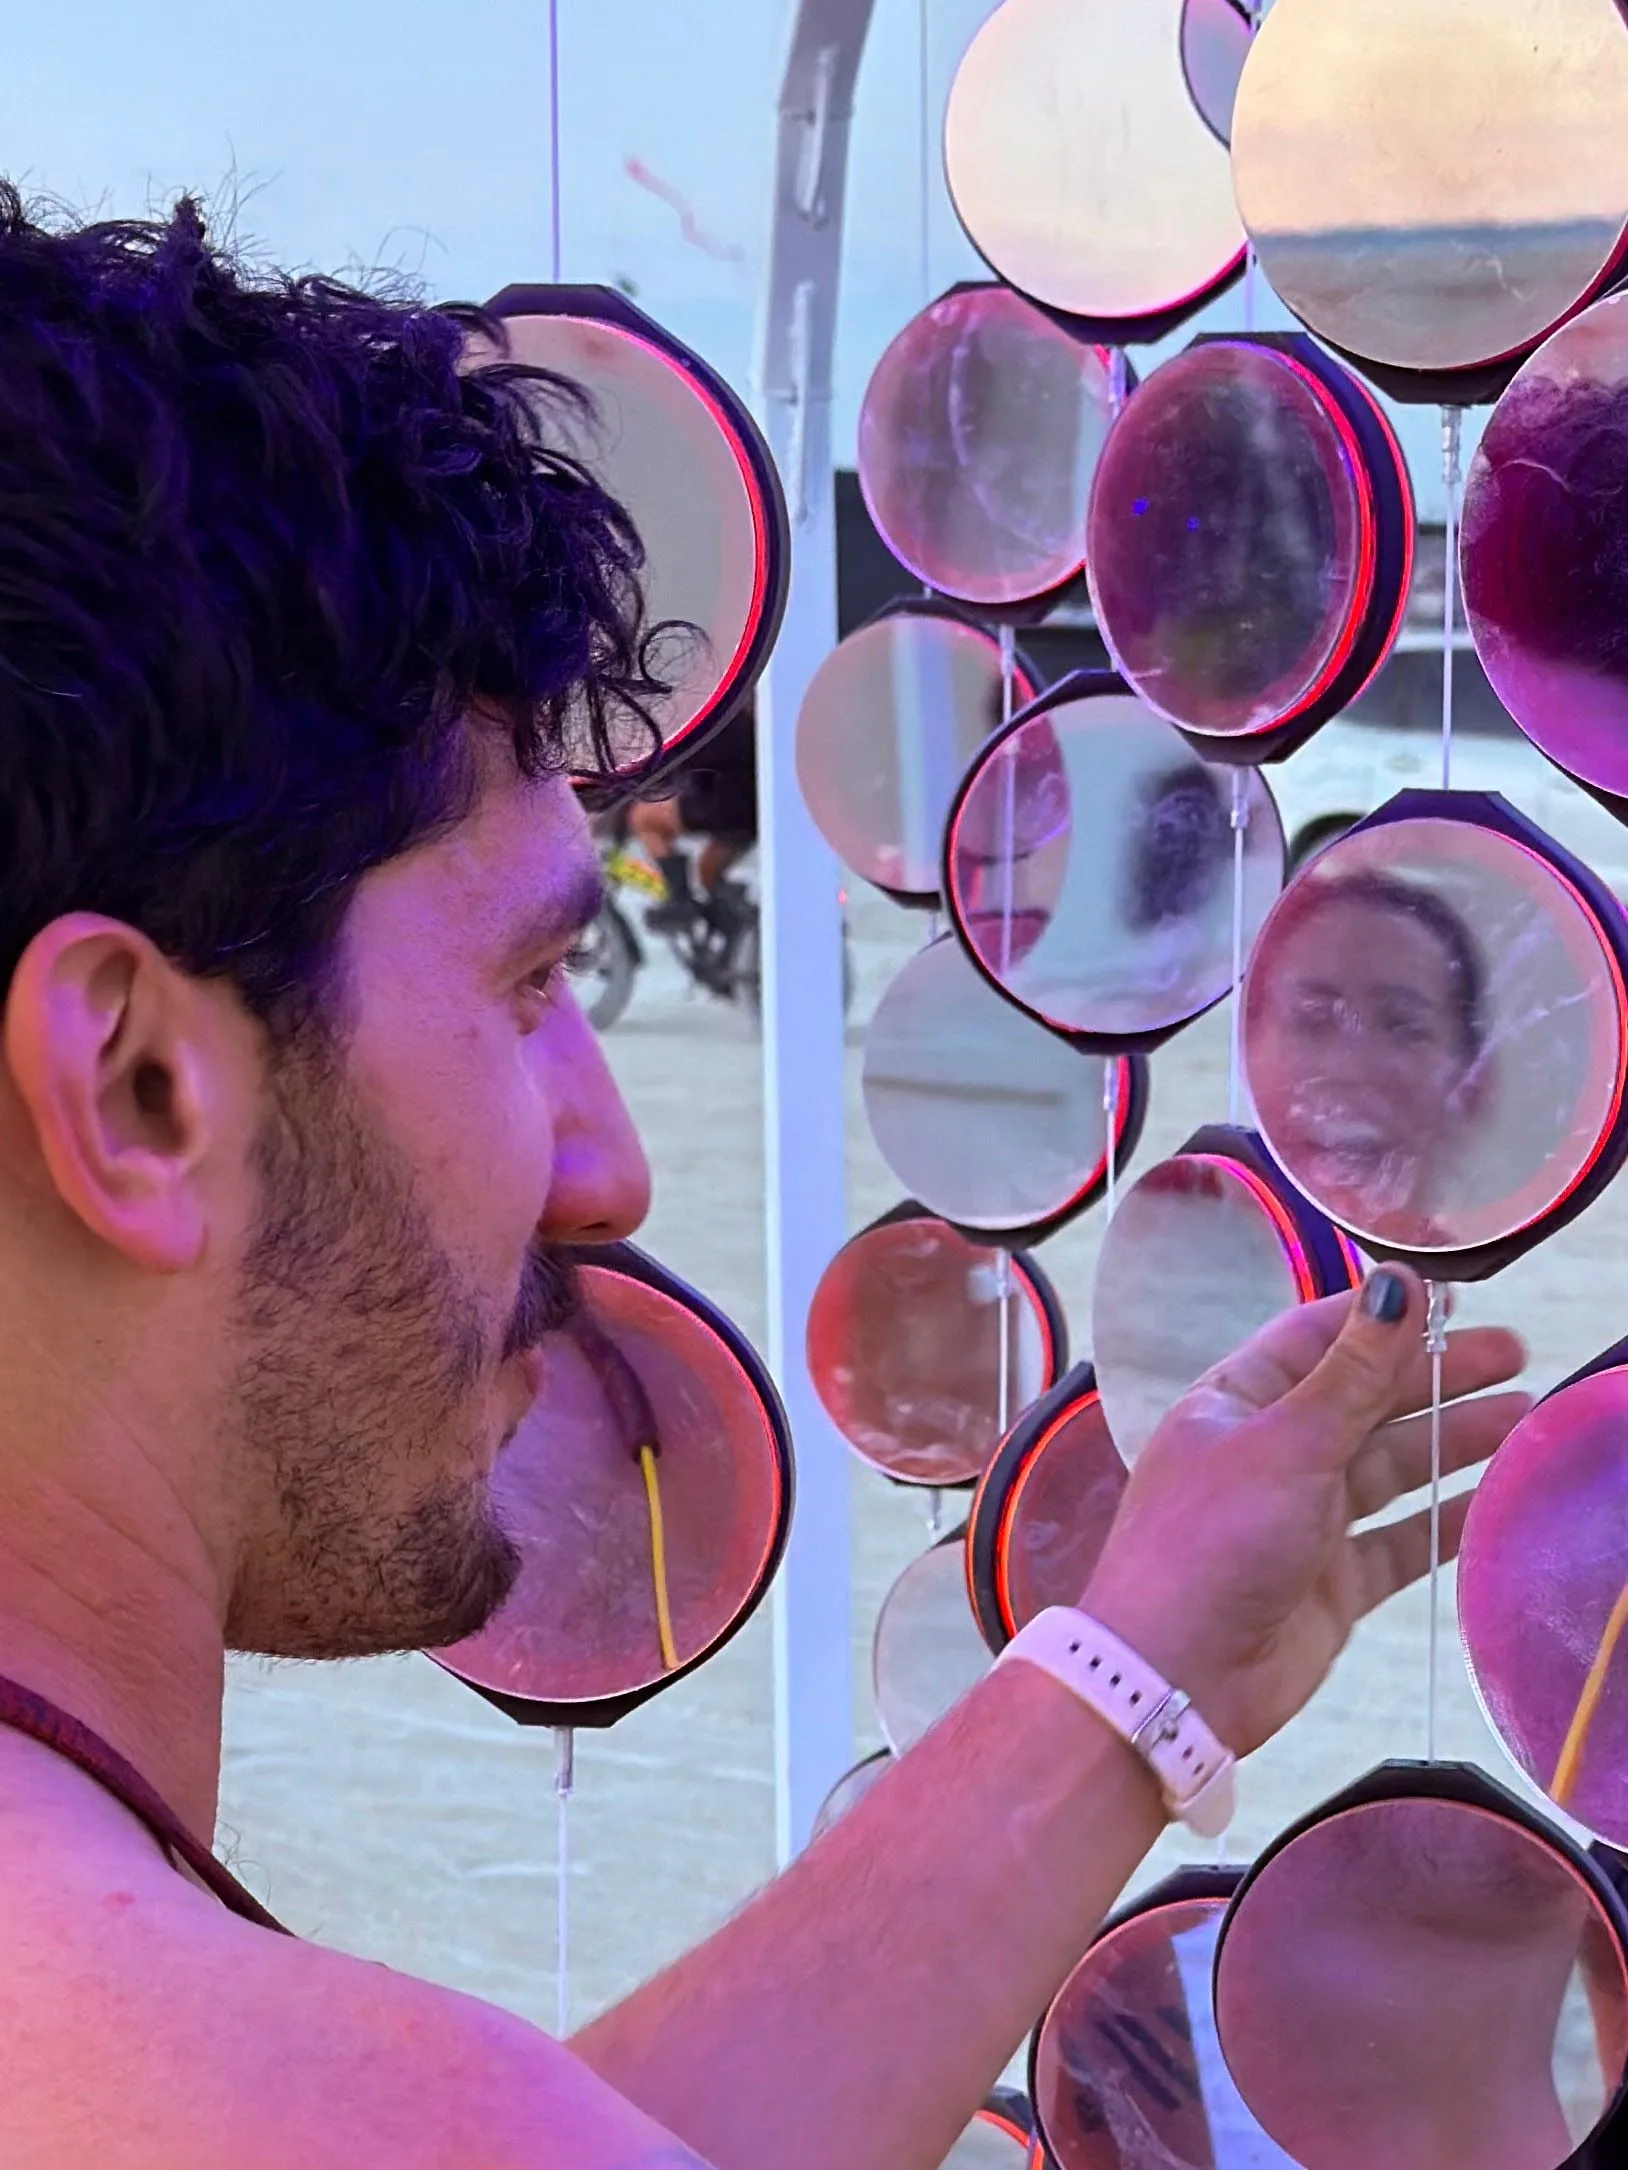
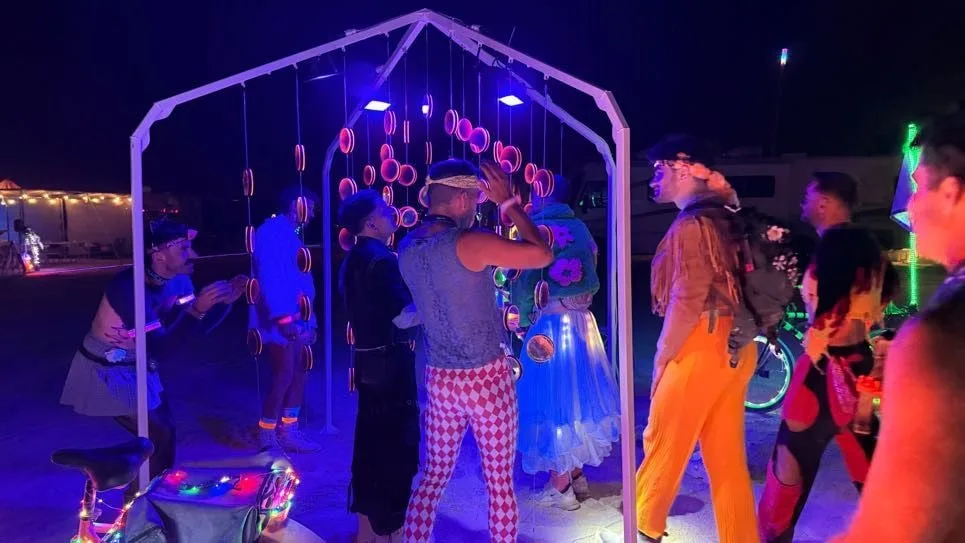
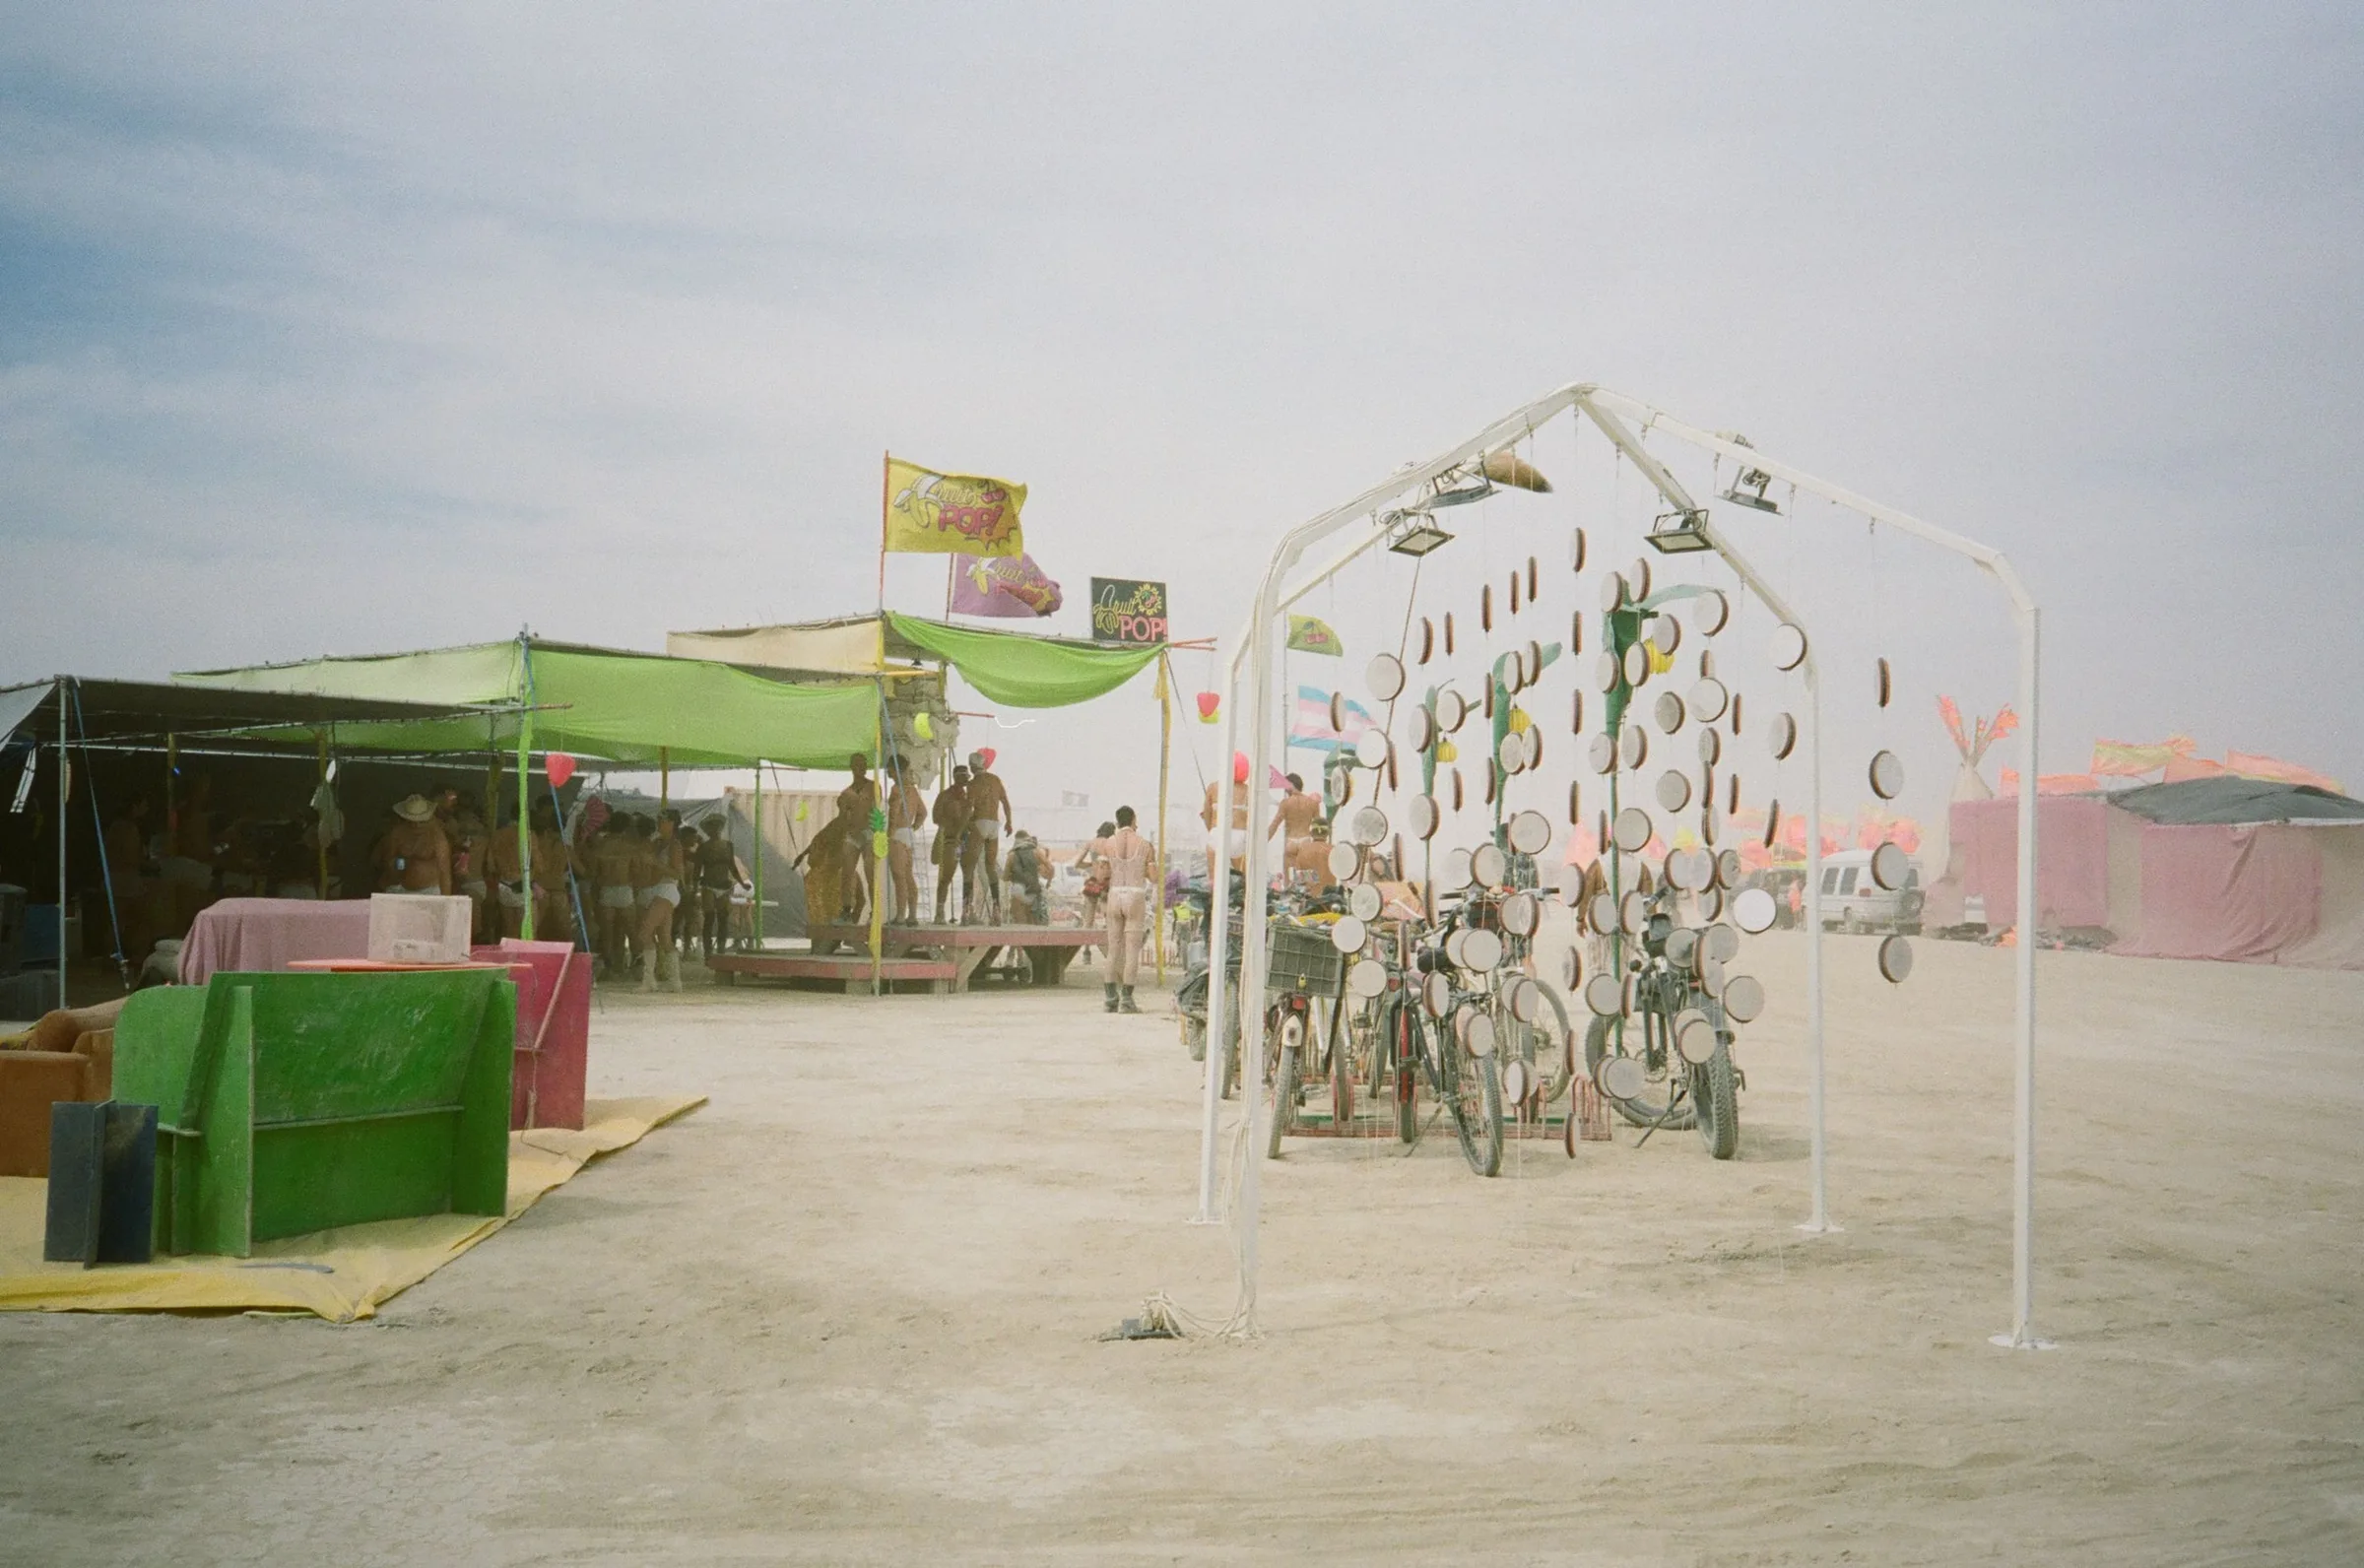
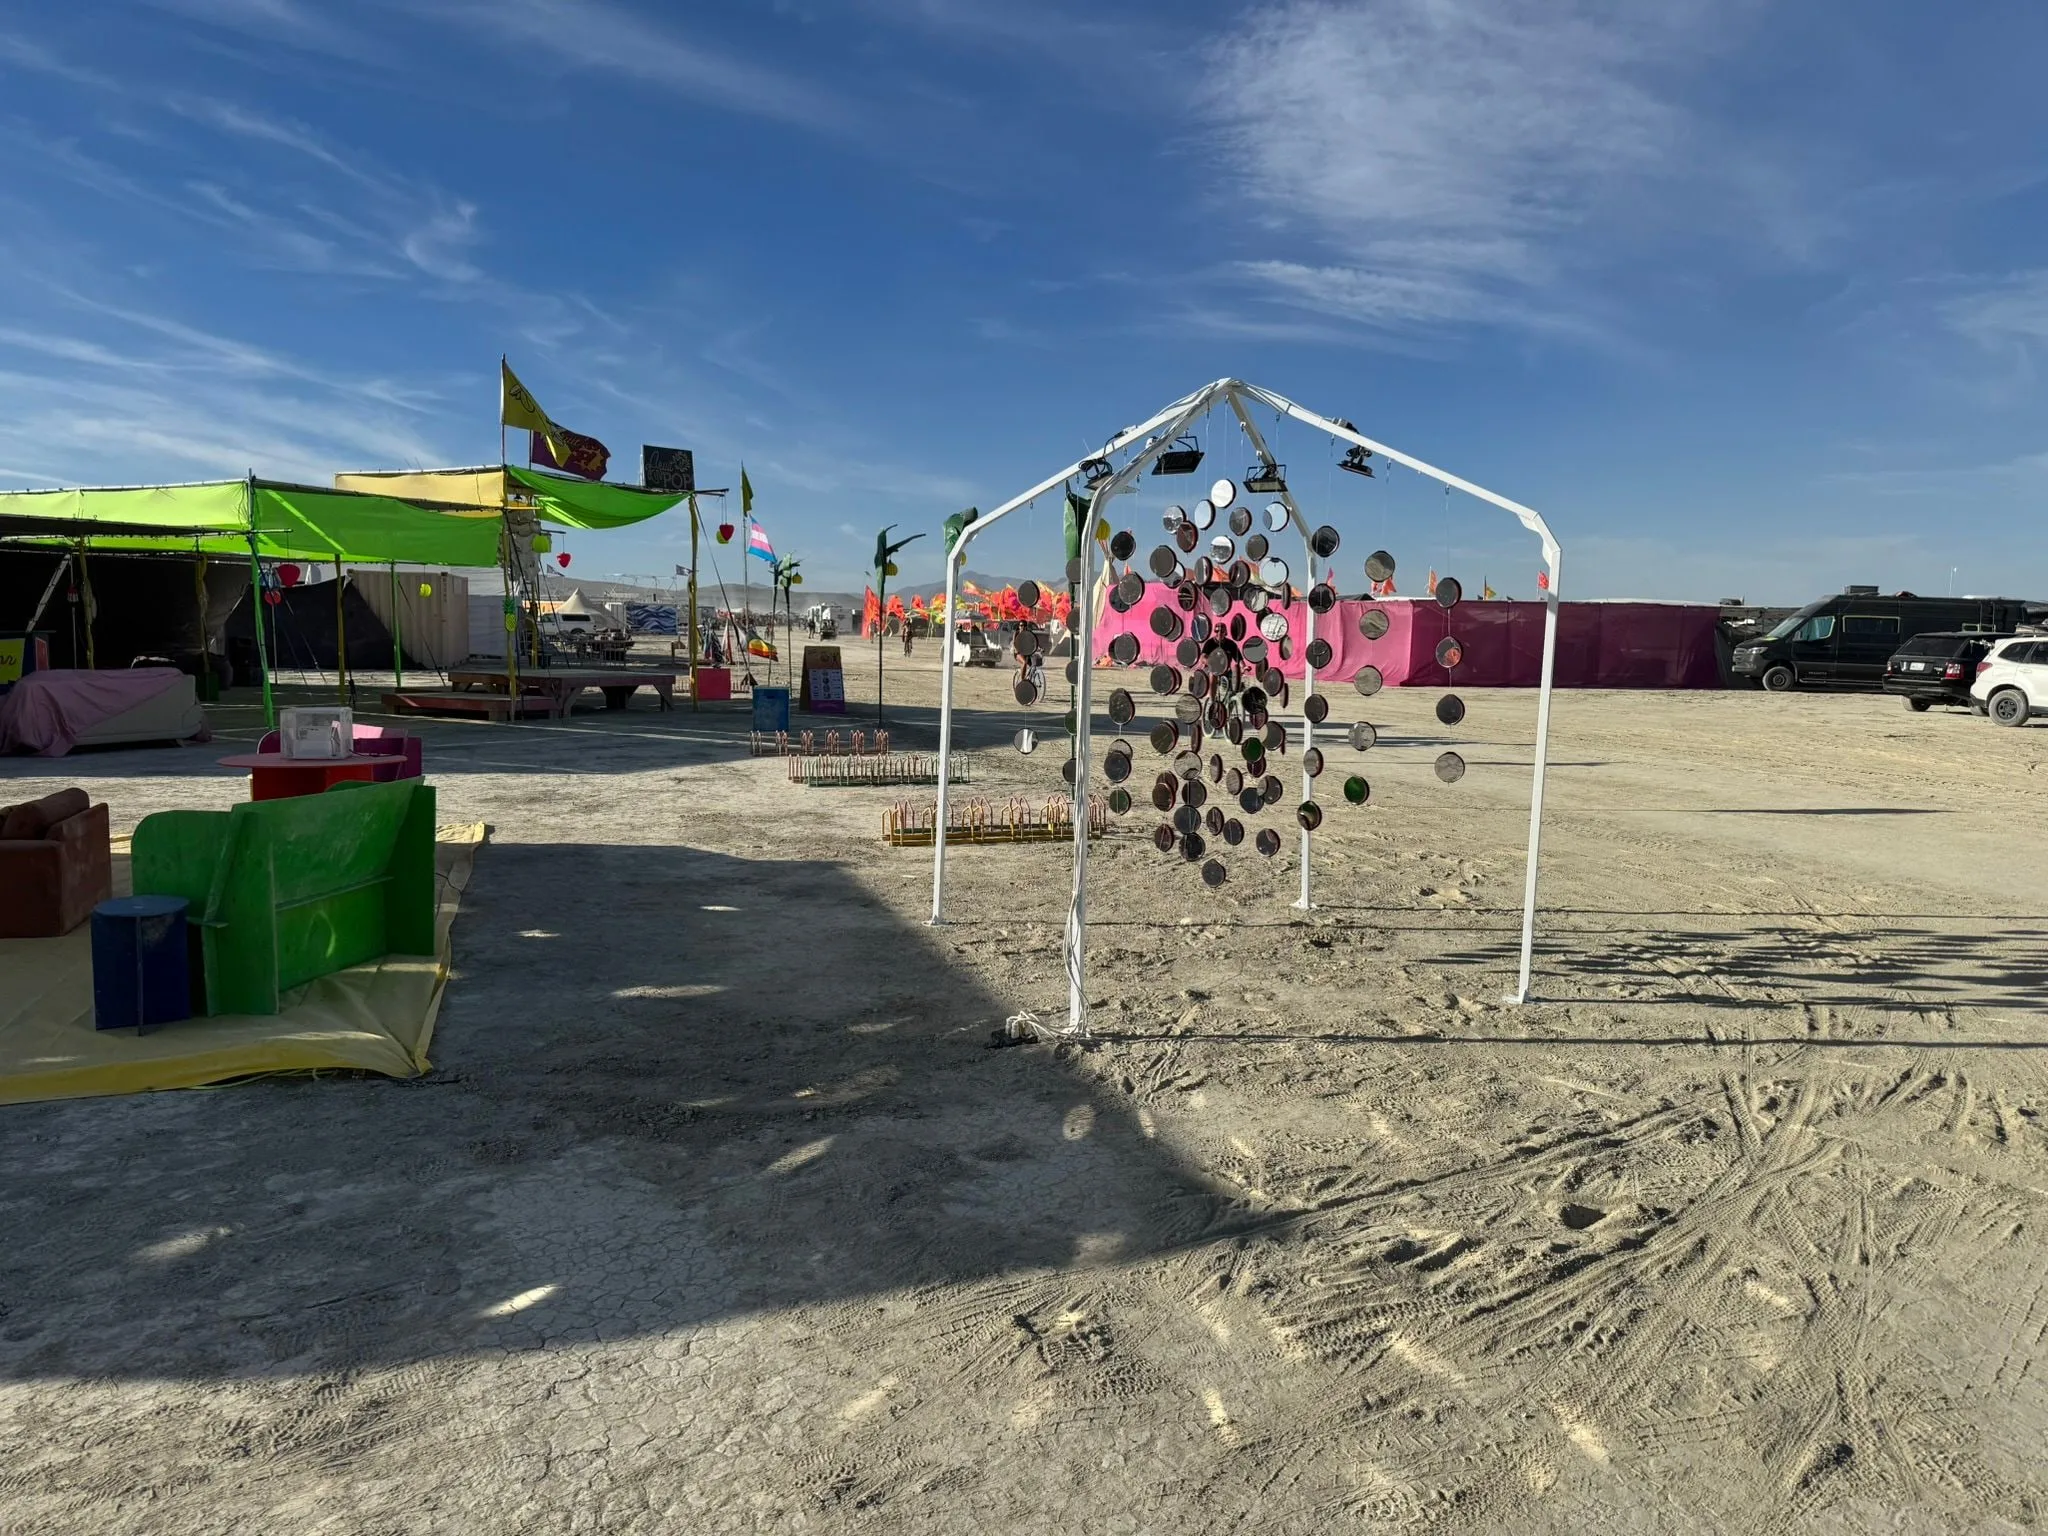
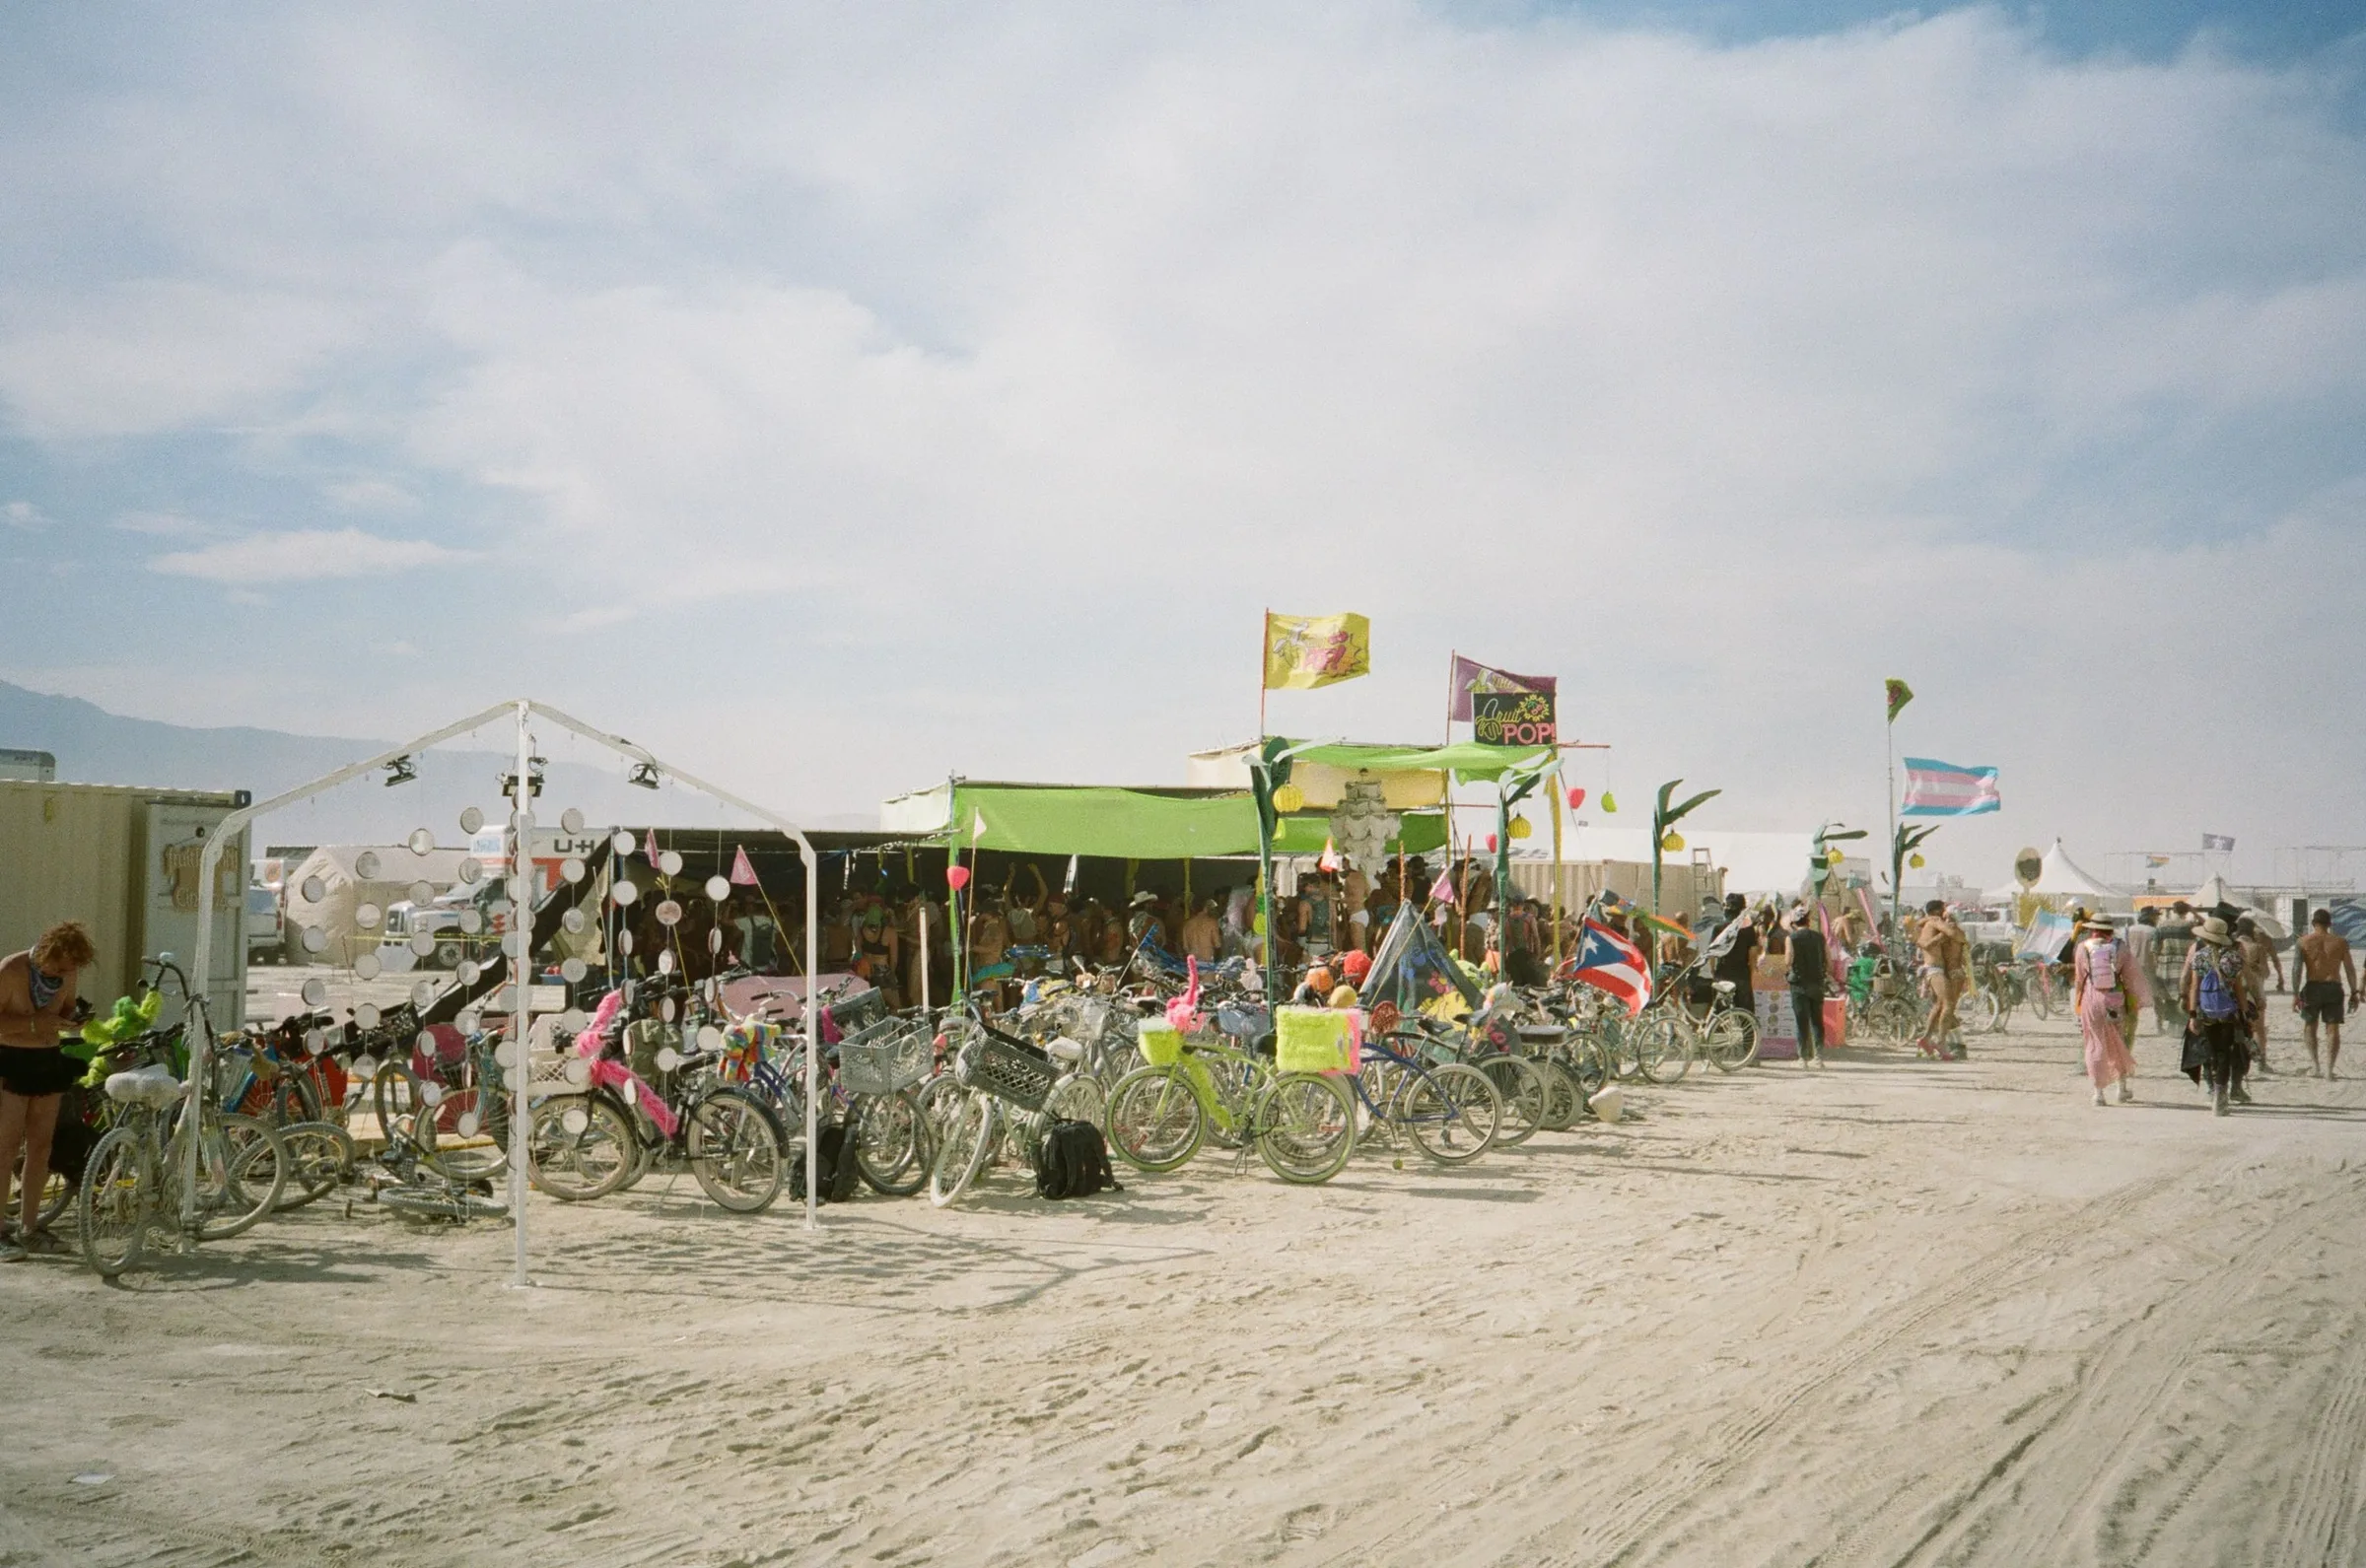
This is “Intent on Dreaming”, my first large-ish scale installation art. I’ve started many many projects in my life, big and small, and finished a small percentage. This was an exercise in “GET IT DONE, PERIOD.” Reduce scope, figure it out, but put something on playa at Burning Man 2026. I’m very happy with the result, which stood at Camp FruitPOP! for the full week.
The piece comprises a take-down welded/painted steel frame in five pieces, four 50W blacklight LED panels, and 192 “passive infinity mirrors” made from fluorescent and mirrored acrylic, mounted on 96 3D-printed PETG housings, suspended by high-test monofilament. The whole thing packs down into two storage bins plus the wrapped steel legs. It survived the 40MPH wind and rain without a fuss.
TL;DR: I built this for $1700 over ~3 months and it rocked.
“Infinity Pixel” Development
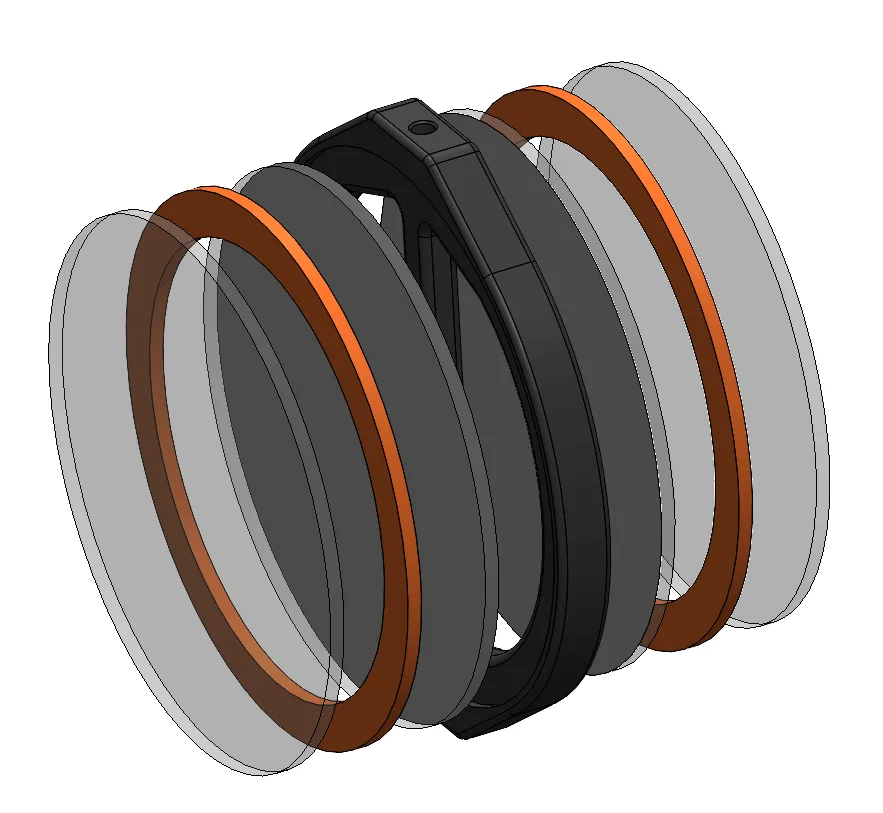
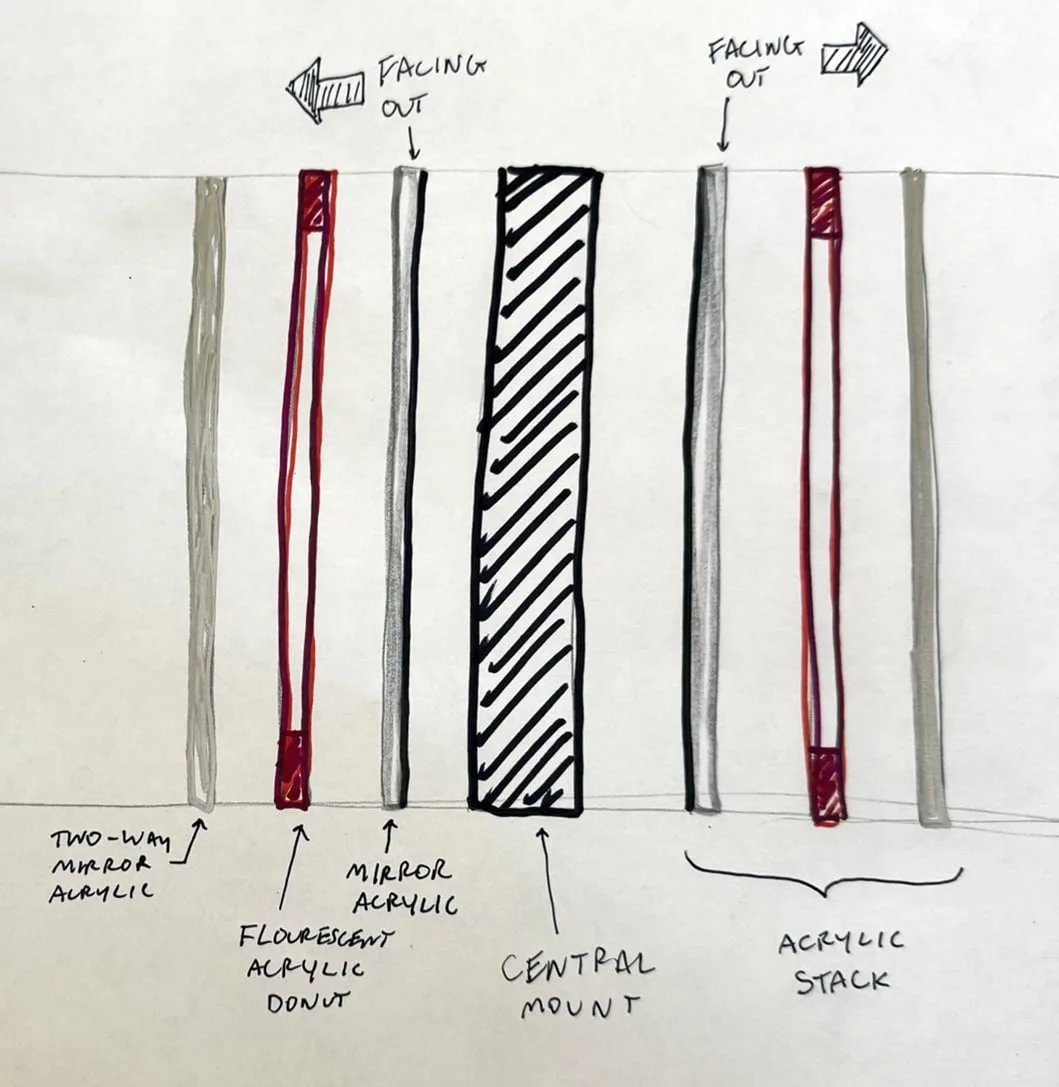
The passive infinity mirror concept was born out by the trash fence a few years ago when I was thinking about how to make a big rotating “portal” without having to deal with slip rings or other methods of routing electricity through moving mechanical joints. Just use fluorescent materials and bulk light the whole thing with an external UV source. I experimented with this format for a few months before settling on this design, sandwiching fluorescent acrylic donuts between standard one-way and two-way mirrored acrylic. The working title for each module was an “infinity pixel” and it stuck.
Proof of concept: Standard infinity mirror sandwich between mirror acrylic and two-way mirror acrylic, but instead of LEDs, using a fluorescent acrylic “donut” between the mirrors which can be edge-lit with a blacklight.
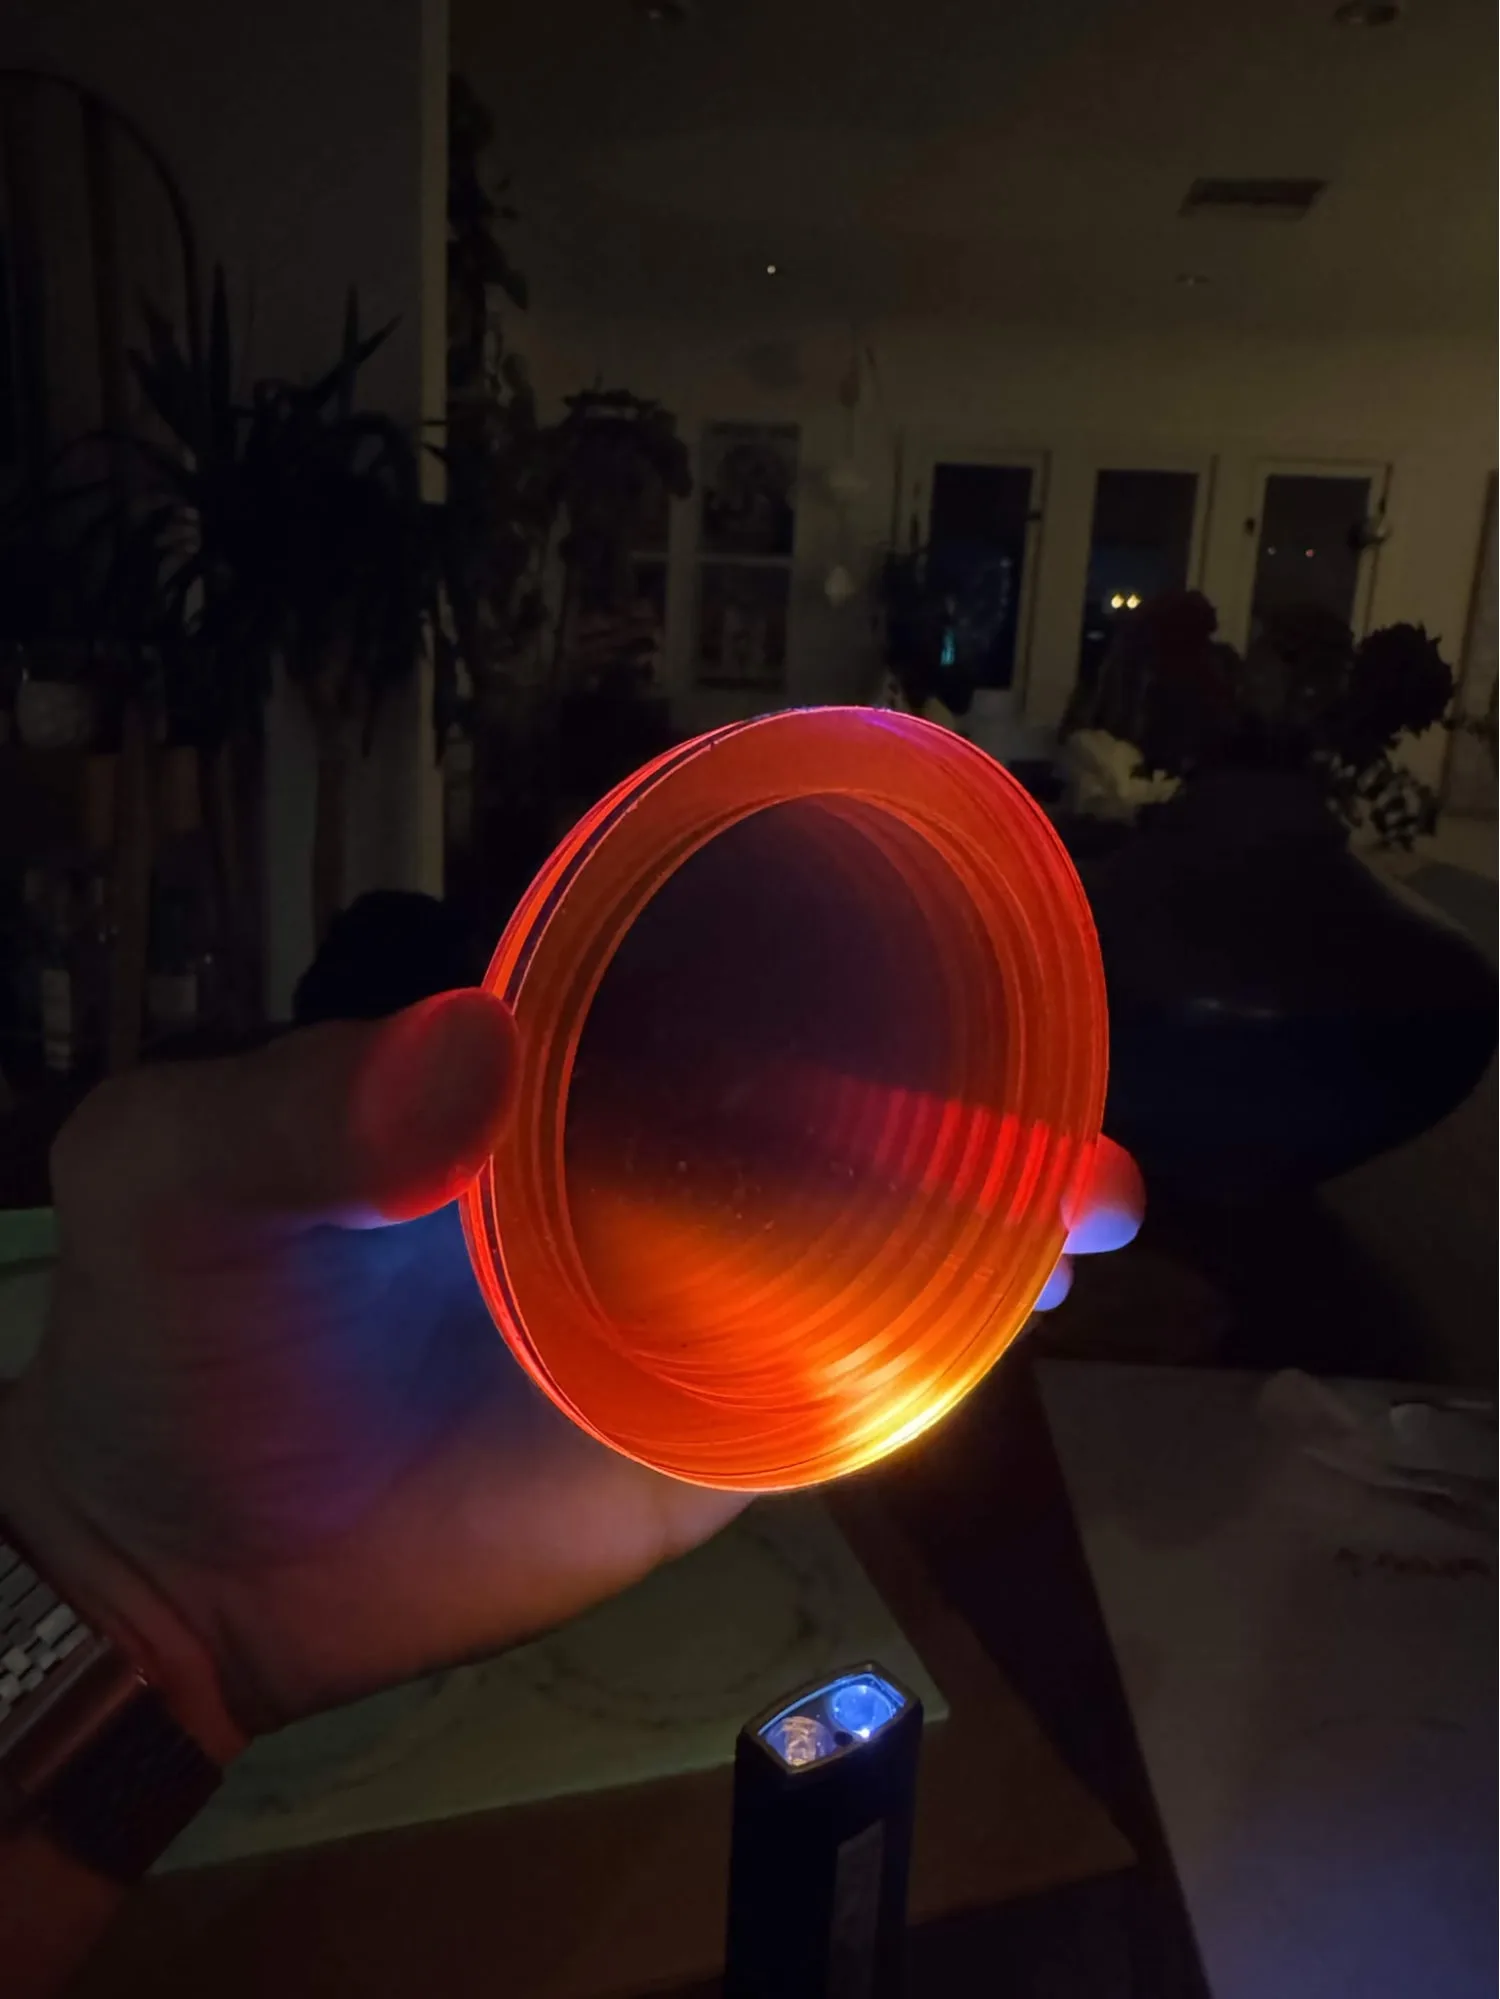
I initially wanted these to sit on a rigid structure, so the second proof of concept had press fit bearings in the printed mount that rotated on a metal rod with 100mm OD mirrors. This is a cool mechanical design project and would spin the most freely in the wind, but requires a bunch of mounting hardware and somewhat precise pre-fab that I then have to integrate on playa. Also, even with sealed bearings, I’m not confident they will remain free spinning through the burn.
So the question is how do I do this 1) relatively affordably, 2) maximize ease of setup on playa, 3) still allow free rotation and movement in the wind?
The idea then moved to erecting a rigid frame, hanging these pixels on paracord at regular intervals to create a grid in the air, and then securing the bottom of each cord to the playa on a lag bolt.
The key here is the edge of the fluorescent acrylic needs to be exposed for maximum brightness in the finished piece, so this needs to be a “frameless” design without side support for the acrylic stack. It would be possible to do this in a clear filament, but getting “clear” filament anywhere near optically clear is a real fine-tuning challenge I didn’t want to rabbit hole into.
I designed a FFF version I can print at home, and a more optimal geometry for resin/powderbed printing overseas. Exploring pricing via Craftcloud3D and other onshore options, the cheapest non-filament option was $8/pc at $800 total for tough resin, and $1.5/pc at $150 total for filament printed ABS or similar.
That resin cost is too high, and I can’t justify outsourcing filament printing without a truly high volume of parts. For 100 pixels, estimating 36 per batch @ 1d17hr print time, 1.5kg material = ~$90 material + a week of print time on my Bambu P1S. For big structural parts like this I’m running a 0.8mm nozzle with HF PETG. This combo hits the volumetric flow ceiling for this machine pretty quickly, but I get thick two-perimeter walls, and thicker layers = less interlayer bonds = stronger parts, plus additional surface area for glue up.
I wanted a sleeker look with a more rounded top and bottom to reduce friction against when spinning in the wind, printed at an angle to provide a “flat” for the first layer:
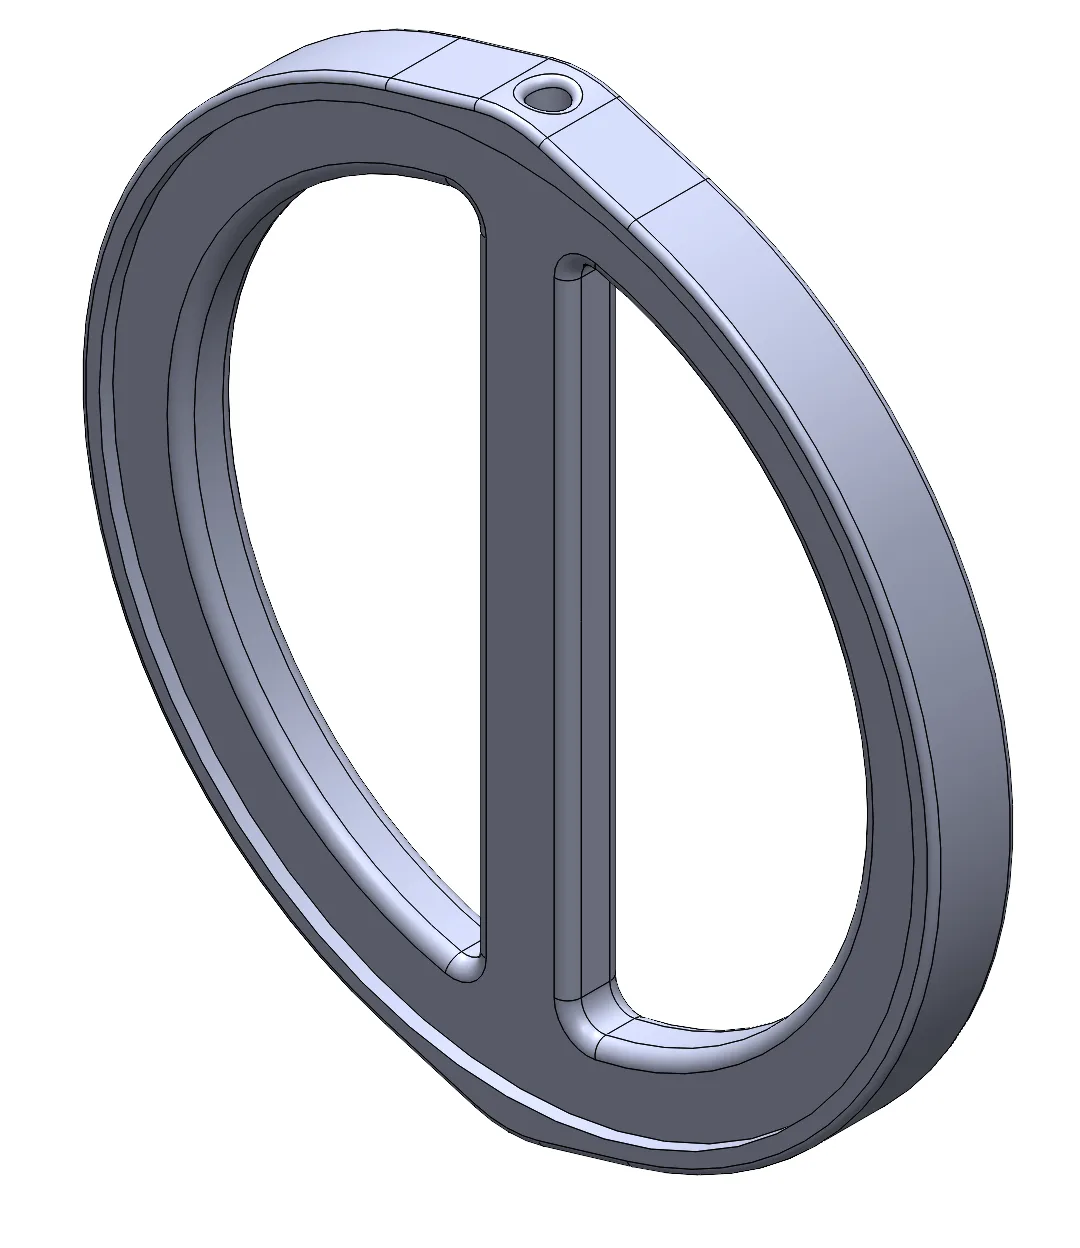
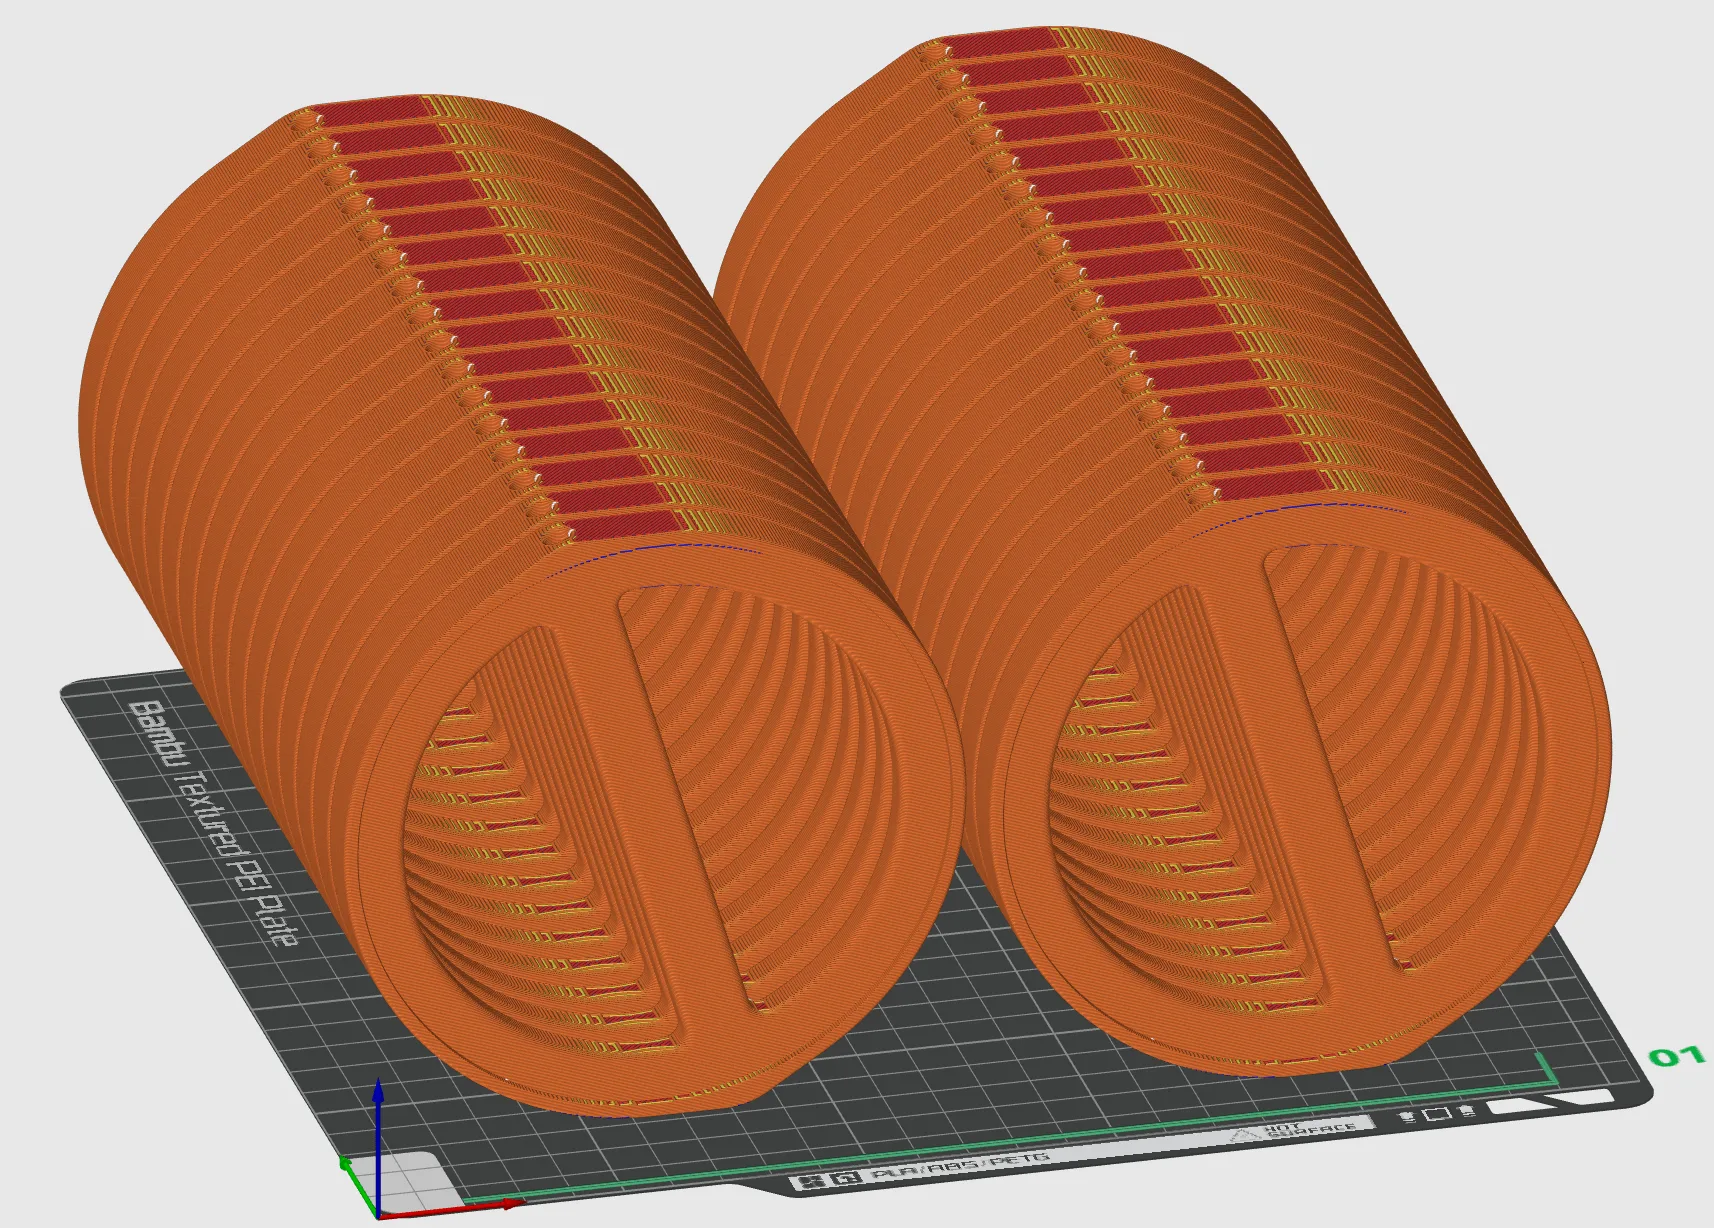
This worked alright. Not the best quality—I probably could’ve dialed something in here—but ultimately decided a vertical central axis would provide more consistent channel quality printing at this speed over 100 parts. I went with a design between the two, with a small flat added to the top and bottom face and an angled section on the top ID to reduce overhang angle and print without supports.
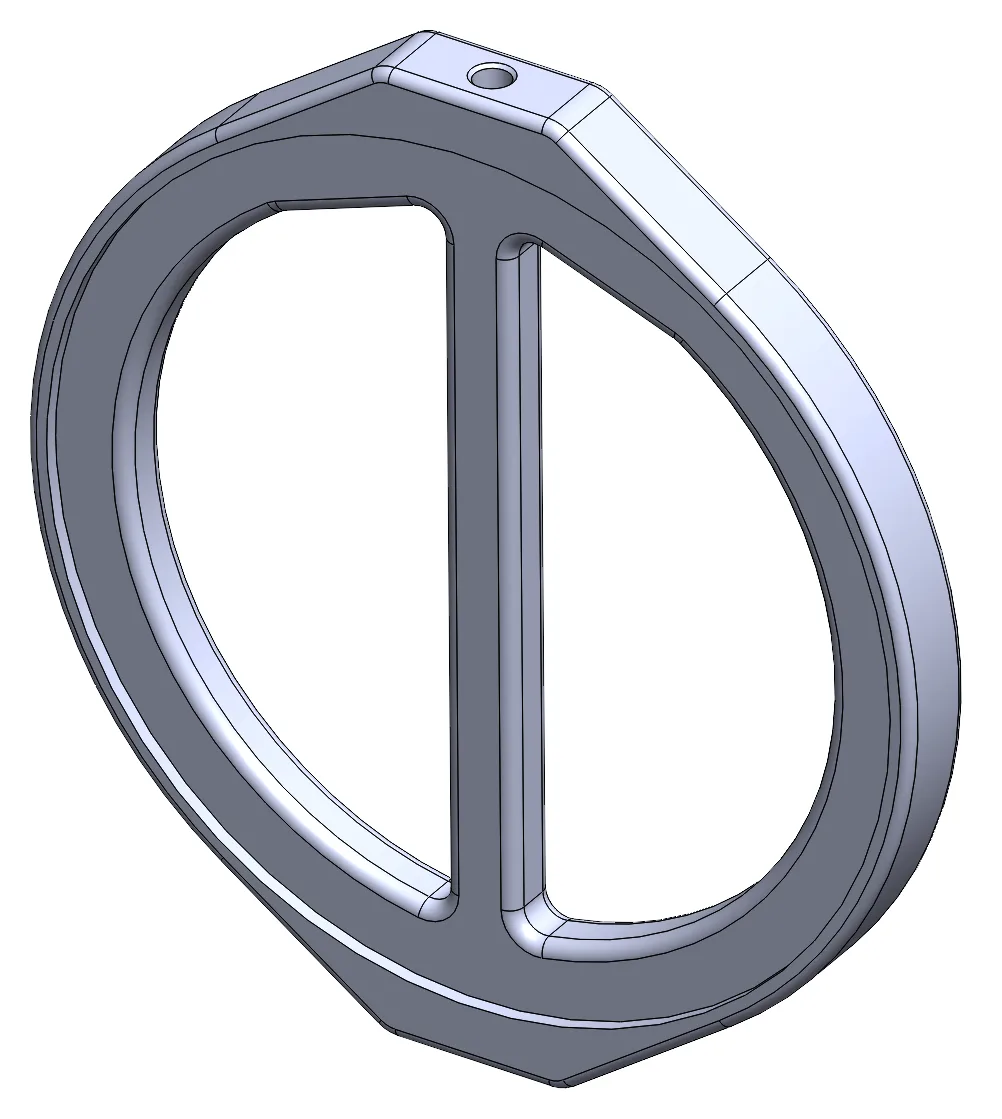
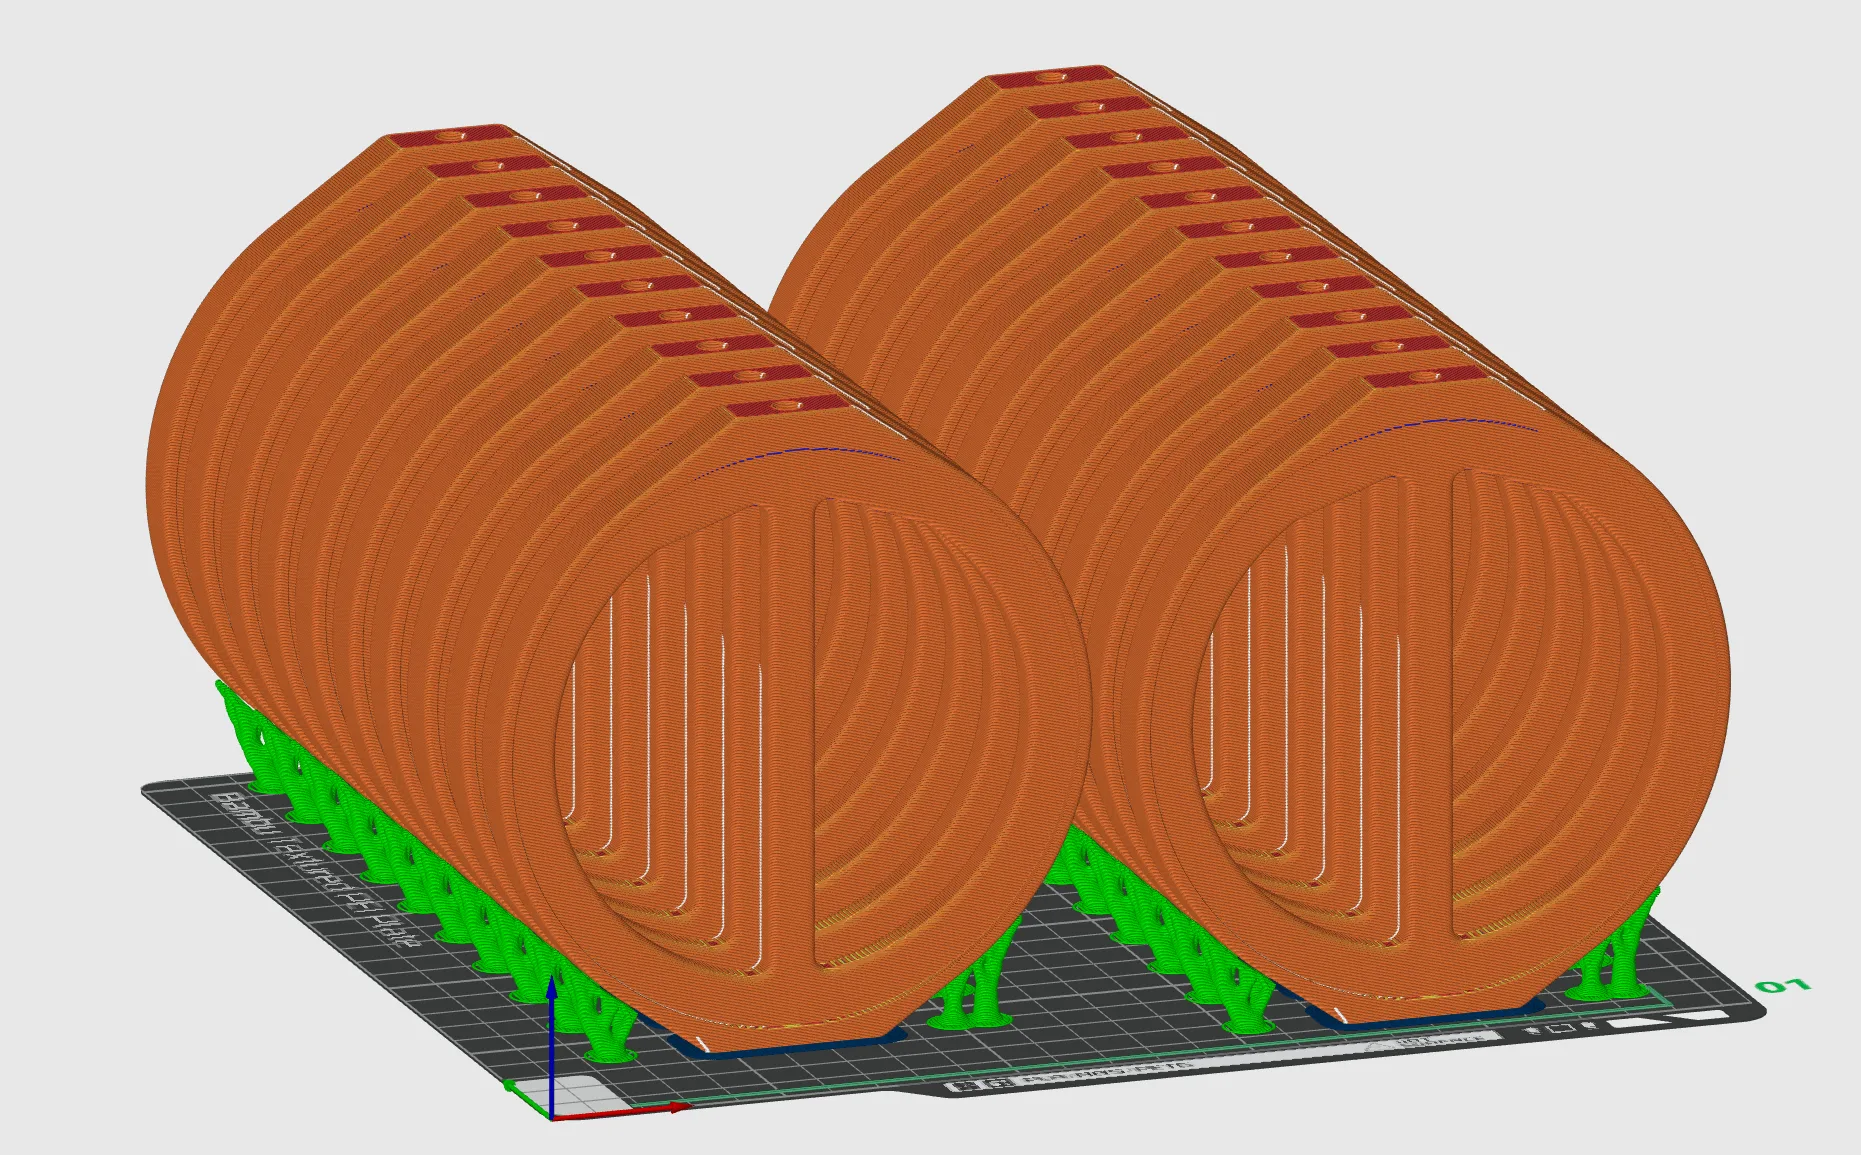
This worked perfectly. At 19hr per print for 21pcs, I could flip the machine each night and print the required 96 (+extras) over five prints in a week. The build setup above included supports and brims for insurance… these can print fully unsupported (and I did so successfully in development), but I was running the production prints while at work and on a tight timeline. It was easier/cheaper to break off a few supports and clean the brim versus potentially failing full builds, losing that day and scrapping the filament.
Acrylic Design & Sourcing
I dug fairly deep on acrylic pricing here.
Option 1: full outsource online
Buy everything already cut and ready to assemble.
The standard online sources were $1100 for the mirror discs and fluorescent donuts, but most sites don’t cut two-way mirror as a standard material. I’ve gotten it cut via custom Ponoko order before and it is not cheap, I’d expect 1.5X the price below so closer to $2000 total.
| 120 mm diameter, qty 200 | SendCutSend | Ponoko |
|---|---|---|
| Mirror acrylic | $372 | $633 |
| 2-way mirror acrylic | — | — |
| Fluorescent donuts | $534 | $586 |
| Printed mounts | — | — |
I did do some outreach on aliexpress and other sketchier direct overseas options, but honestly the pricing wasn’t so competitive. Sendcutsend does a great job reducing cost via 2D shape packing.
Option 2: full outsource locally
I spoke with a few laser cutting companies local to LA. Most were significantly more expensive than the above options, even sourcing my own acrylic for them to cut to pull some margin off.
americanlaserco.com were communicative and helpful, with cutting cost at $200 per full 4x8ft sheet of discs, $360 per full sheet of donuts, so $760 + material. They also offer laser rental for $70/hr for a larger 120W CO2 system with a two hour initial setup/training. I estimated ~6hr total cutting time so 9hrs of rental at $630 total + material. But they’re only open during the week while I’m working.
Tony at lasersoverlosangeles.com was quite responsive with quick turnaround, with cut-only cost around $1100 total for 400x discs and 200x donuts.
Between these two laser shops I got three local acrylic supplier recommendations: https://santamonicaplastics.com/ and https://solterplastics.com/ on the west side, and https://plasticpointinc.com/ in the valley.
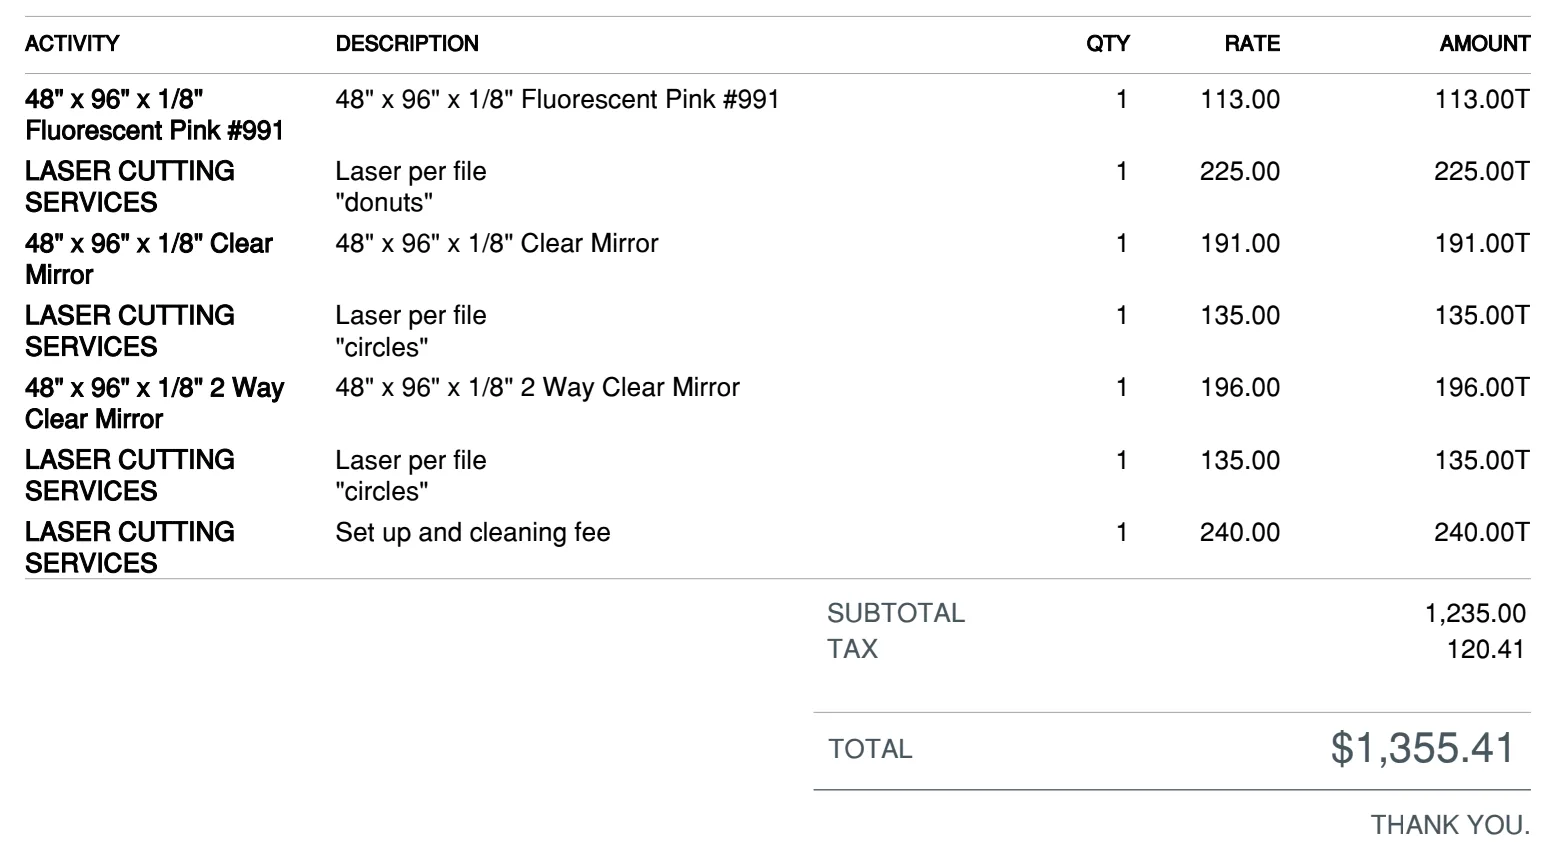
Plastic Point Inc was the most responsive with the best pricing for material + cutting.
Option 3: Buy acrylic and DIY lasercut
It was killing me to spend this much to save myself a few hours of weekend work, if only I could find a big CO2 laser to play with…
Enter Crash Space, an exceptional maker space in Culver City that I’d had on my list forever. I didn’t think this kind of low-cost/co-op business model was possible to sustain in LA–this 2013 Makezine article is canonical and cites overhead cost differences of 10-30X between a VHCOL city like LA and a dirt cheap city like Detroit (home of the exceptional i3Detroit). Somehow they make it work, housing a surprising density of useful tooling and a plethora of other delightful nerds building impressive projects. It’s been a real joy joining the community.
Key for this project: they have a 36”x48” 120W Boss CO2 laser system and it’s free to use with a monthly membership and training.
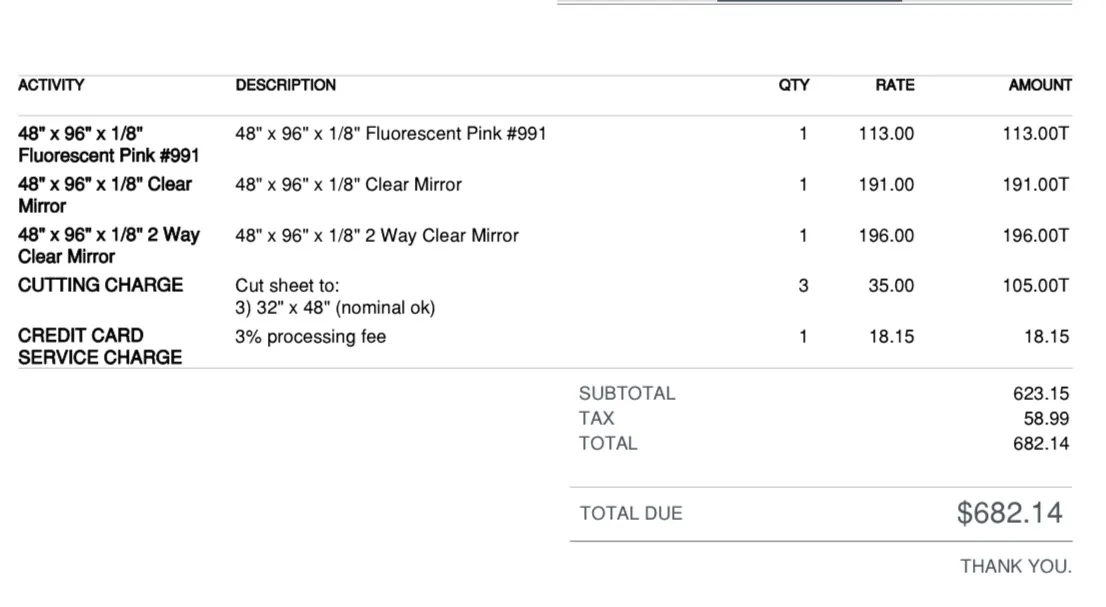
So, back to Plastic Point Inc for material only. Total cost for one full 4x8ft sheet of each material cut down to 32”x48” was $682. $20 per cut sucks but I have to fit these in a hatchback.
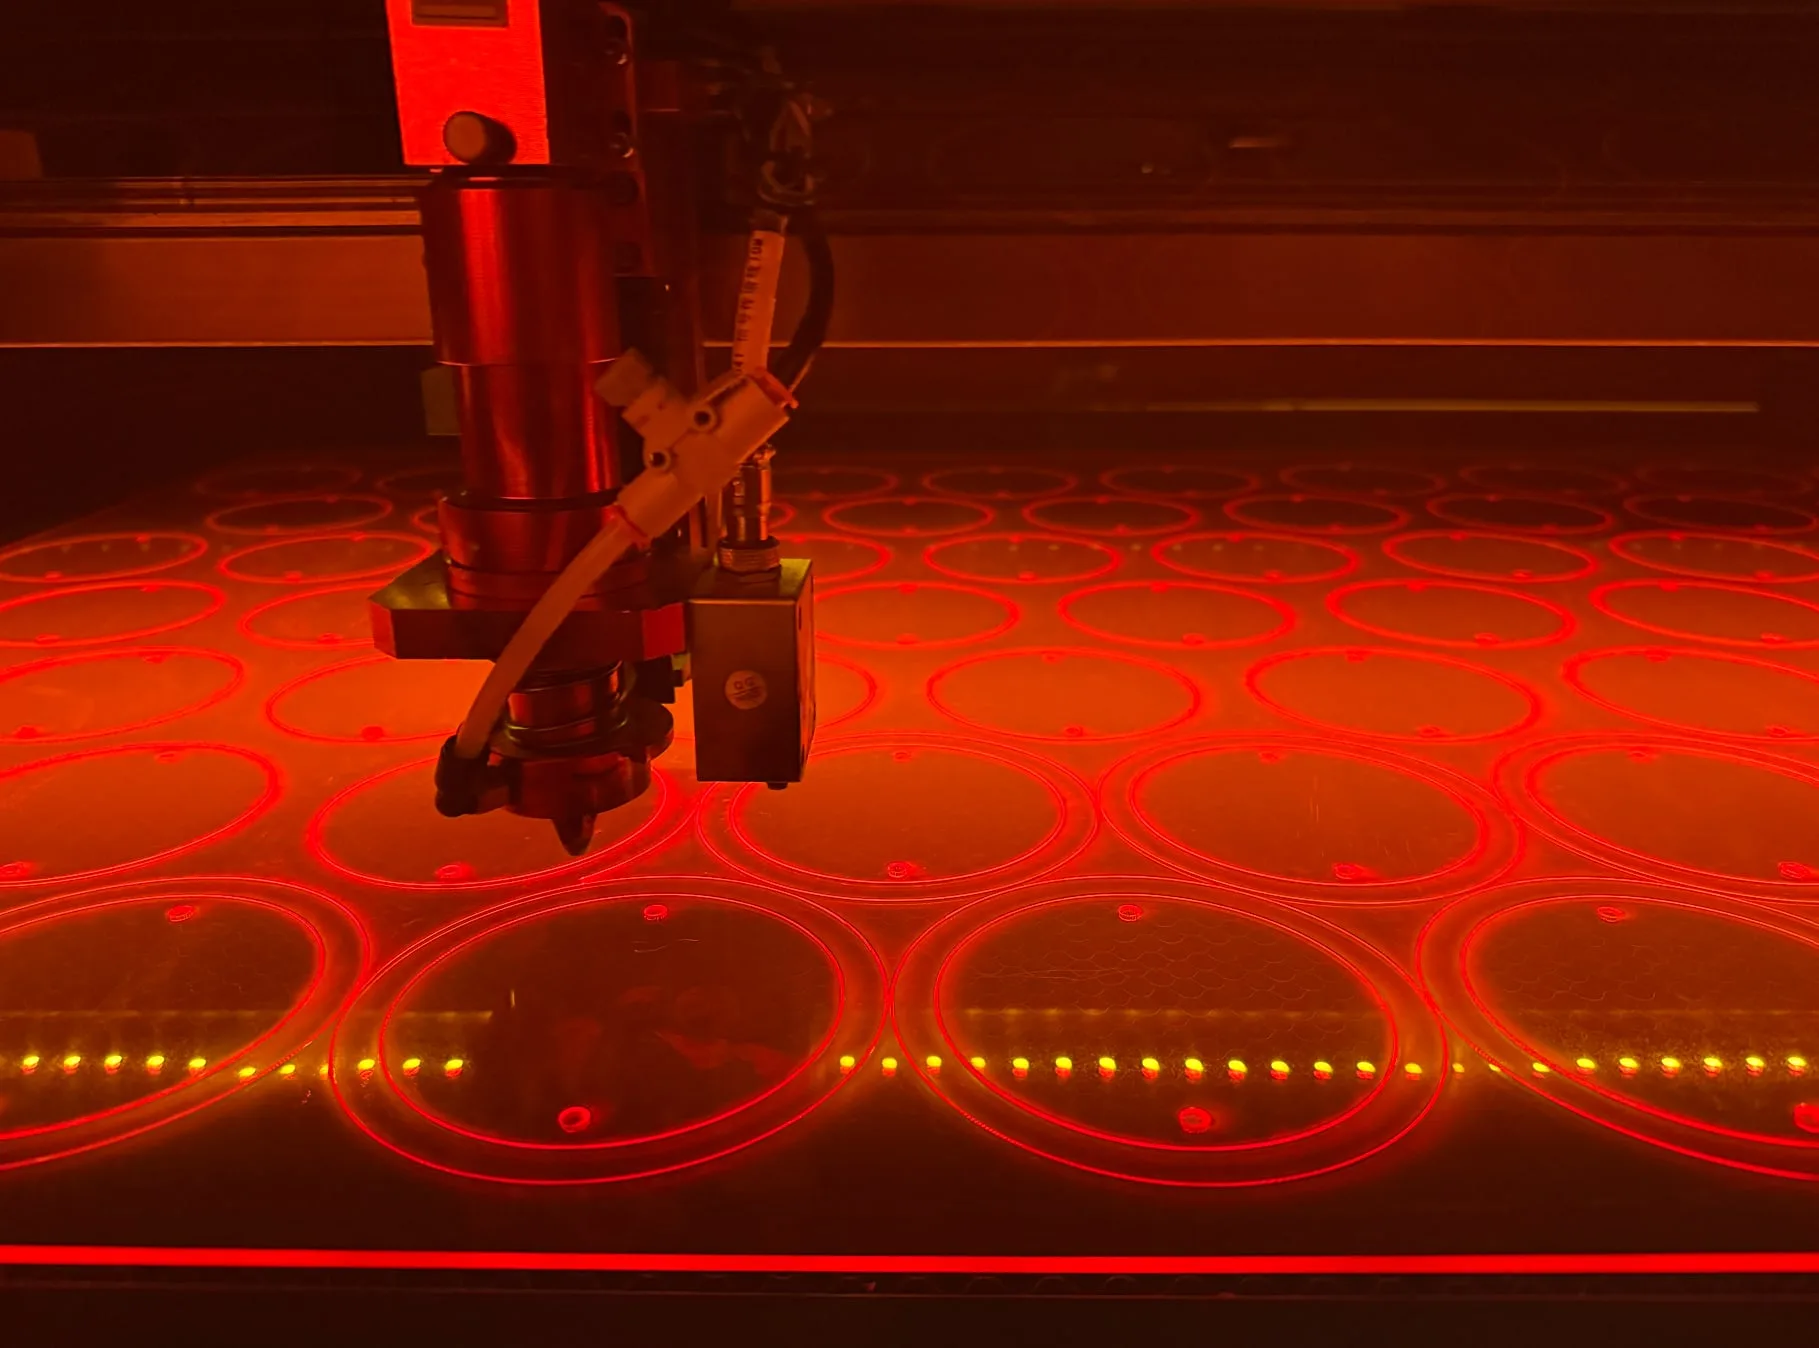
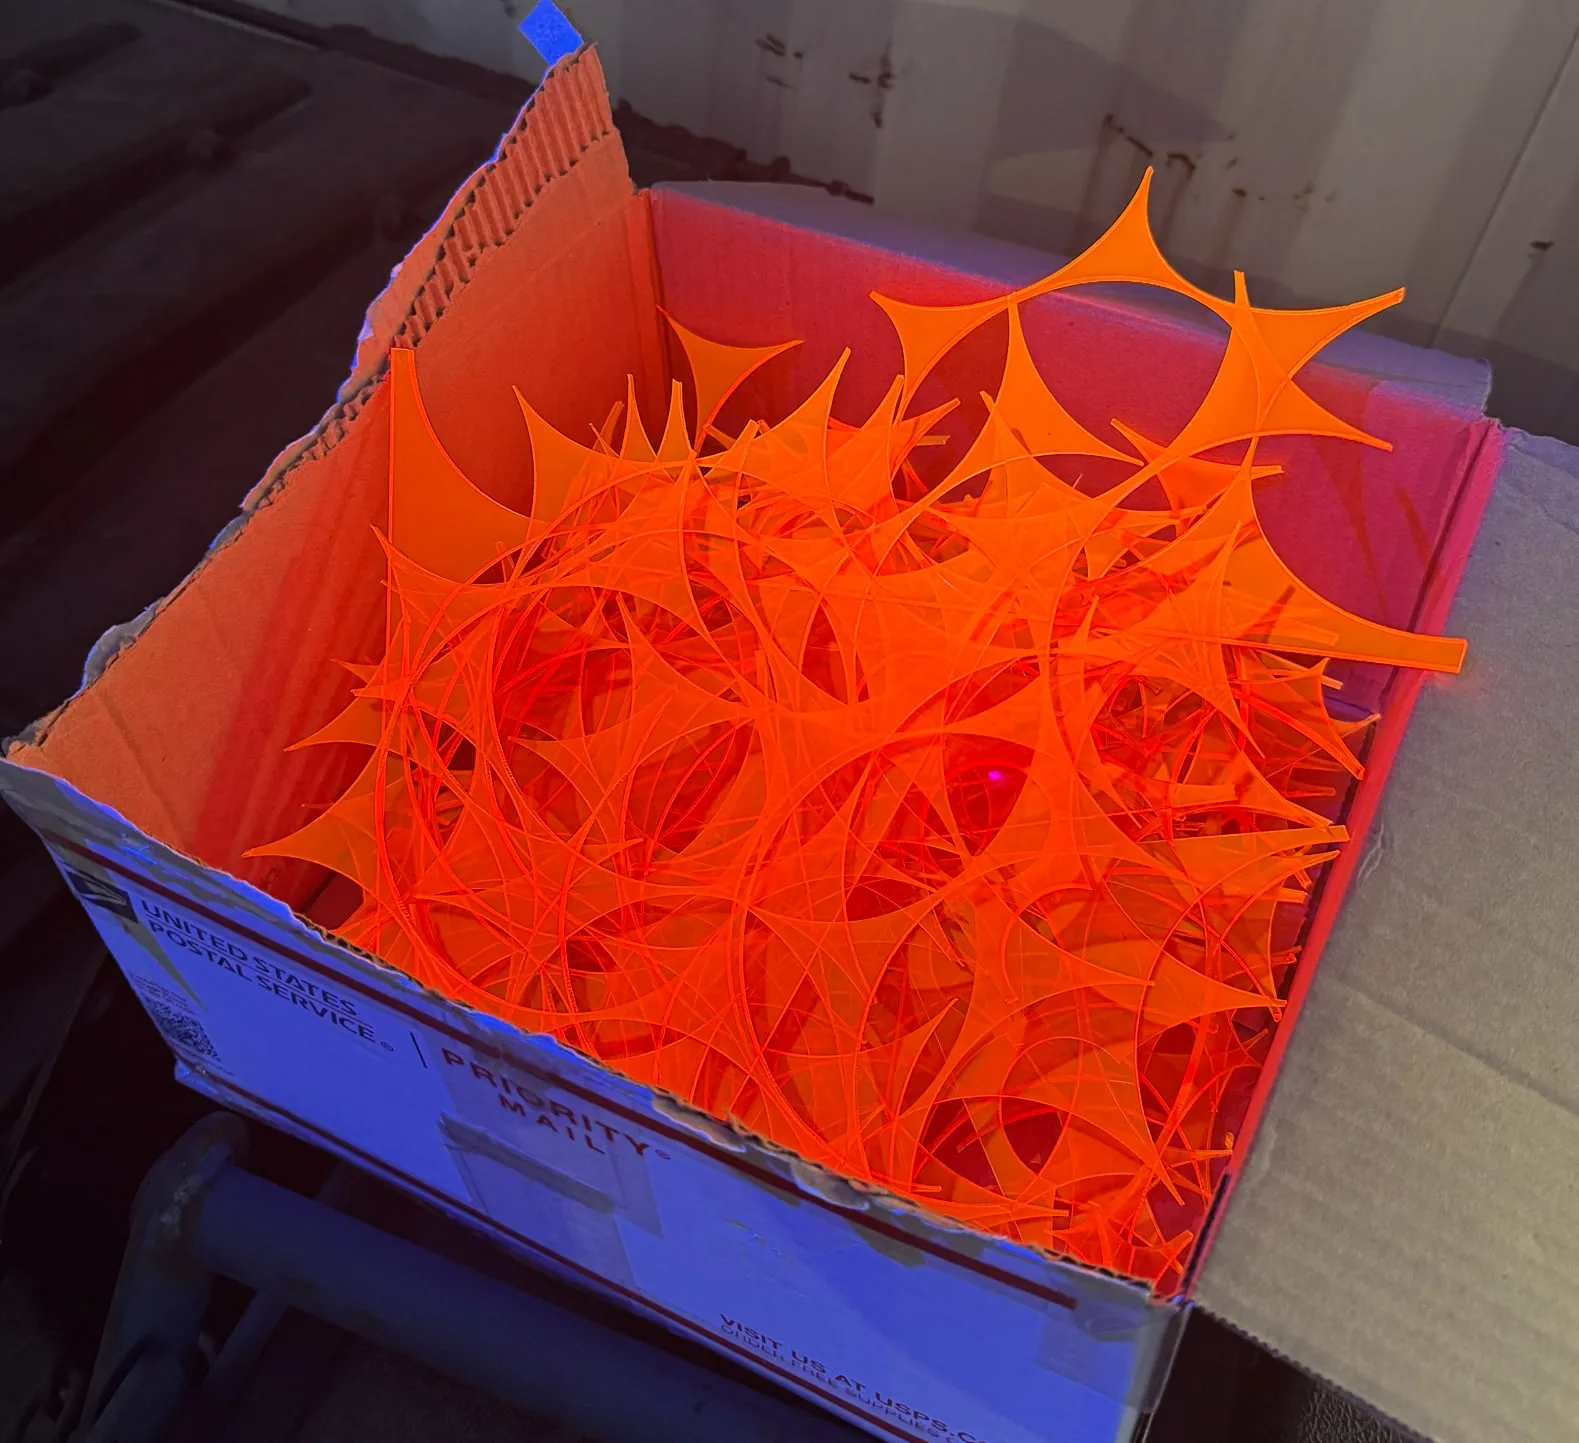
I got 201 sets out of each full sheet, cutting 67 at a time from the ⅓ sheet sections. Roughly 10 hours of cut time. I know I could’ve pushed the system faster, but the bed isn’t perfectly plane and I didn’t feel like dealing with the stragglers that would need a second exposure.
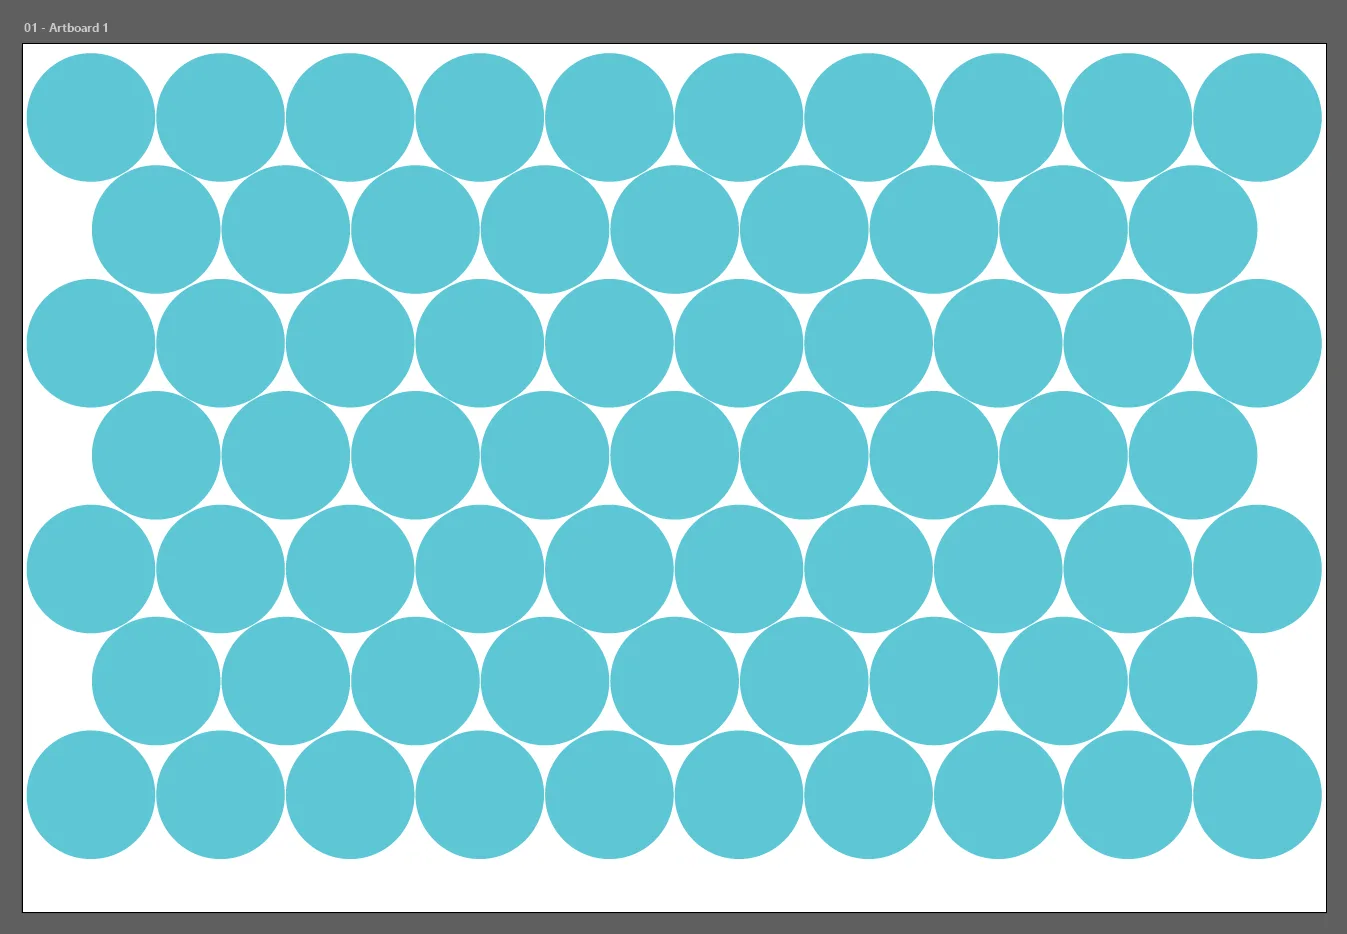
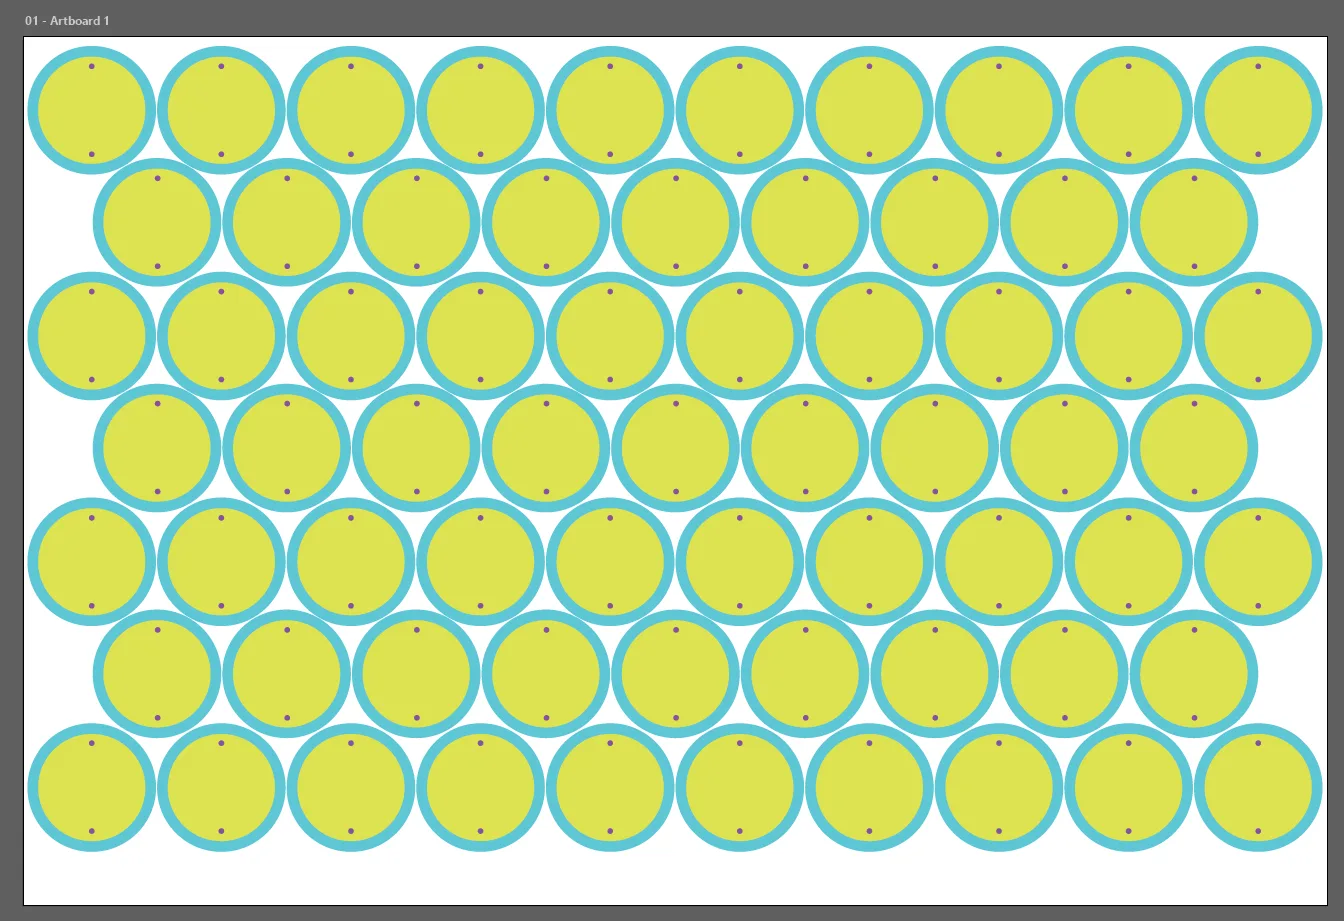
Trust me, this layout maximizes the number of 120mm circles printable on a 48”x32” sheet. I also added small mounting holes in the “scrap” circles from the donut cuts, which will make pretty fluorescent hanging flourishes for something in the future.
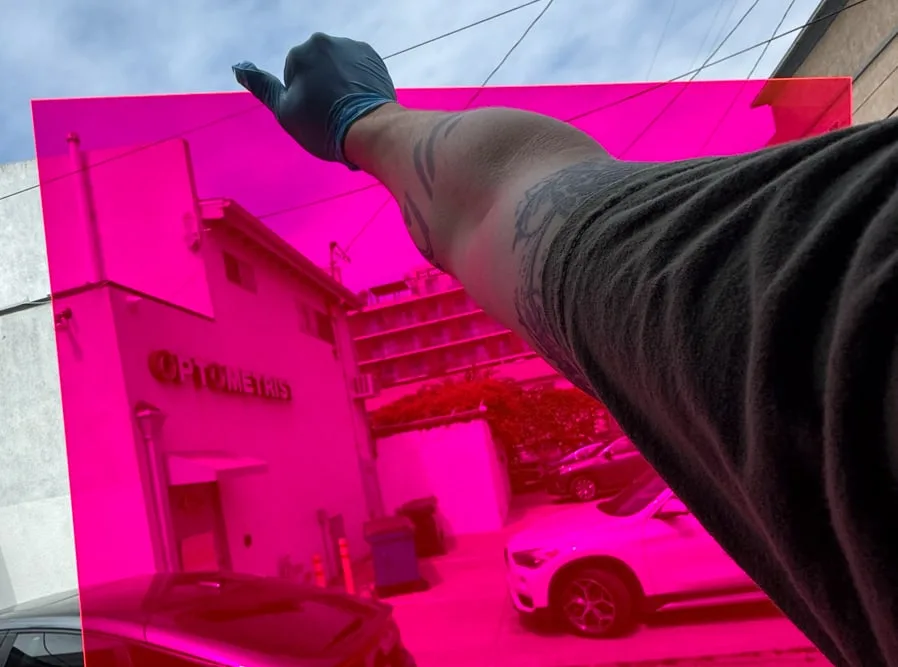
This #991 pink fluorescent acrylic is awesome, by the way. More orange in normal light, bright pink with light through it, and fluoresces a bright pink-orange
Module Assembly
How to connect all these layers?
Initially I wanted to spend more for an adhesive tape solution so I wouldn’t have to mess with gluing 100 assemblies total, 200 acrylic stacks, 600 individual bonds, and 700 total pieces. This would also let me apply the tape to the full acrylic sheets and lasercut in the same operation, making assembly super straightforward.
I spec’d out 3M 9495LE to connect the acrylic layers, and then classic 3M VHB to absorb the thermal expansion mismatch between acrylic and printed PETG, given these will see direct sunlight/desert heat during the day, and down to 40-50°F temps at night. The math isn’t too bad–even taking a worst case 100°F (55°C) temp swing and conservative CTE gap of 60-90 10⁻⁶/°C, over 120mm diameter we’re talking (55°C)(30*10⁻⁶/°C)(120mm) ~ 0.2mm, but it’s enough that I’d worry about crazing/cracking on the acrylic with a rigid epoxy bond over time.
Probably overthinking it.
I tested this and it worked perfectly… but big rolls/sheets of 9495LE and VHB are expensive at this scale. I’d need to cover ~40sqft between the acrylic layers and 20sqft between acrylic and PETG (if I covered the entire panel prior to cutting).
Cheapest I could find via findtape.com was ~$300 for the 9495LE, and a similar amount for VHB. I have a moral opposition to spending half my BOM and over $500 on tape.
Back in glue world, I wanted to make sure it was viscous enough not to leak out of the glue joint and ruin the reflectivity of the mirror layers. Permabond UV639 looked like a great option–viscous enough not to flow, curable in seconds with the same 395nm UV panels I’m using to lighting the art. But, again, $300 incl shipping at over $1000/liter is absurd to me for this project.
Definitely overthinking it.
Back to where I should’ve started–readily accessible basics. GE Advanced Silicone 2 is neutral-cure and shouldn’t screw with the mirror coating on the two-way mirror acrylic, flexible enough to handle any CTE mismatch, silicone so temp is not an issue, comes in clear, and will cost something like $30 total for the entire project. But is it strong enough?
After some quick tests–definitely.
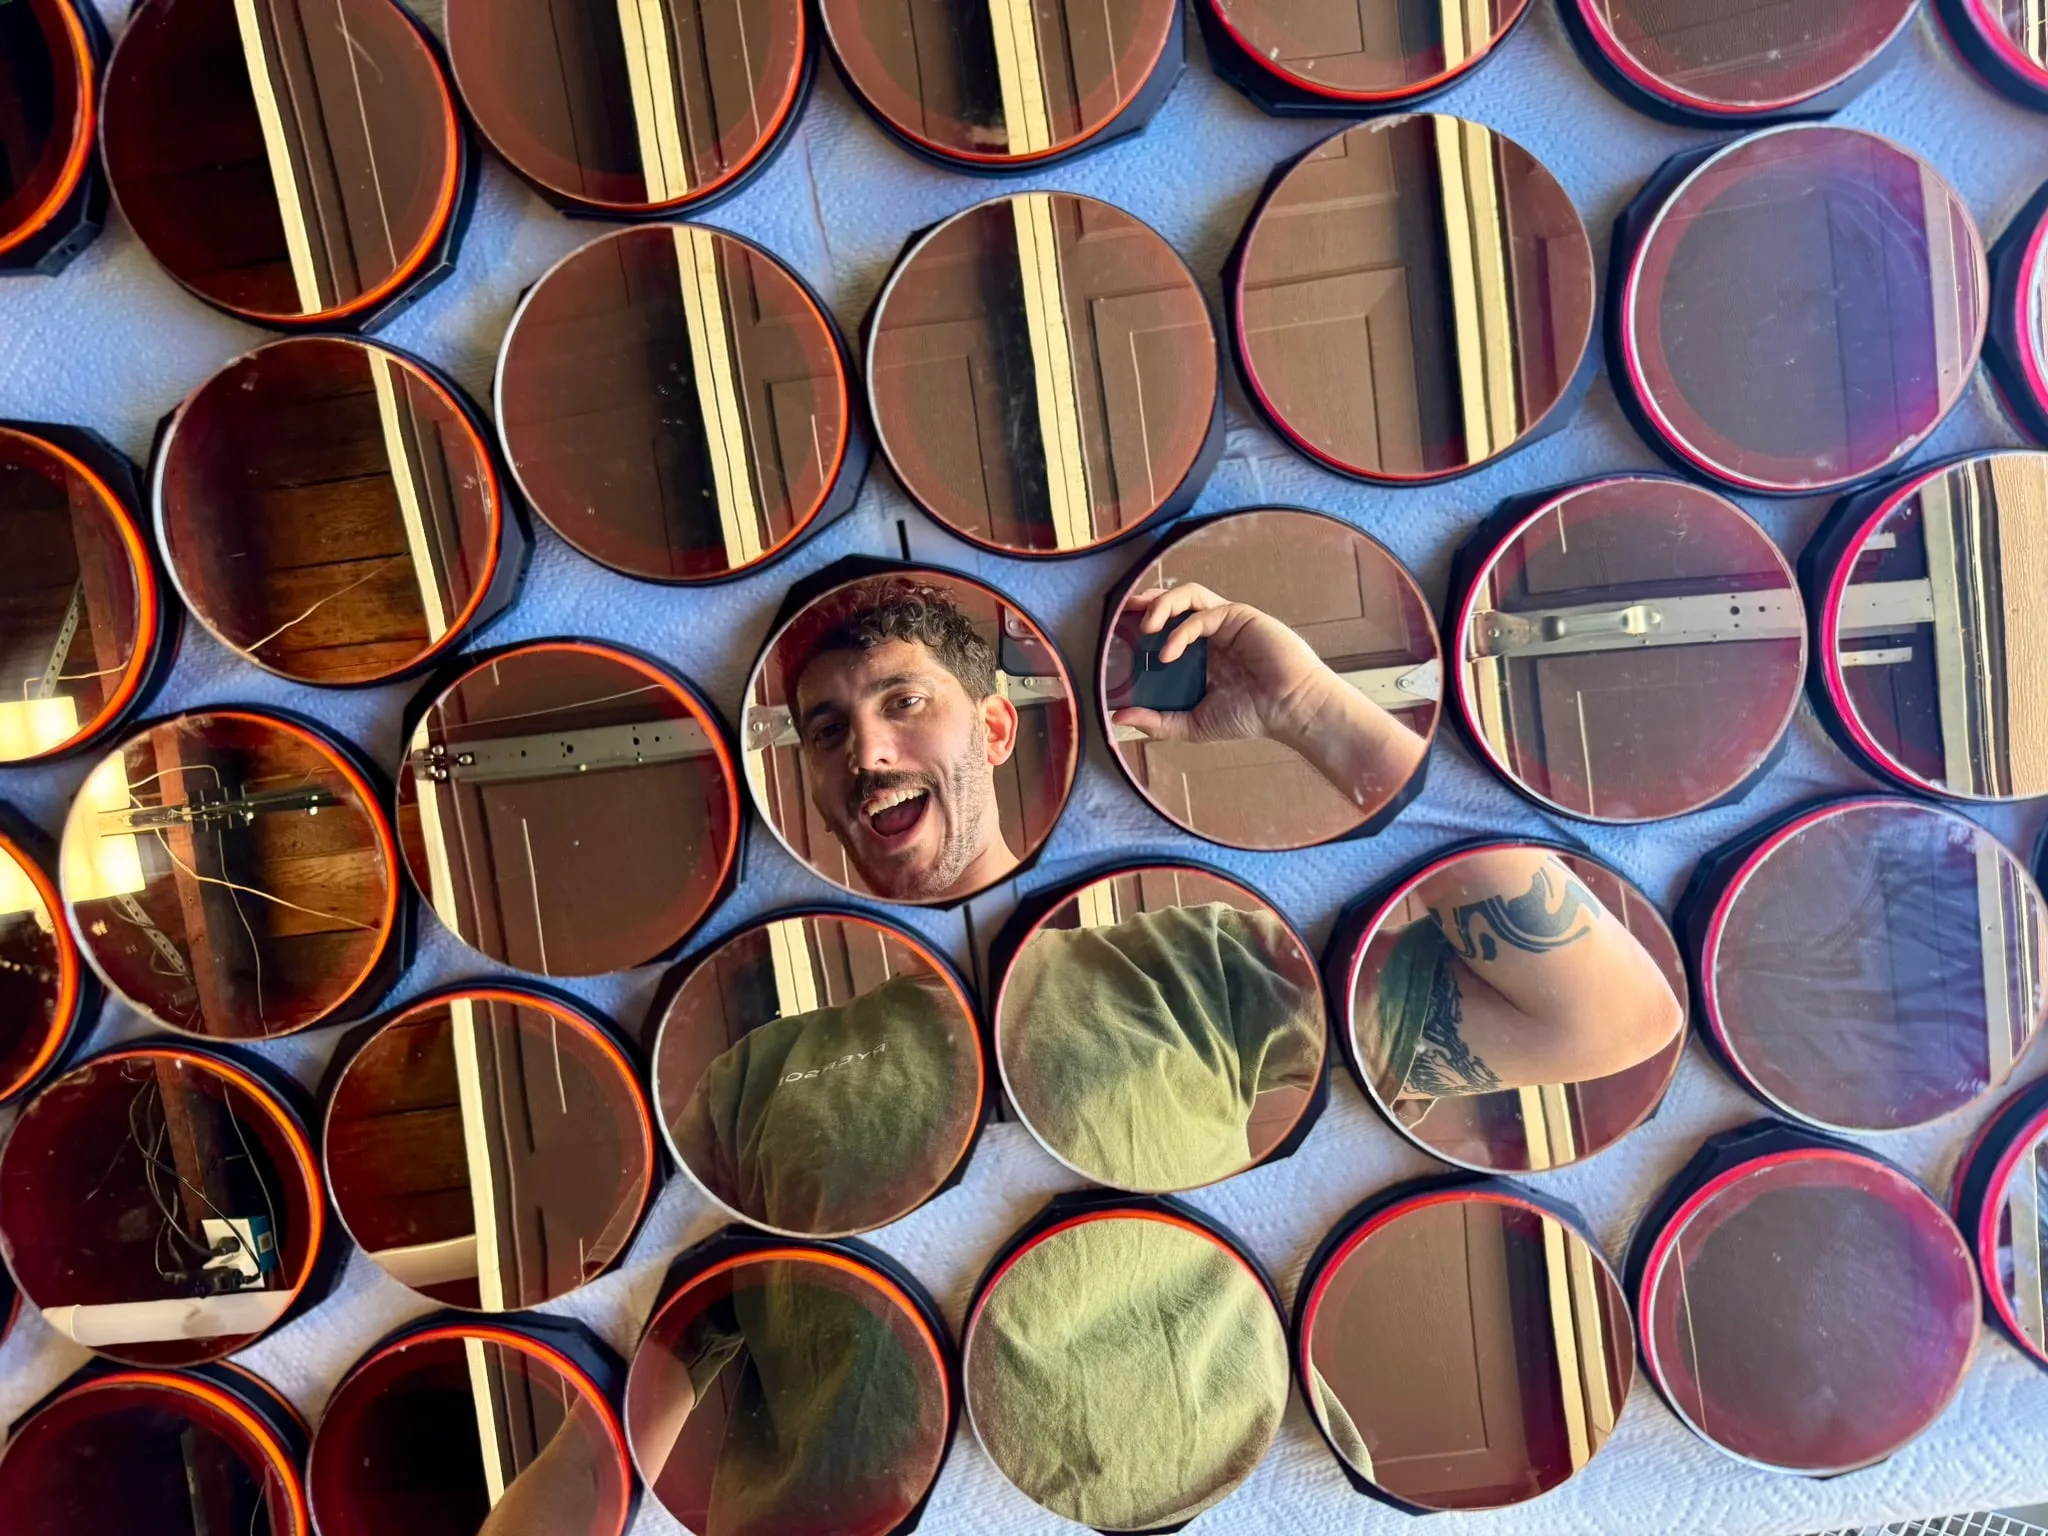
I had a group of friends over for my birthday and they helped remove the acrylic backings, clean up the central mounts, and glue up the 600 component parts. Thank you Dusty for organizing this (and SO MUCH MORE 🧡), and thank you Ryan, Andrew, Alex, John, Dillon, Kevin, Carlos, and Max for your assistance.
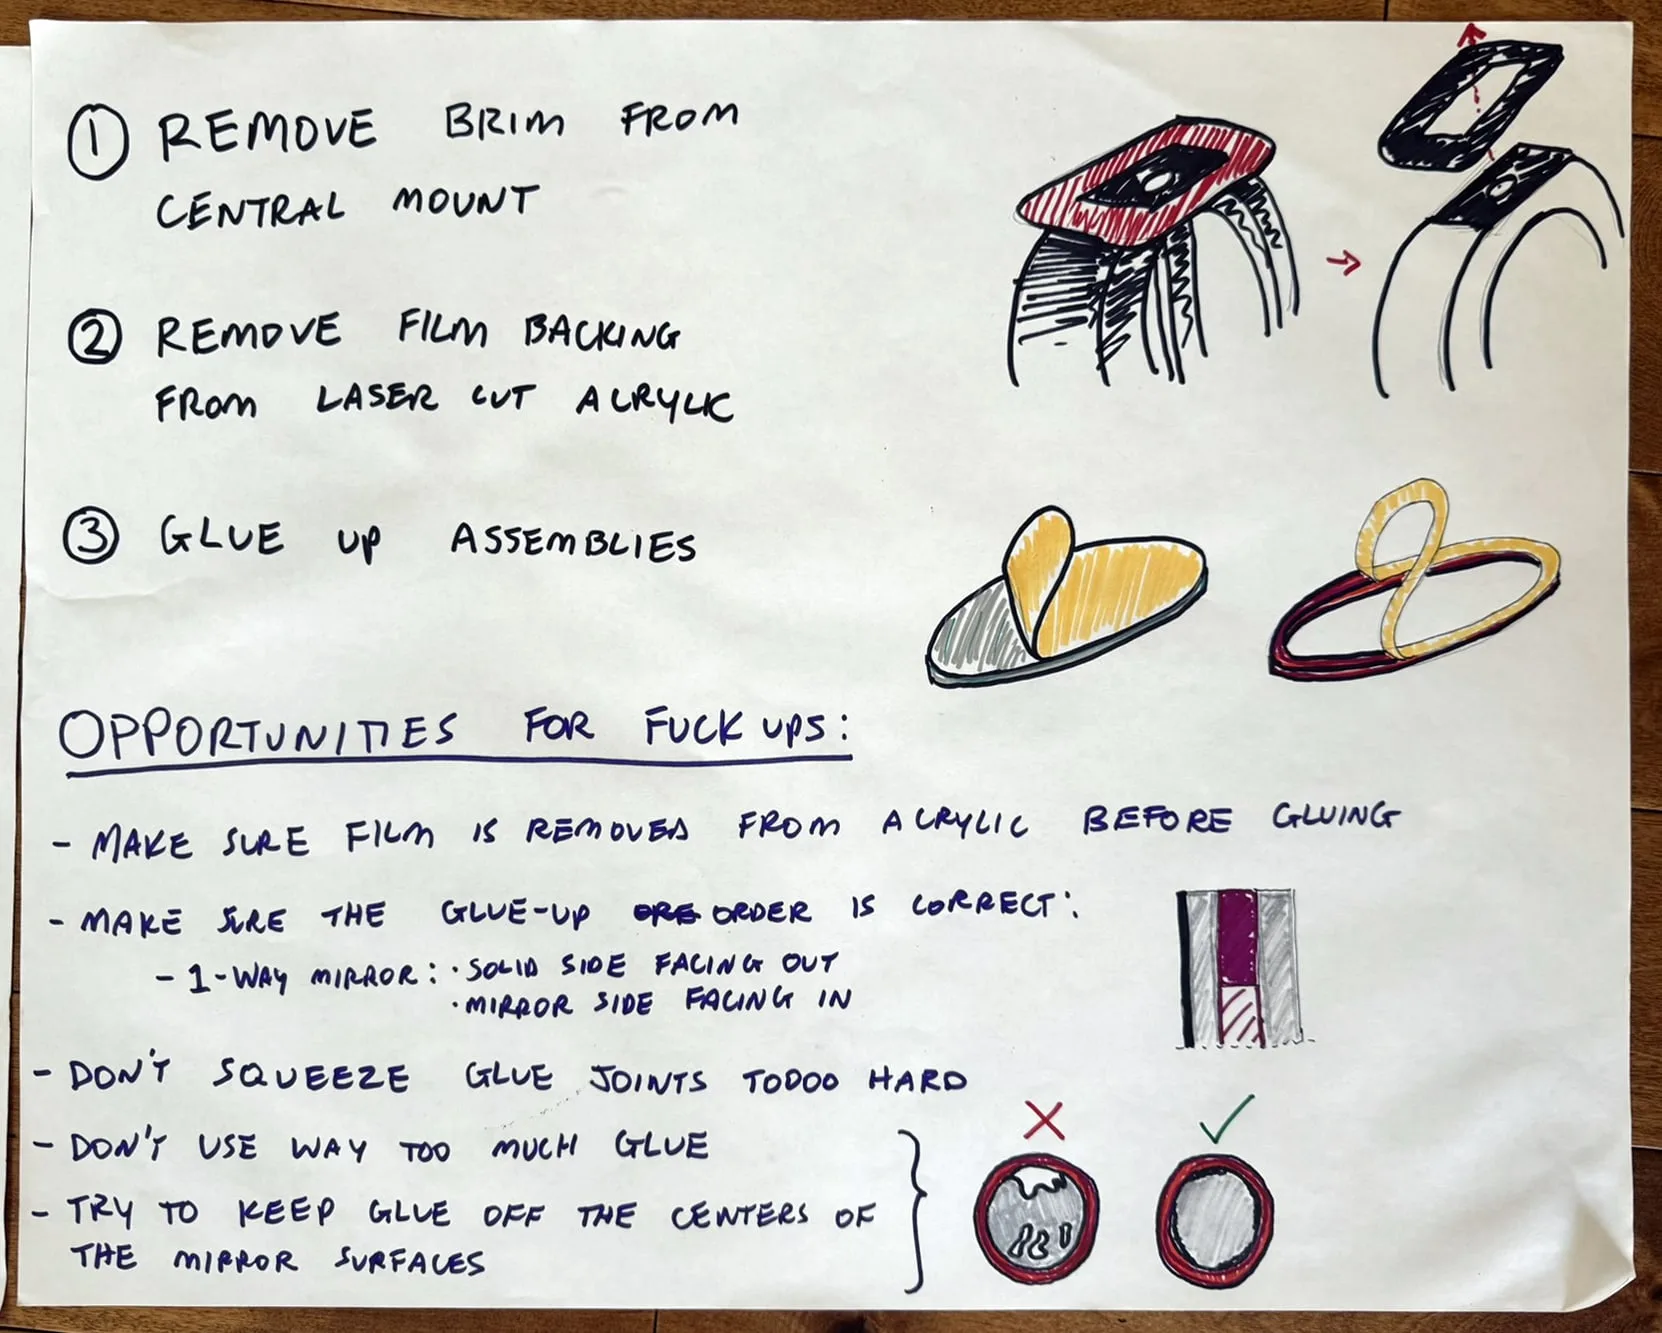
But of course I’m a manufacturing engineer so I had to make good work instructions! Critical to understand how you can screw up the process and then mitigate those possibilities with guidelines and training beforehand.
It came together quickly with extra hands and honestly less issues than I expected. Don’t mind me completely maxing out available single car garage space.
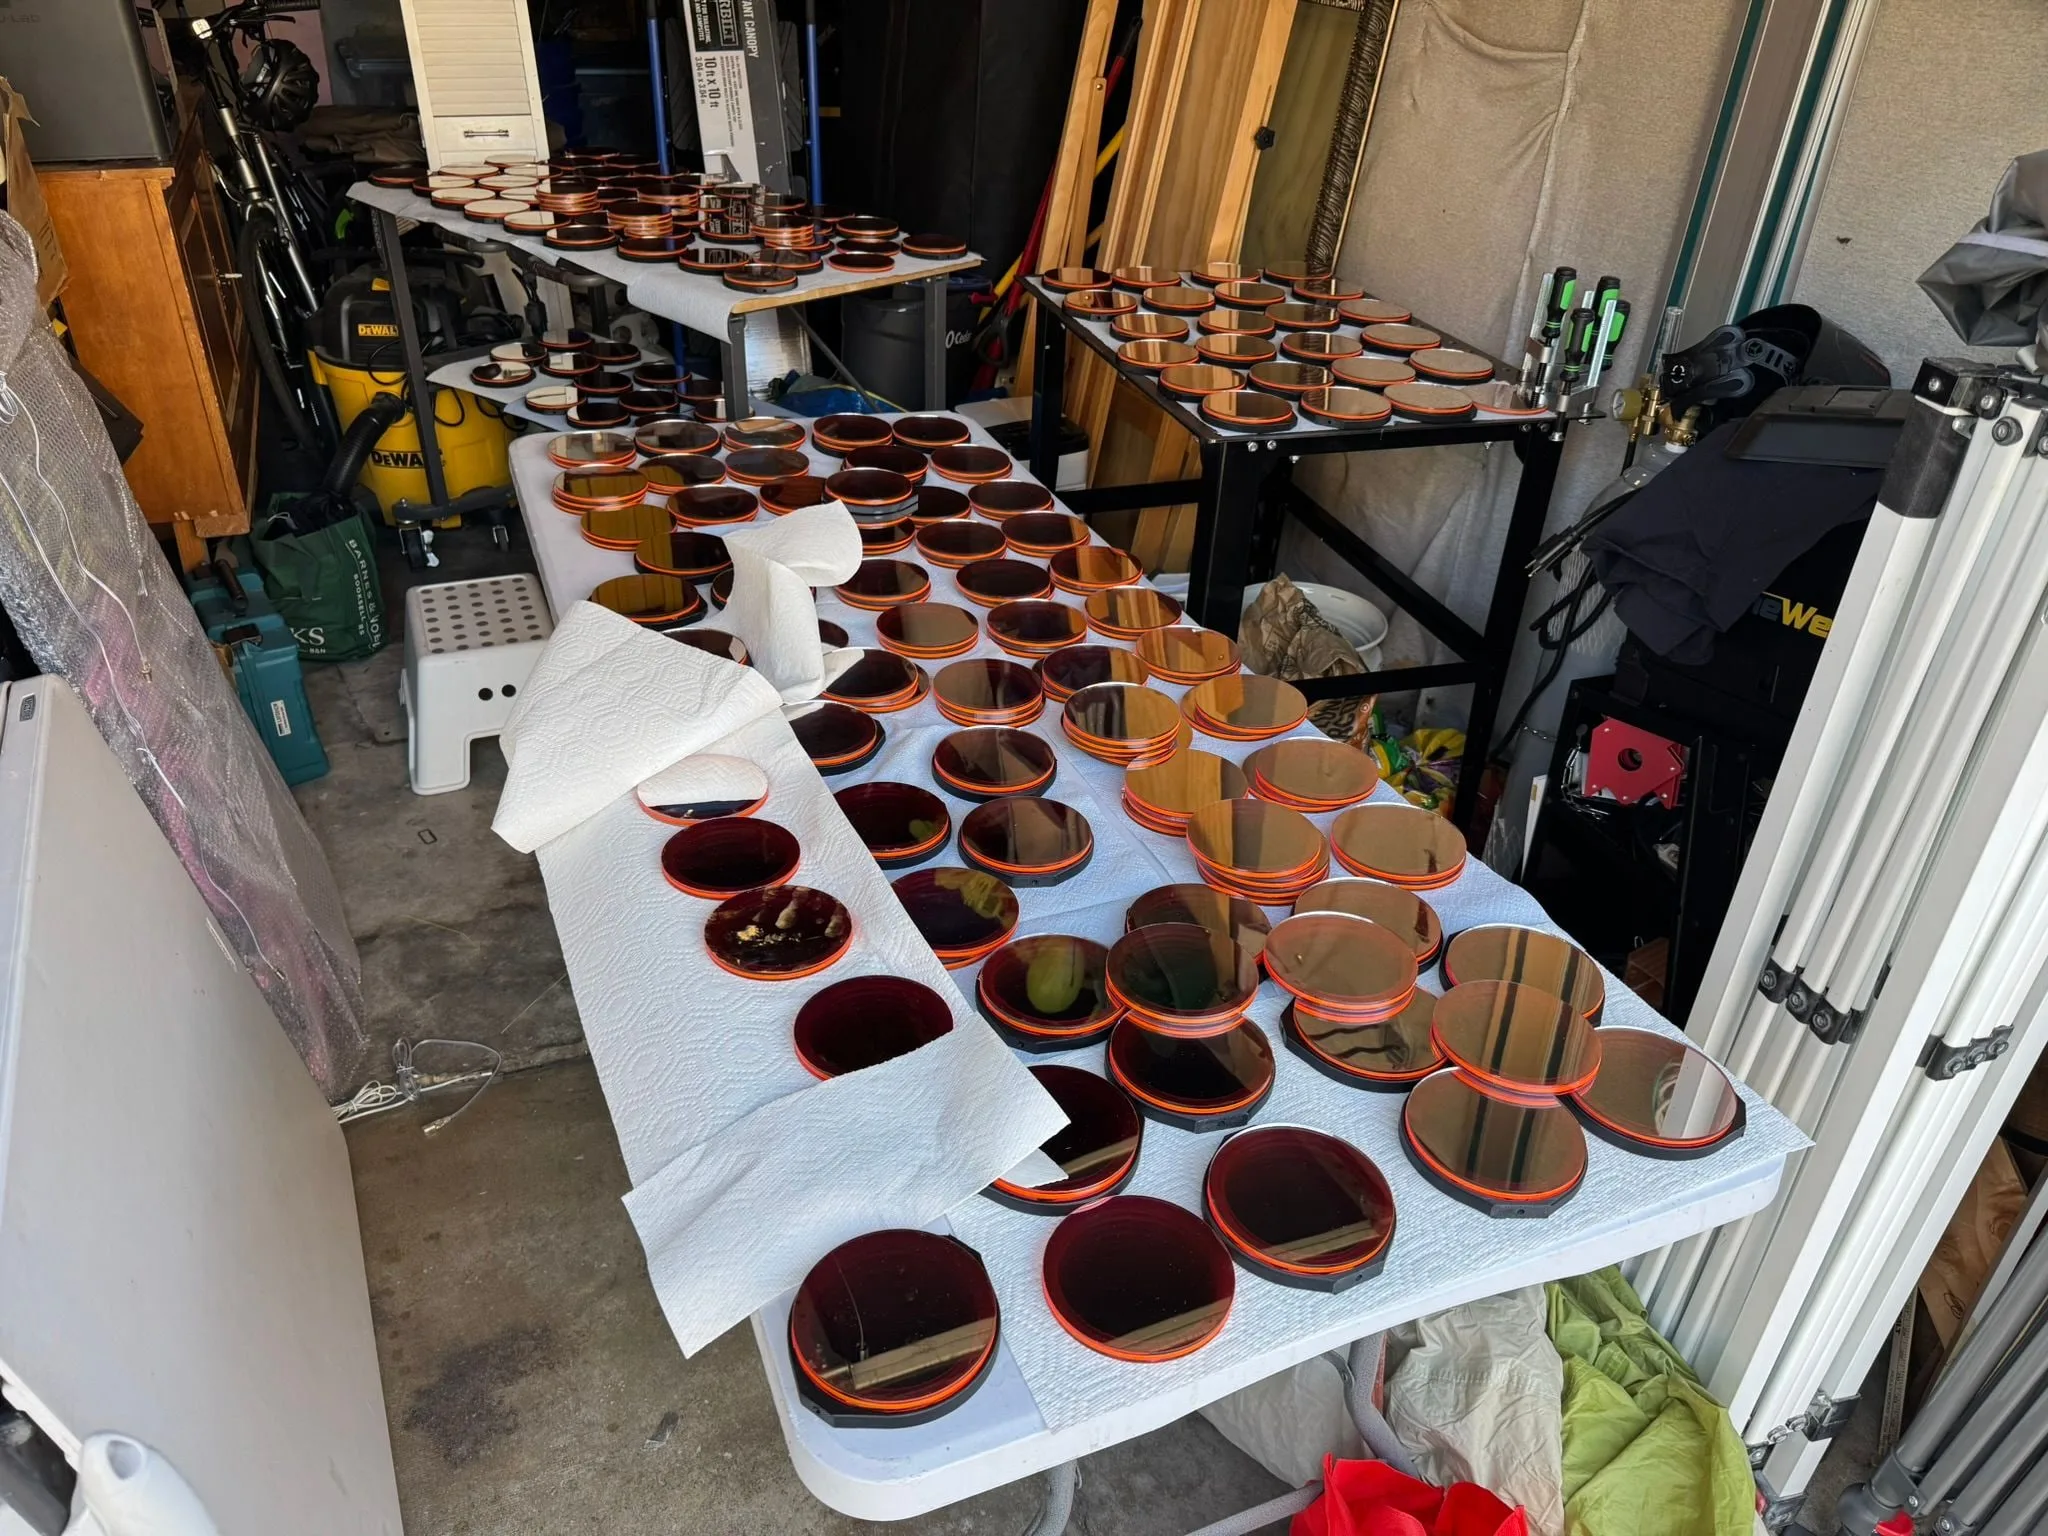
Suspended Array
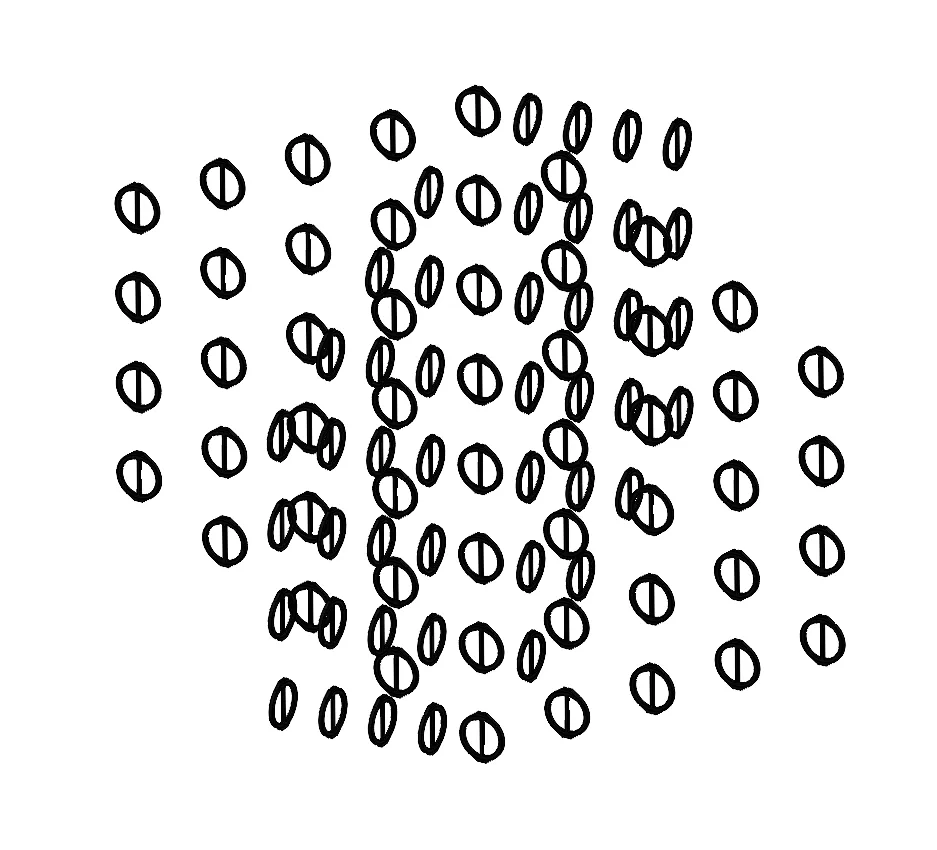
I sketched out several different patterns to suspend the individual pixels in space, and modeled a few in CAD. These needed to hang on individual strings, and I wanted to use as many as possible up to the max of 100 (this limit was set by the number of acrylic stacks I could cut from a full 4’x8’ sheet).
Ultimately I settled on this two-plane intersecting hexagon. 96 total pixels: a central stack of eight, and then four-fold radial symmetry with decreasing stacks of seven/six/five/four pixels.
Frame Design and Fabrication
Cheaper and easier ways to do this, but I used my tax refund this year for a basic MIG welding setup and (something like this) was the intended project.
Requirements:
- Pack relatively flat for transport
- Maximum prefab, minimum active work on playa
- Bolts to the playa, freestanding without additional ratchet strapping or other supports
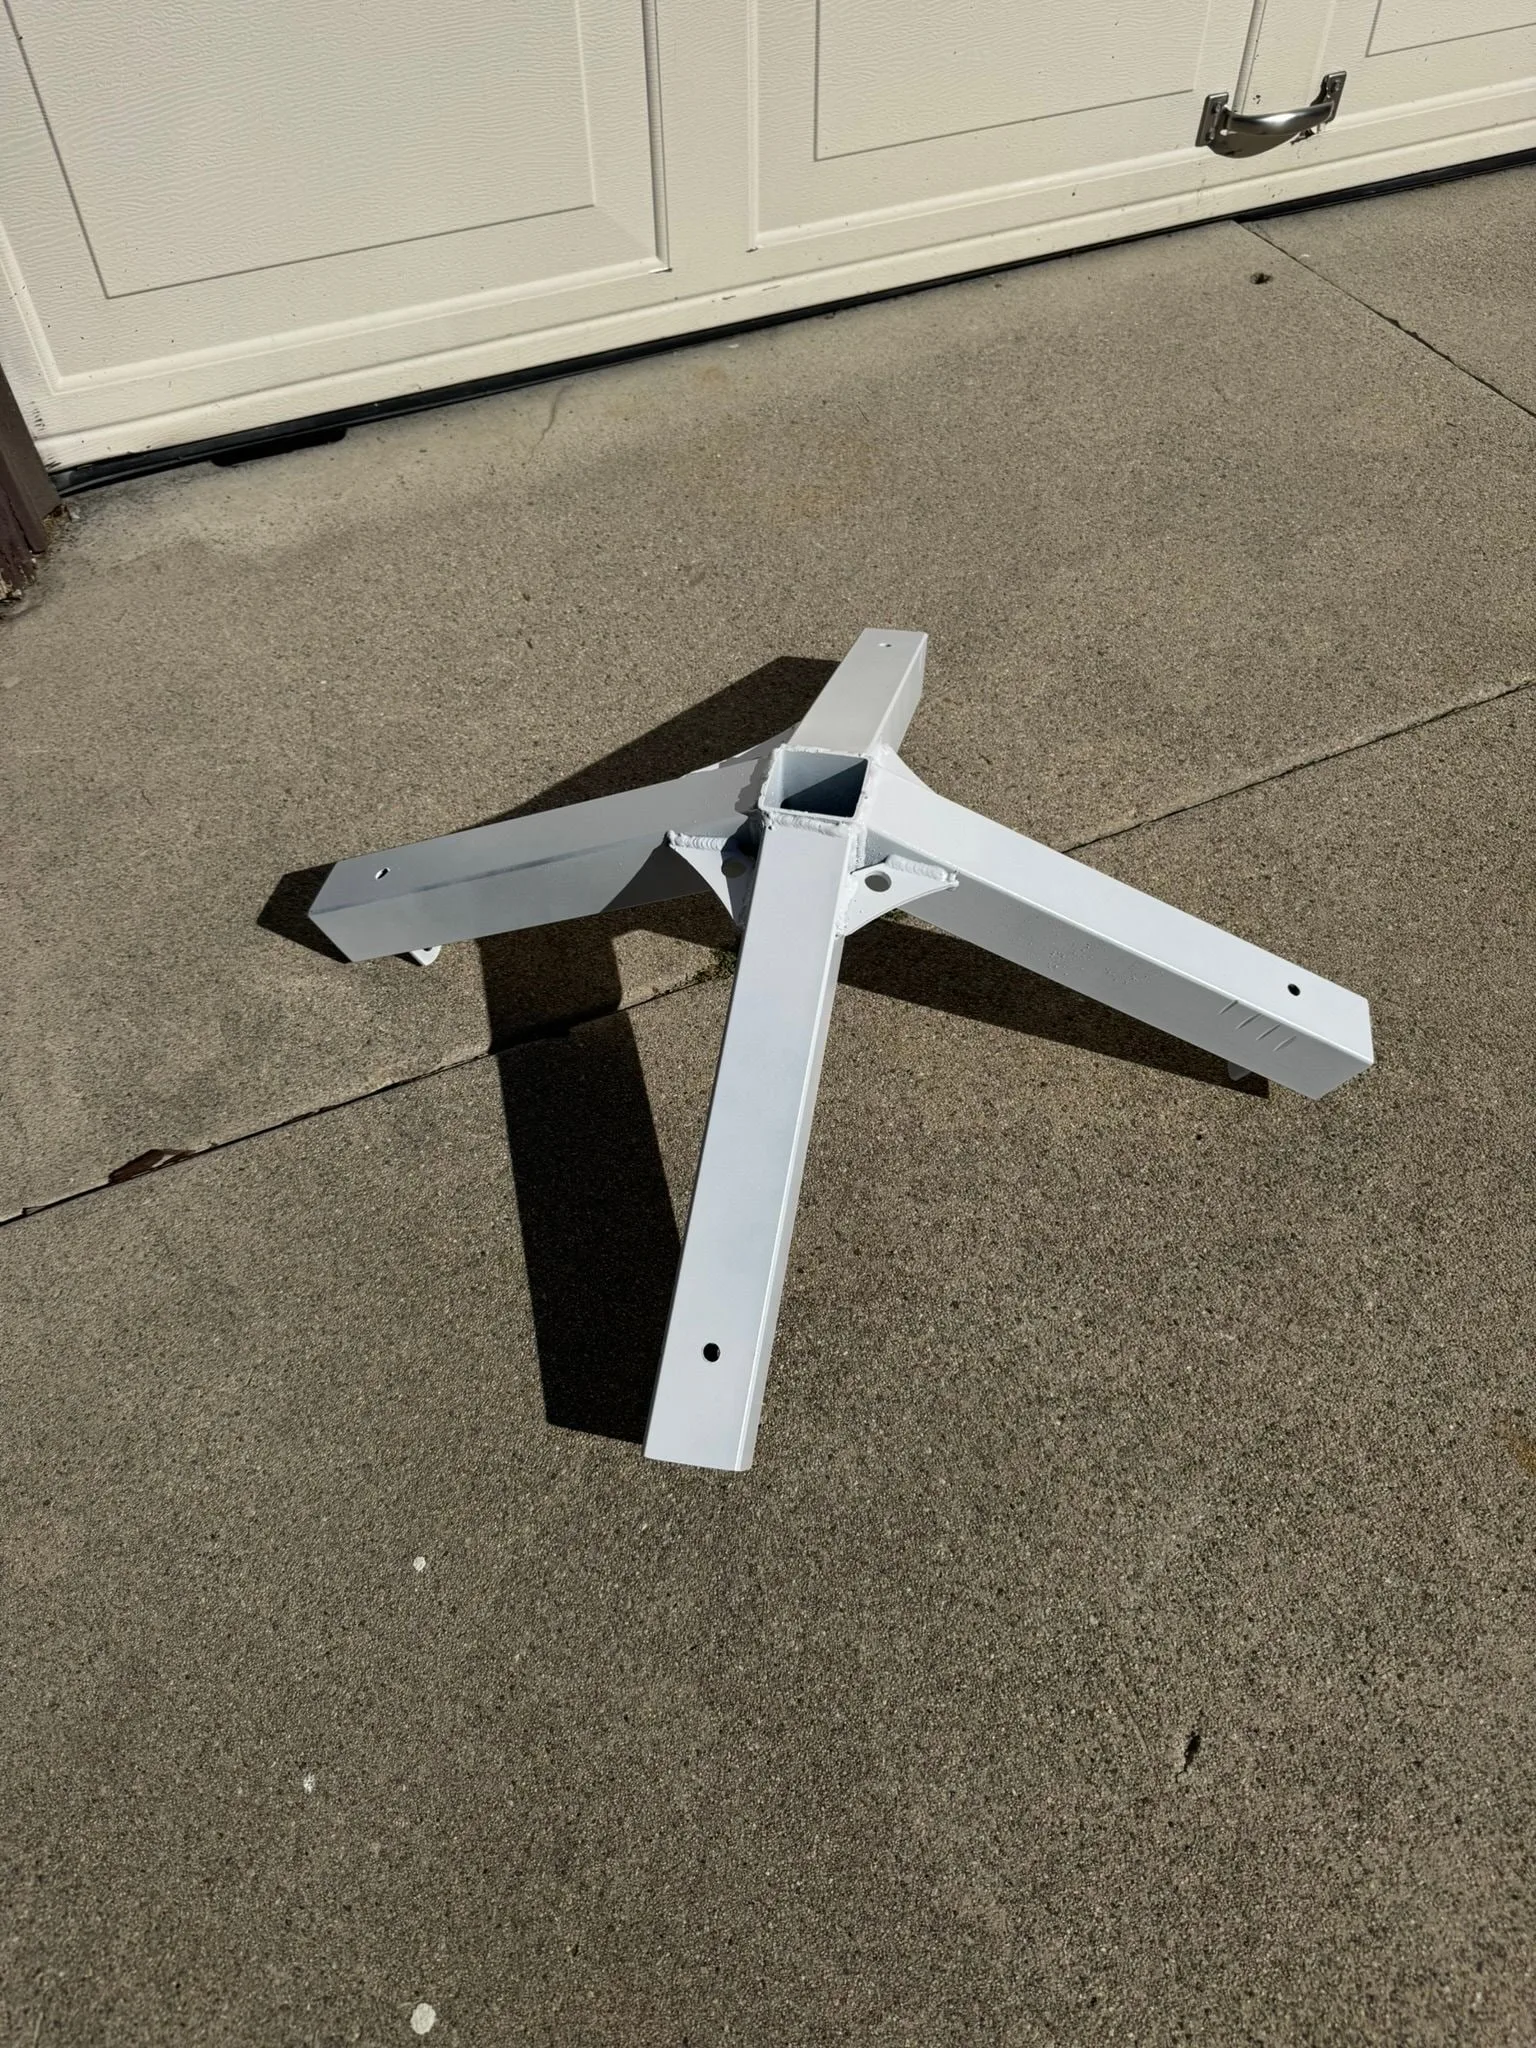
After a few iterations I ended up with the design below. The four legs sleeve into the central crown and get secured with a single bolt, and then each foot gets lag screws into the playa.
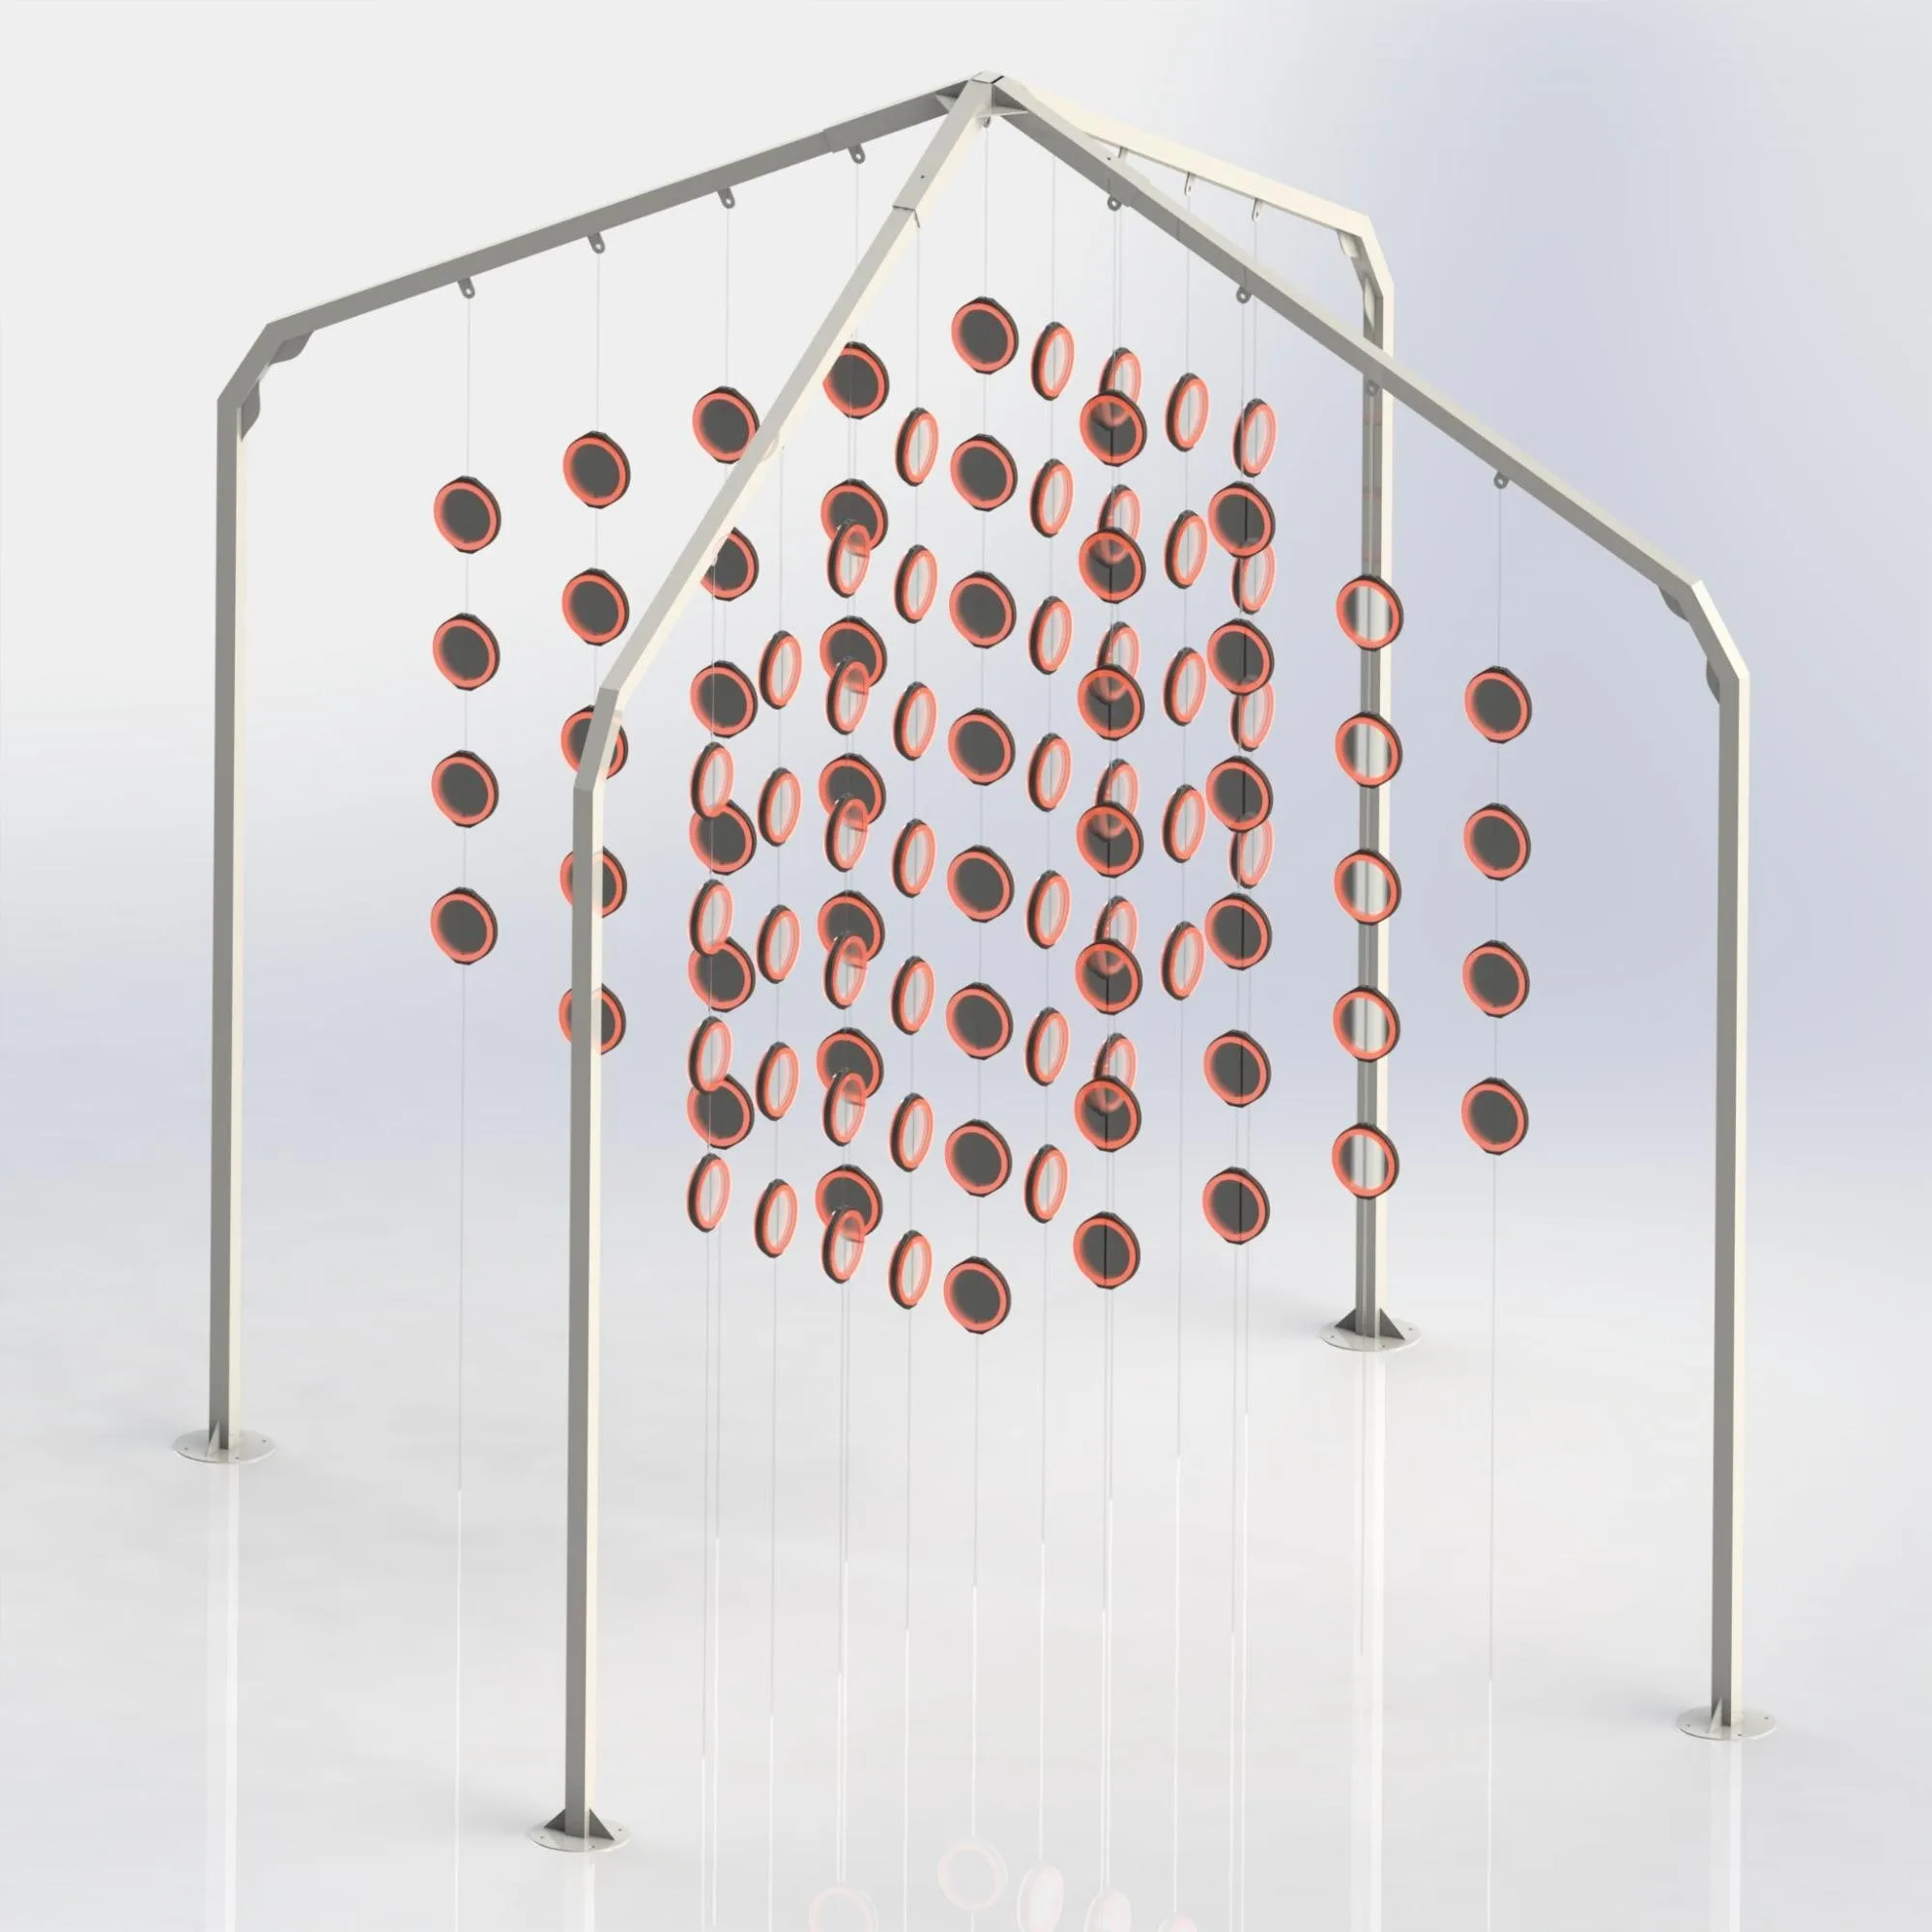
I did price out custom bent steel tubes for the legs to be a little more elegant, but went with this design due to price and lead time.
Each leg is made from three lengths of 1.5” x .083” square steel tube with mitered butt welds, 2x custom cut 148.3° gussets (why make things easy?), a custom foot (both in .119” sheet from Sendcutsend), and 2x 90° 1/8” gussets.
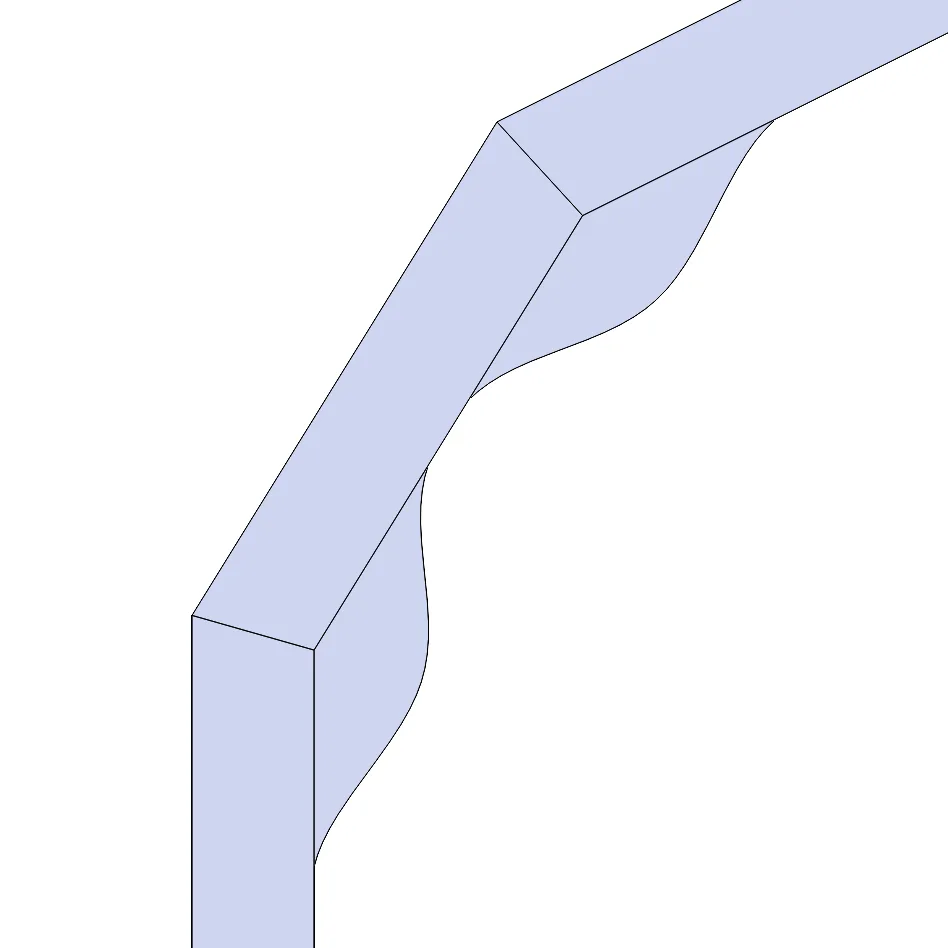
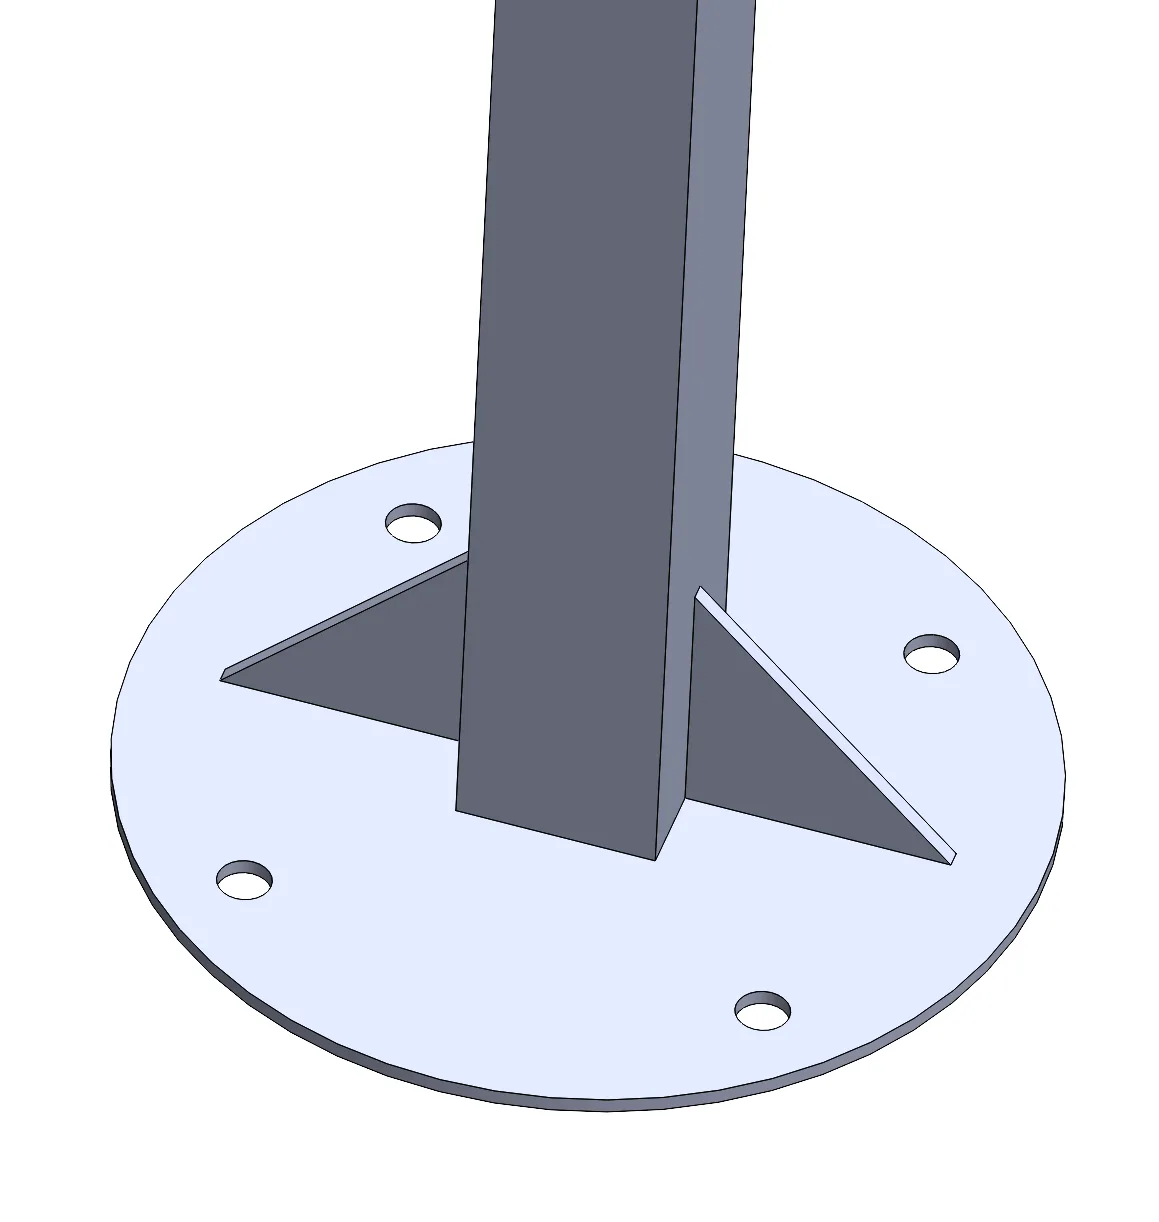
The crown is made from 4x mitered ~12” lengths of 1.75” x .095” square steel tube, welded to a central ~2” vertical length of 2” x .120” square steel tube. This is capped on top and bottom with scrap plate, and supported by 4x 90° 1/8” gussets. This tube size + thickness combination was harder to find locally and I ended up purchasing online for far too much, but I wanted to make sure it would sleeve nicely with the 1.5” leg tubes for ease of installation, without too much clearance that would lead to a wobbly structure.
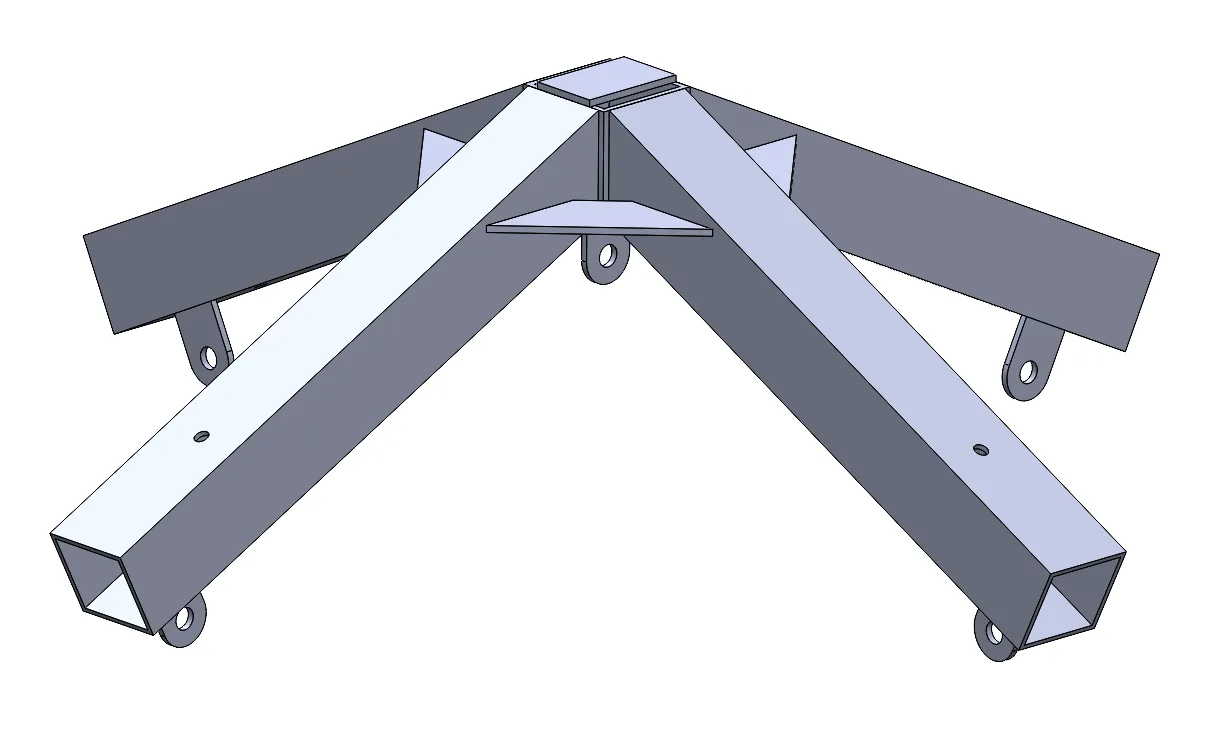
I also welded tabs to the legs at measured intervals to clip on each strand of pixels, and welded 2x ¼”-20 nuts to the inside of each leg to for blacklight panel mounting options.
I designed and printed layout tools that slide over the steel tube and let me mark out the correct angles for each cut. These worked perfectly, and honestly I’m surprised how consistent I was able to hold everything using a handheld bandsaw. Anything is possible with good fixturing, consistent technique, and attention to detail.
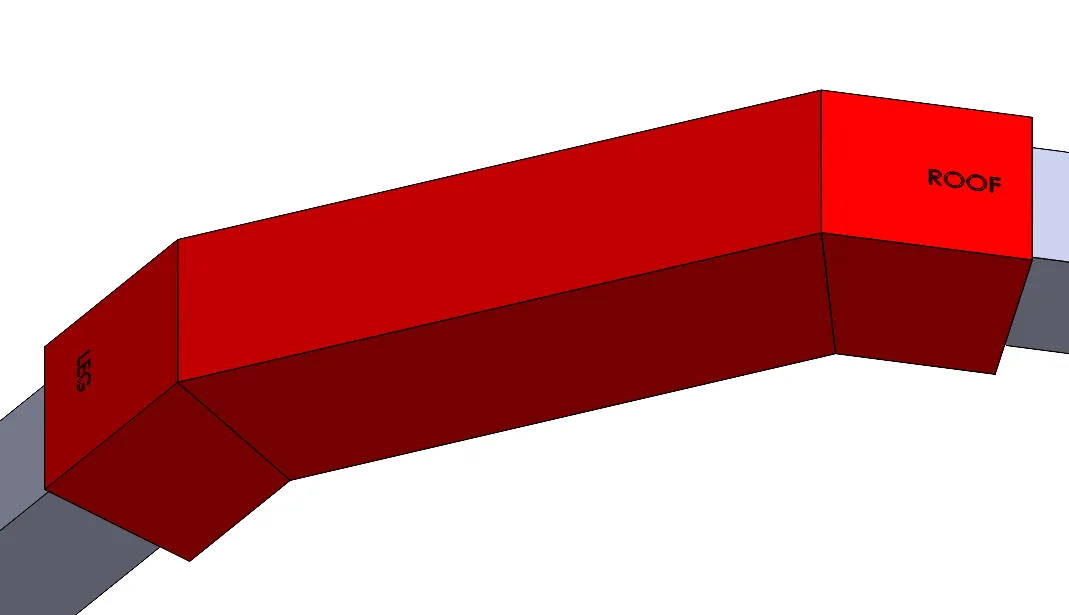
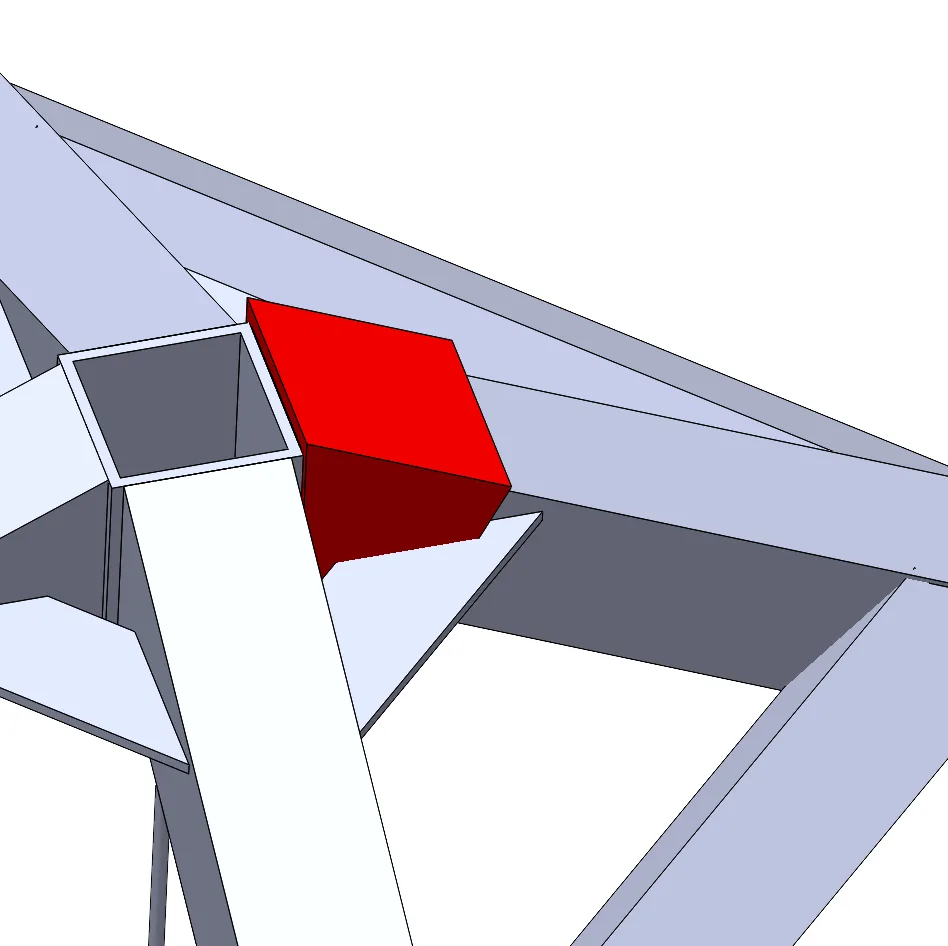
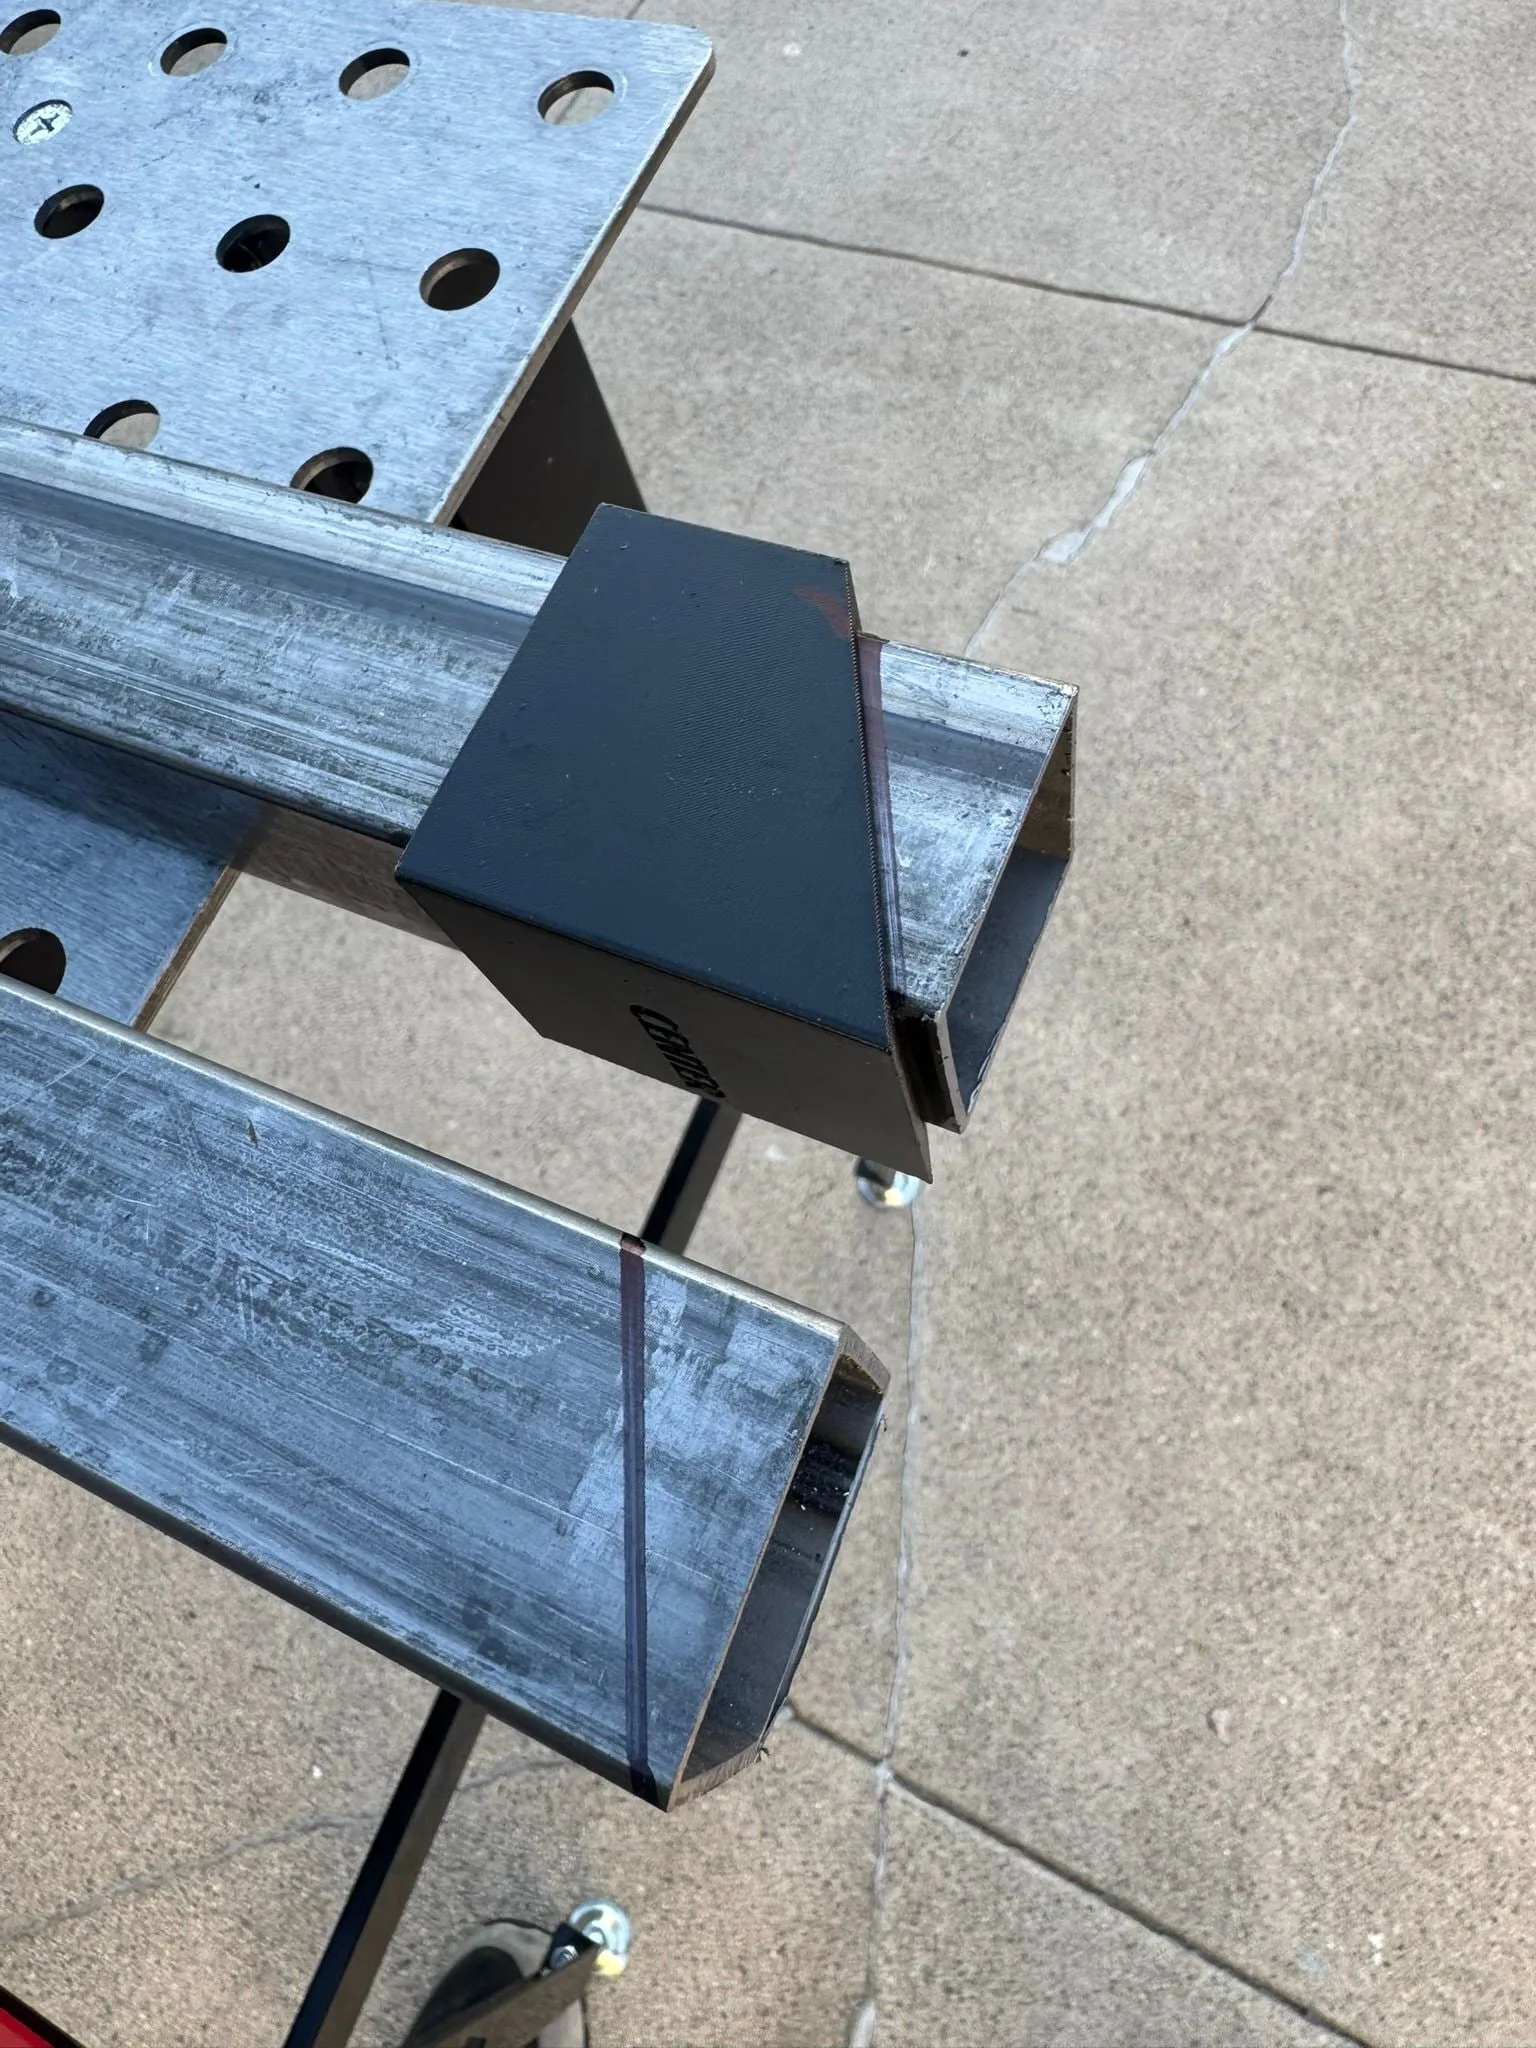
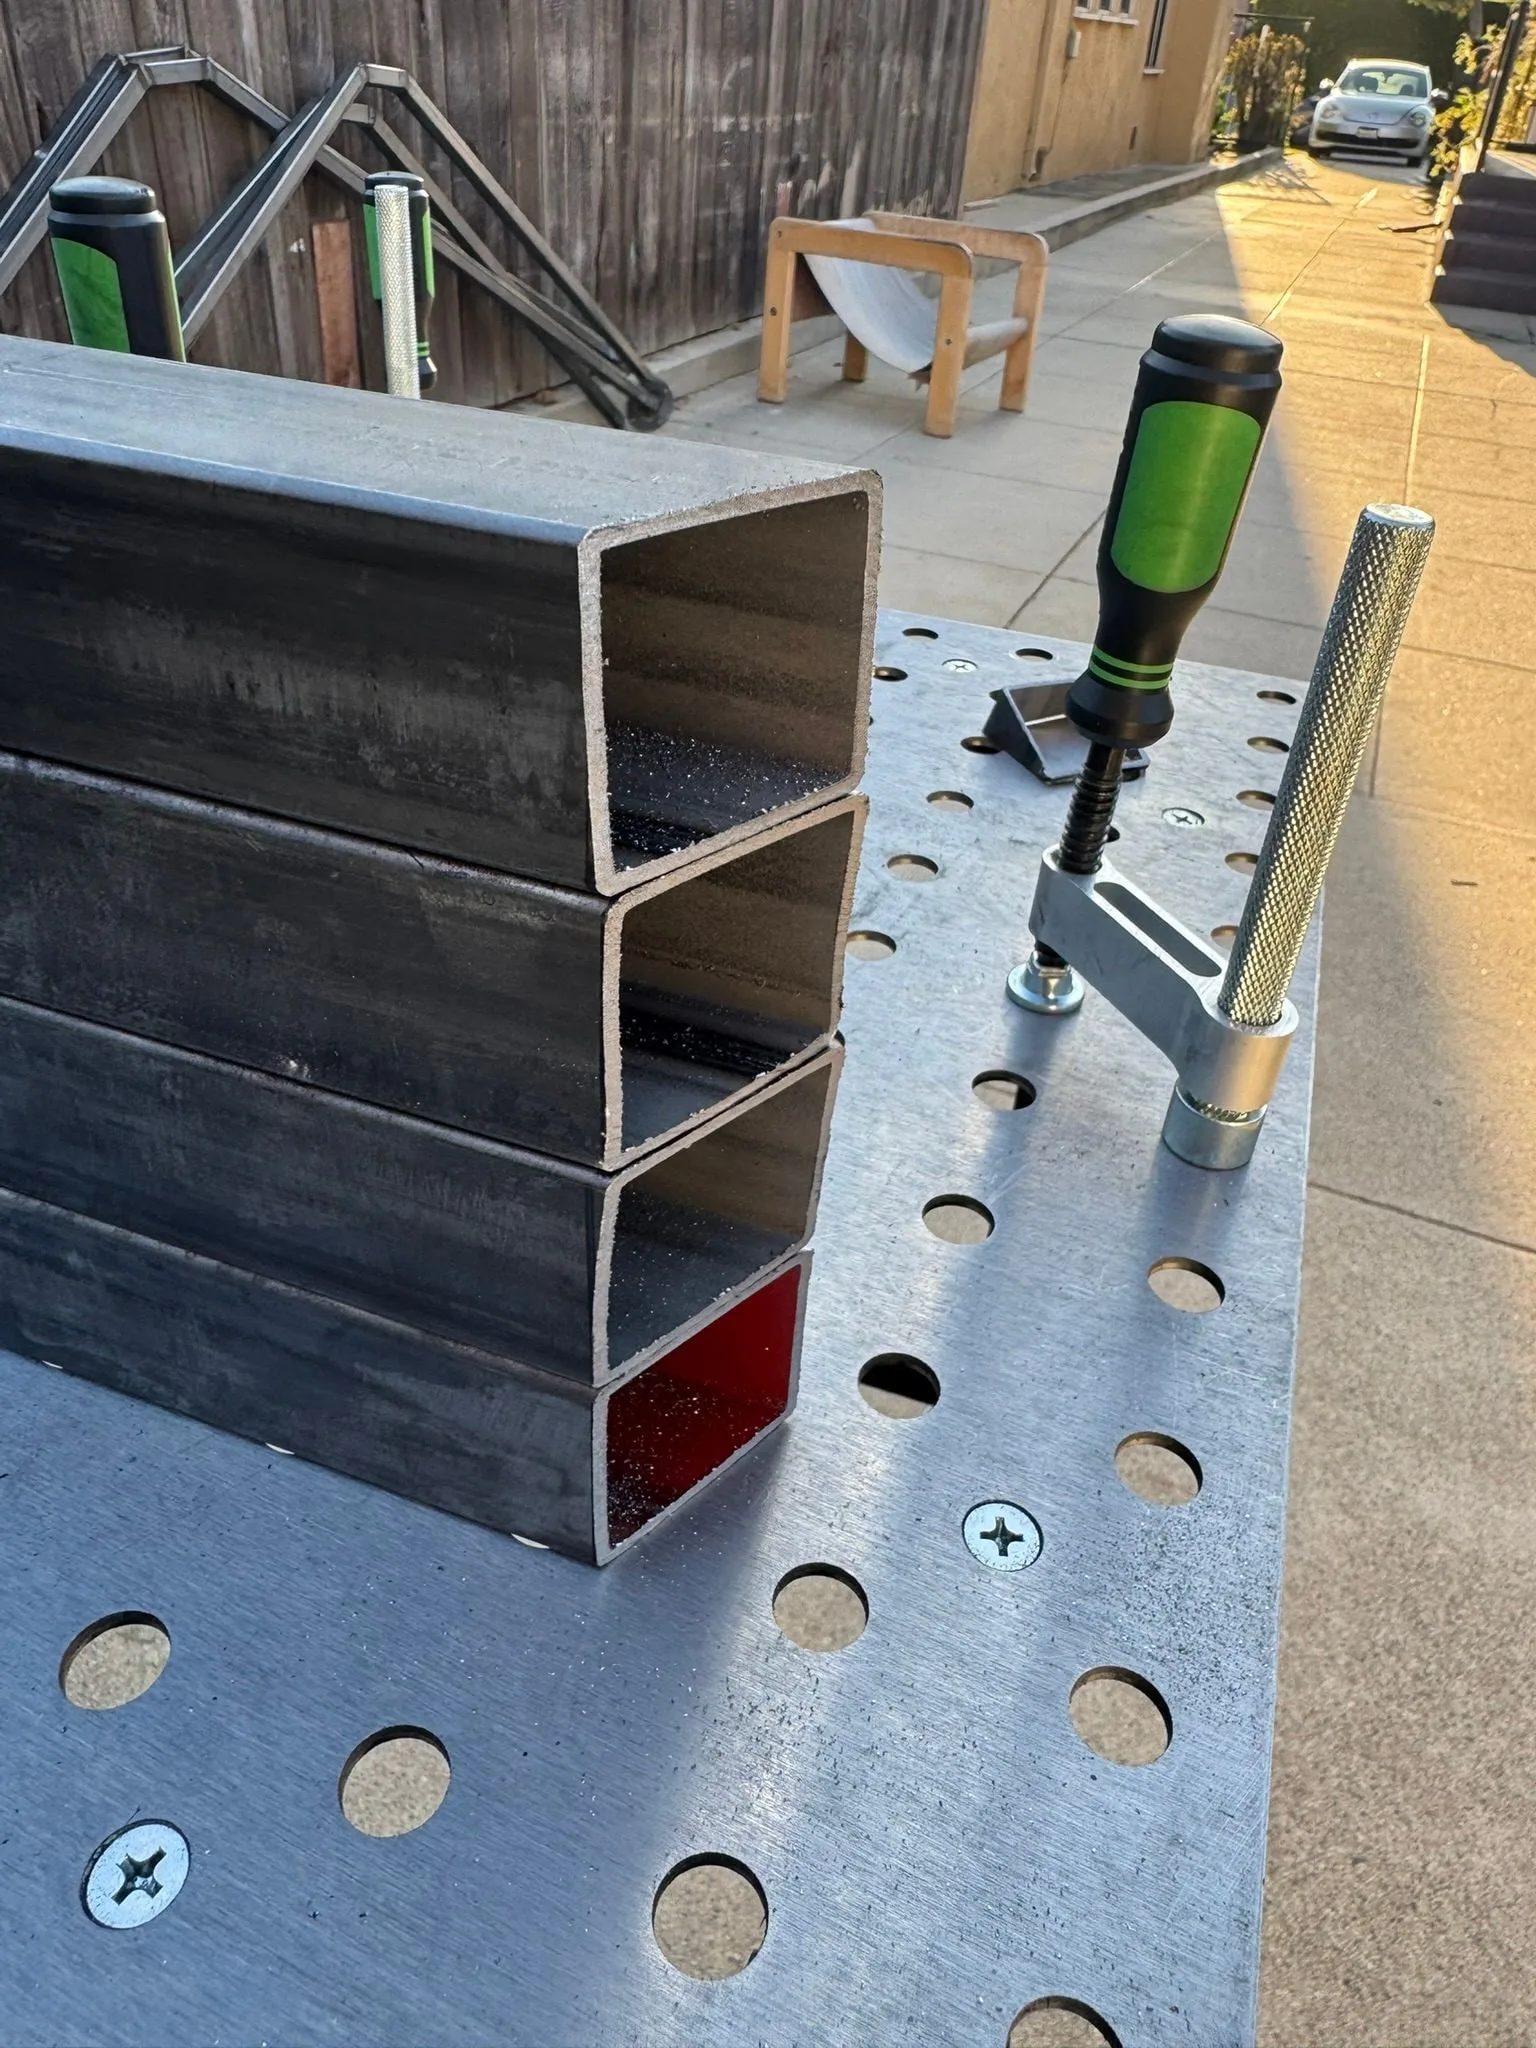
I also printed weld fixtures to let me precisely set the miter angles on the legs, but the cuts were accurate enough (and required tolerances open enough) that I mostly ignored those during the process.
(Psst no one tell him that these are the same miter angle and he only needed to print one)
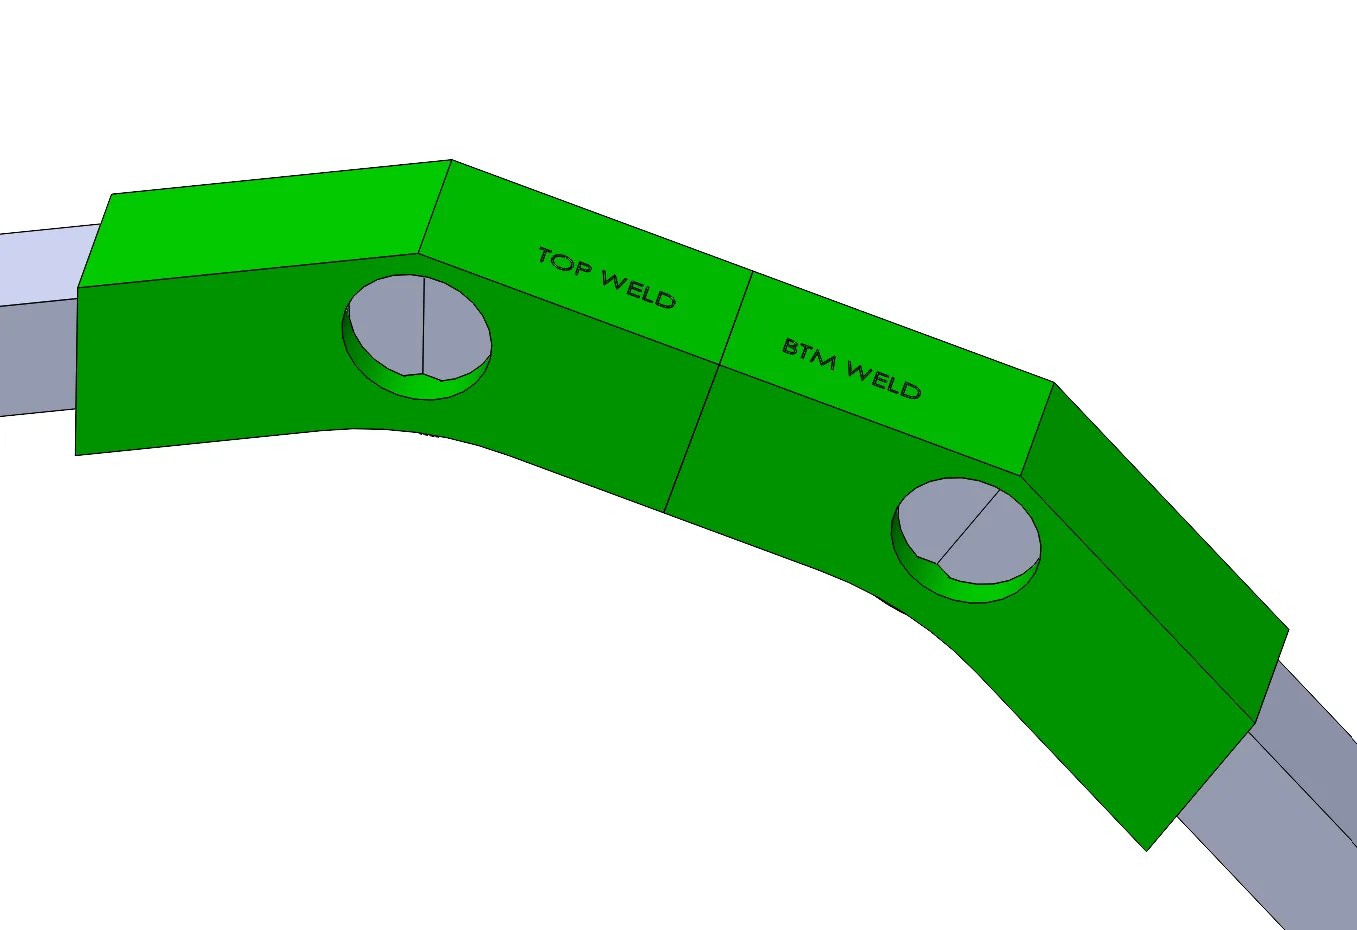
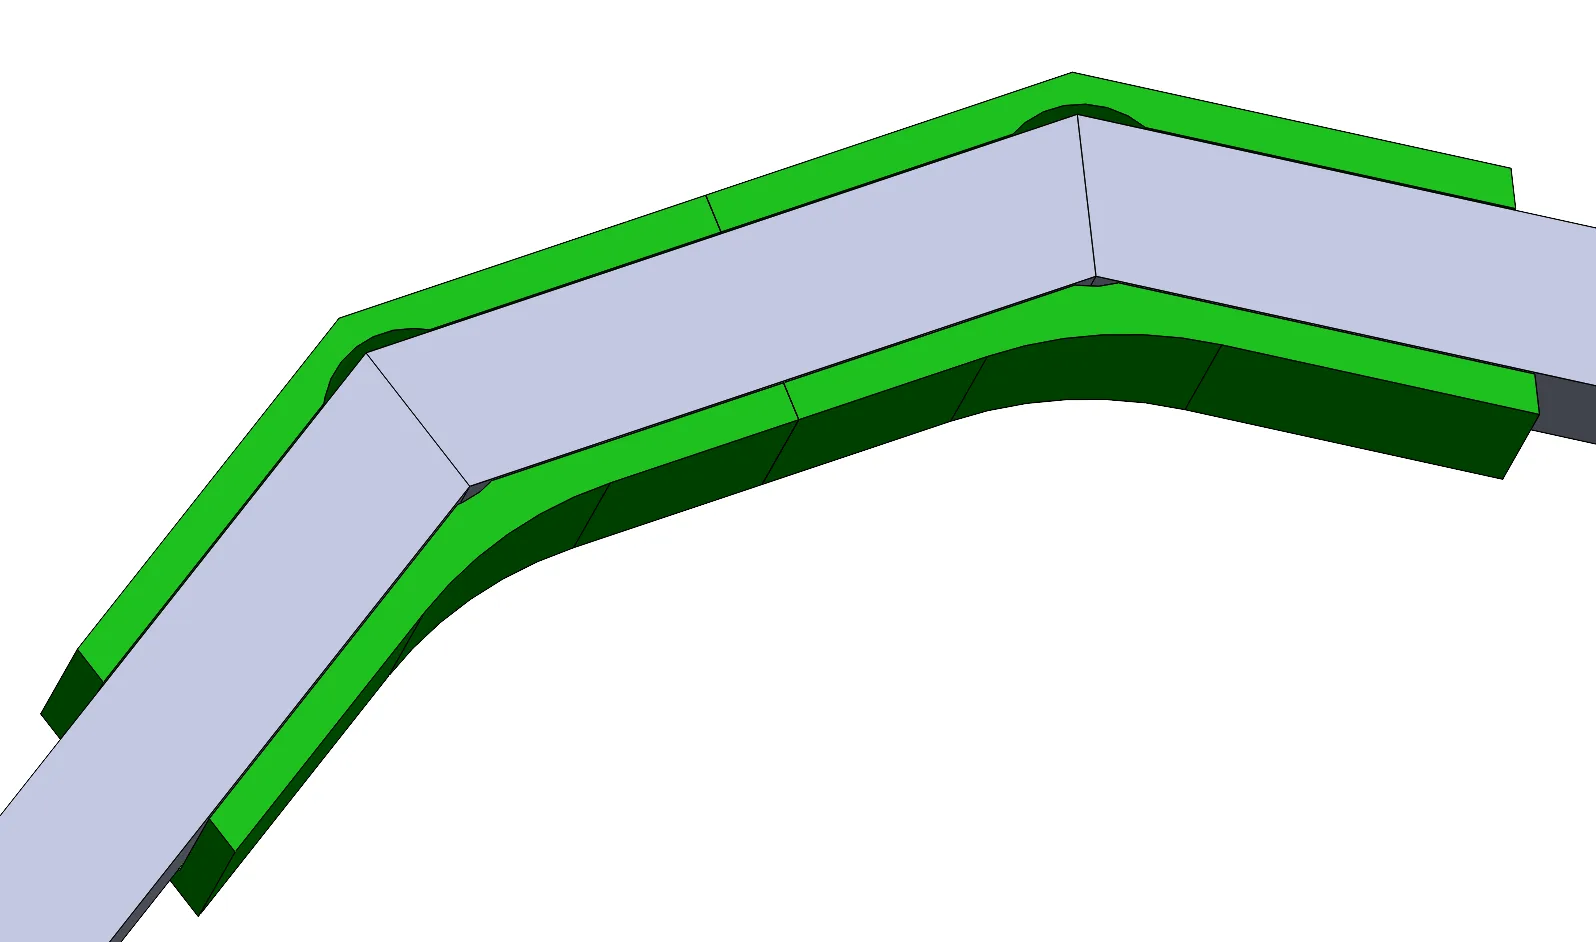
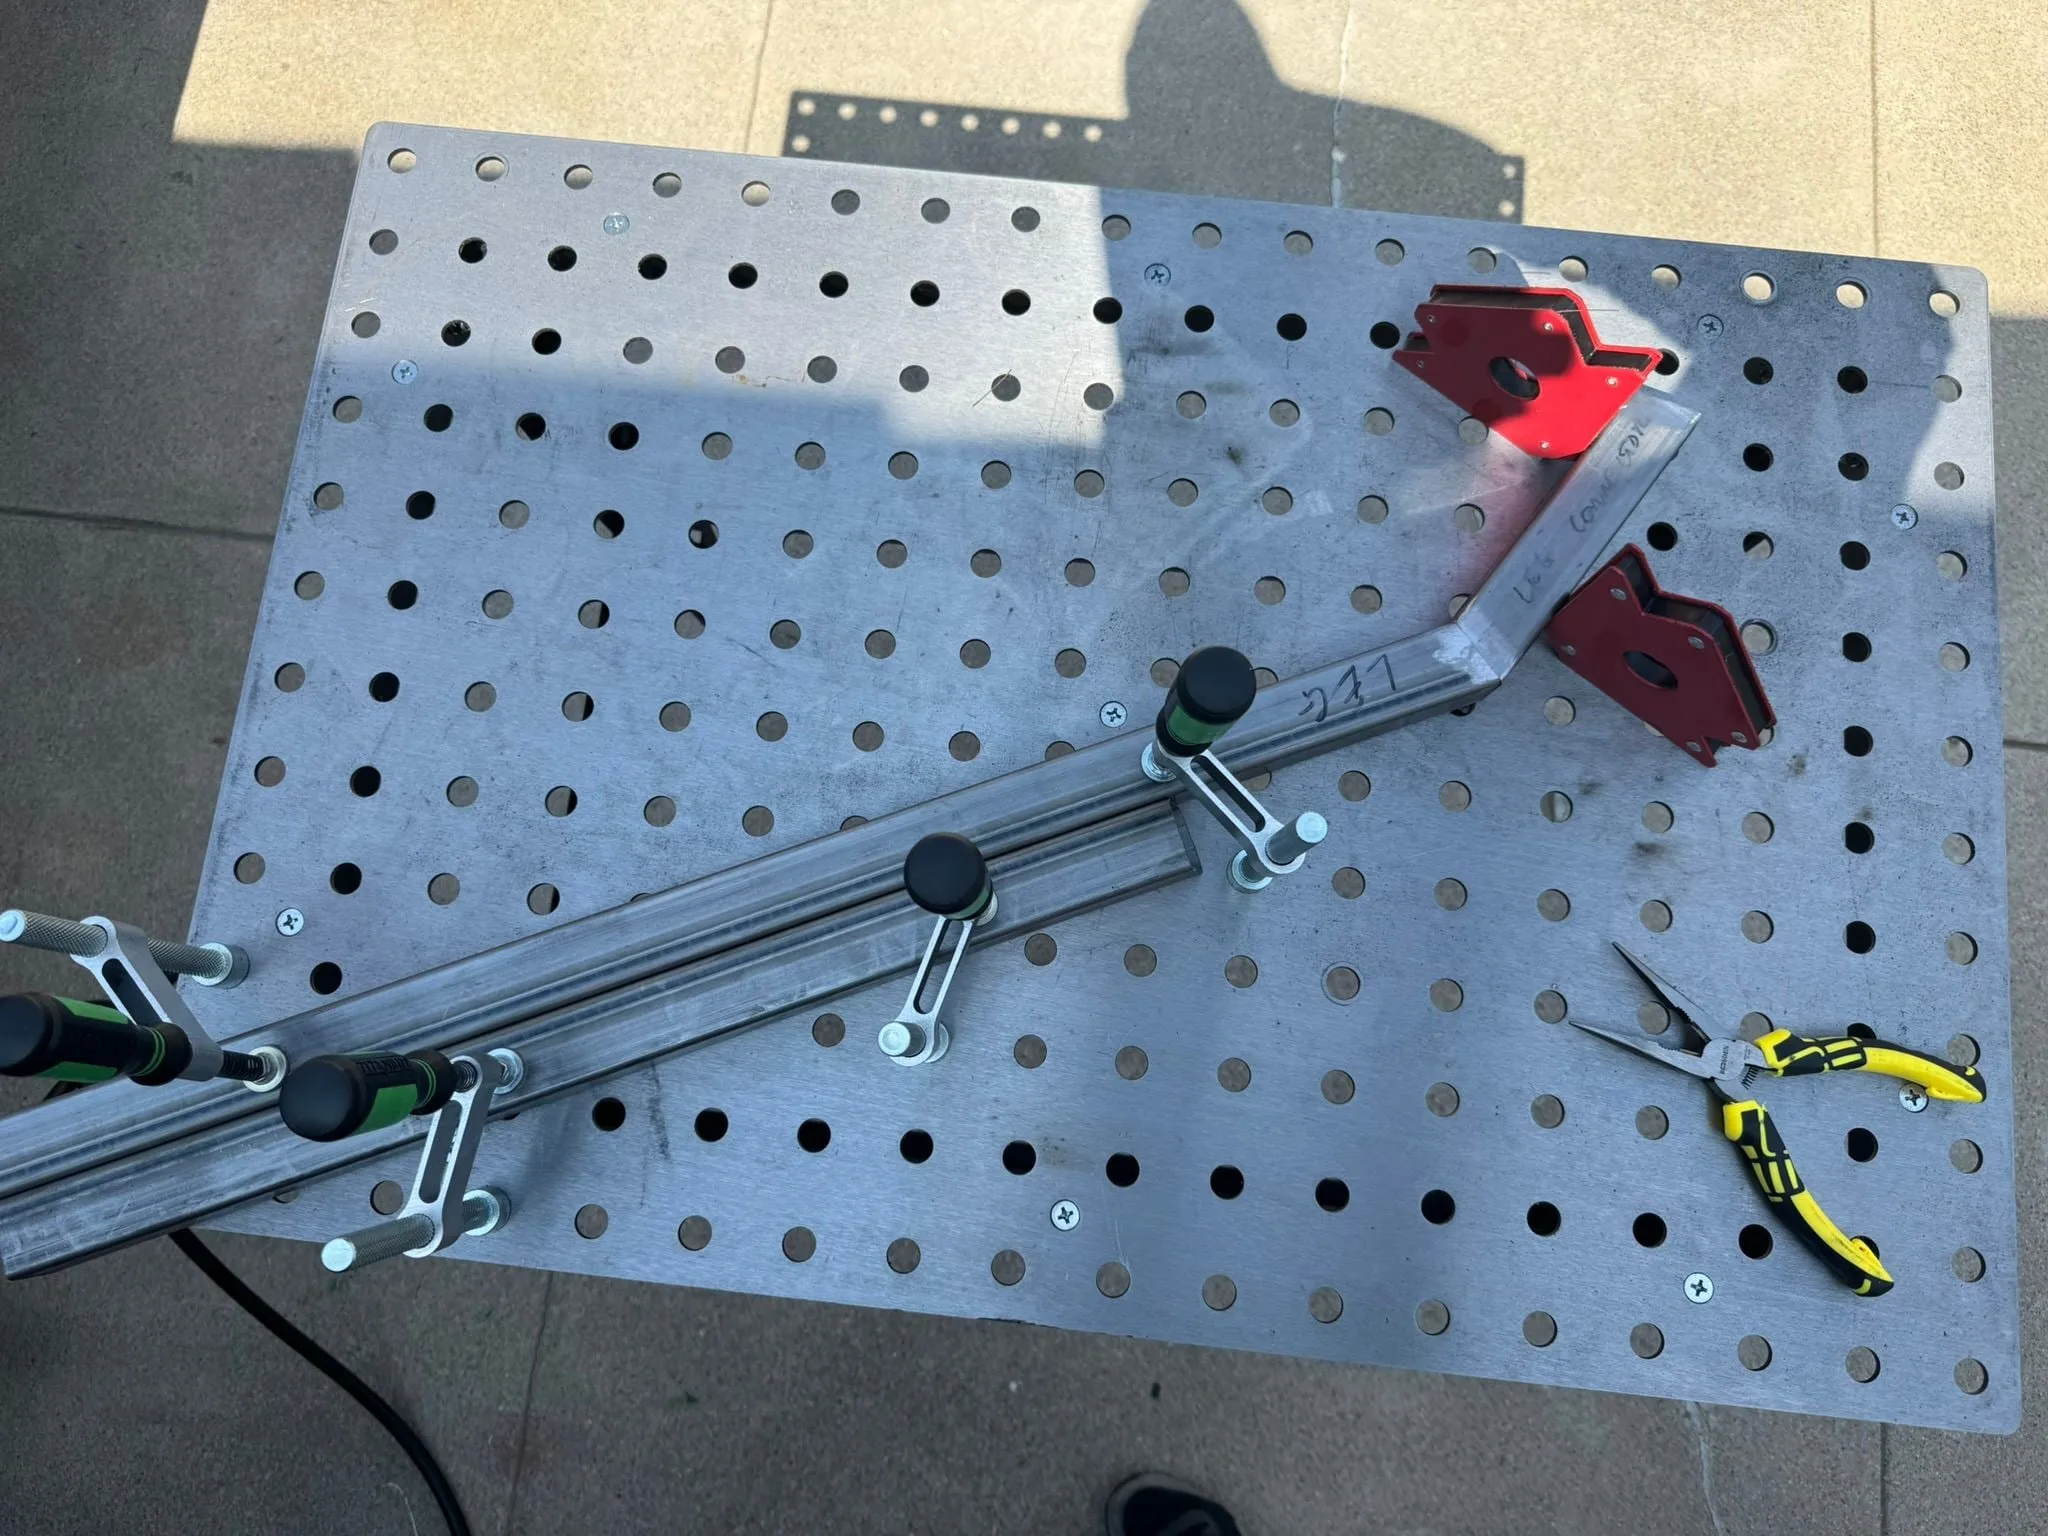
I tacked up all the leg segments first to make sure I was in the ballpark.
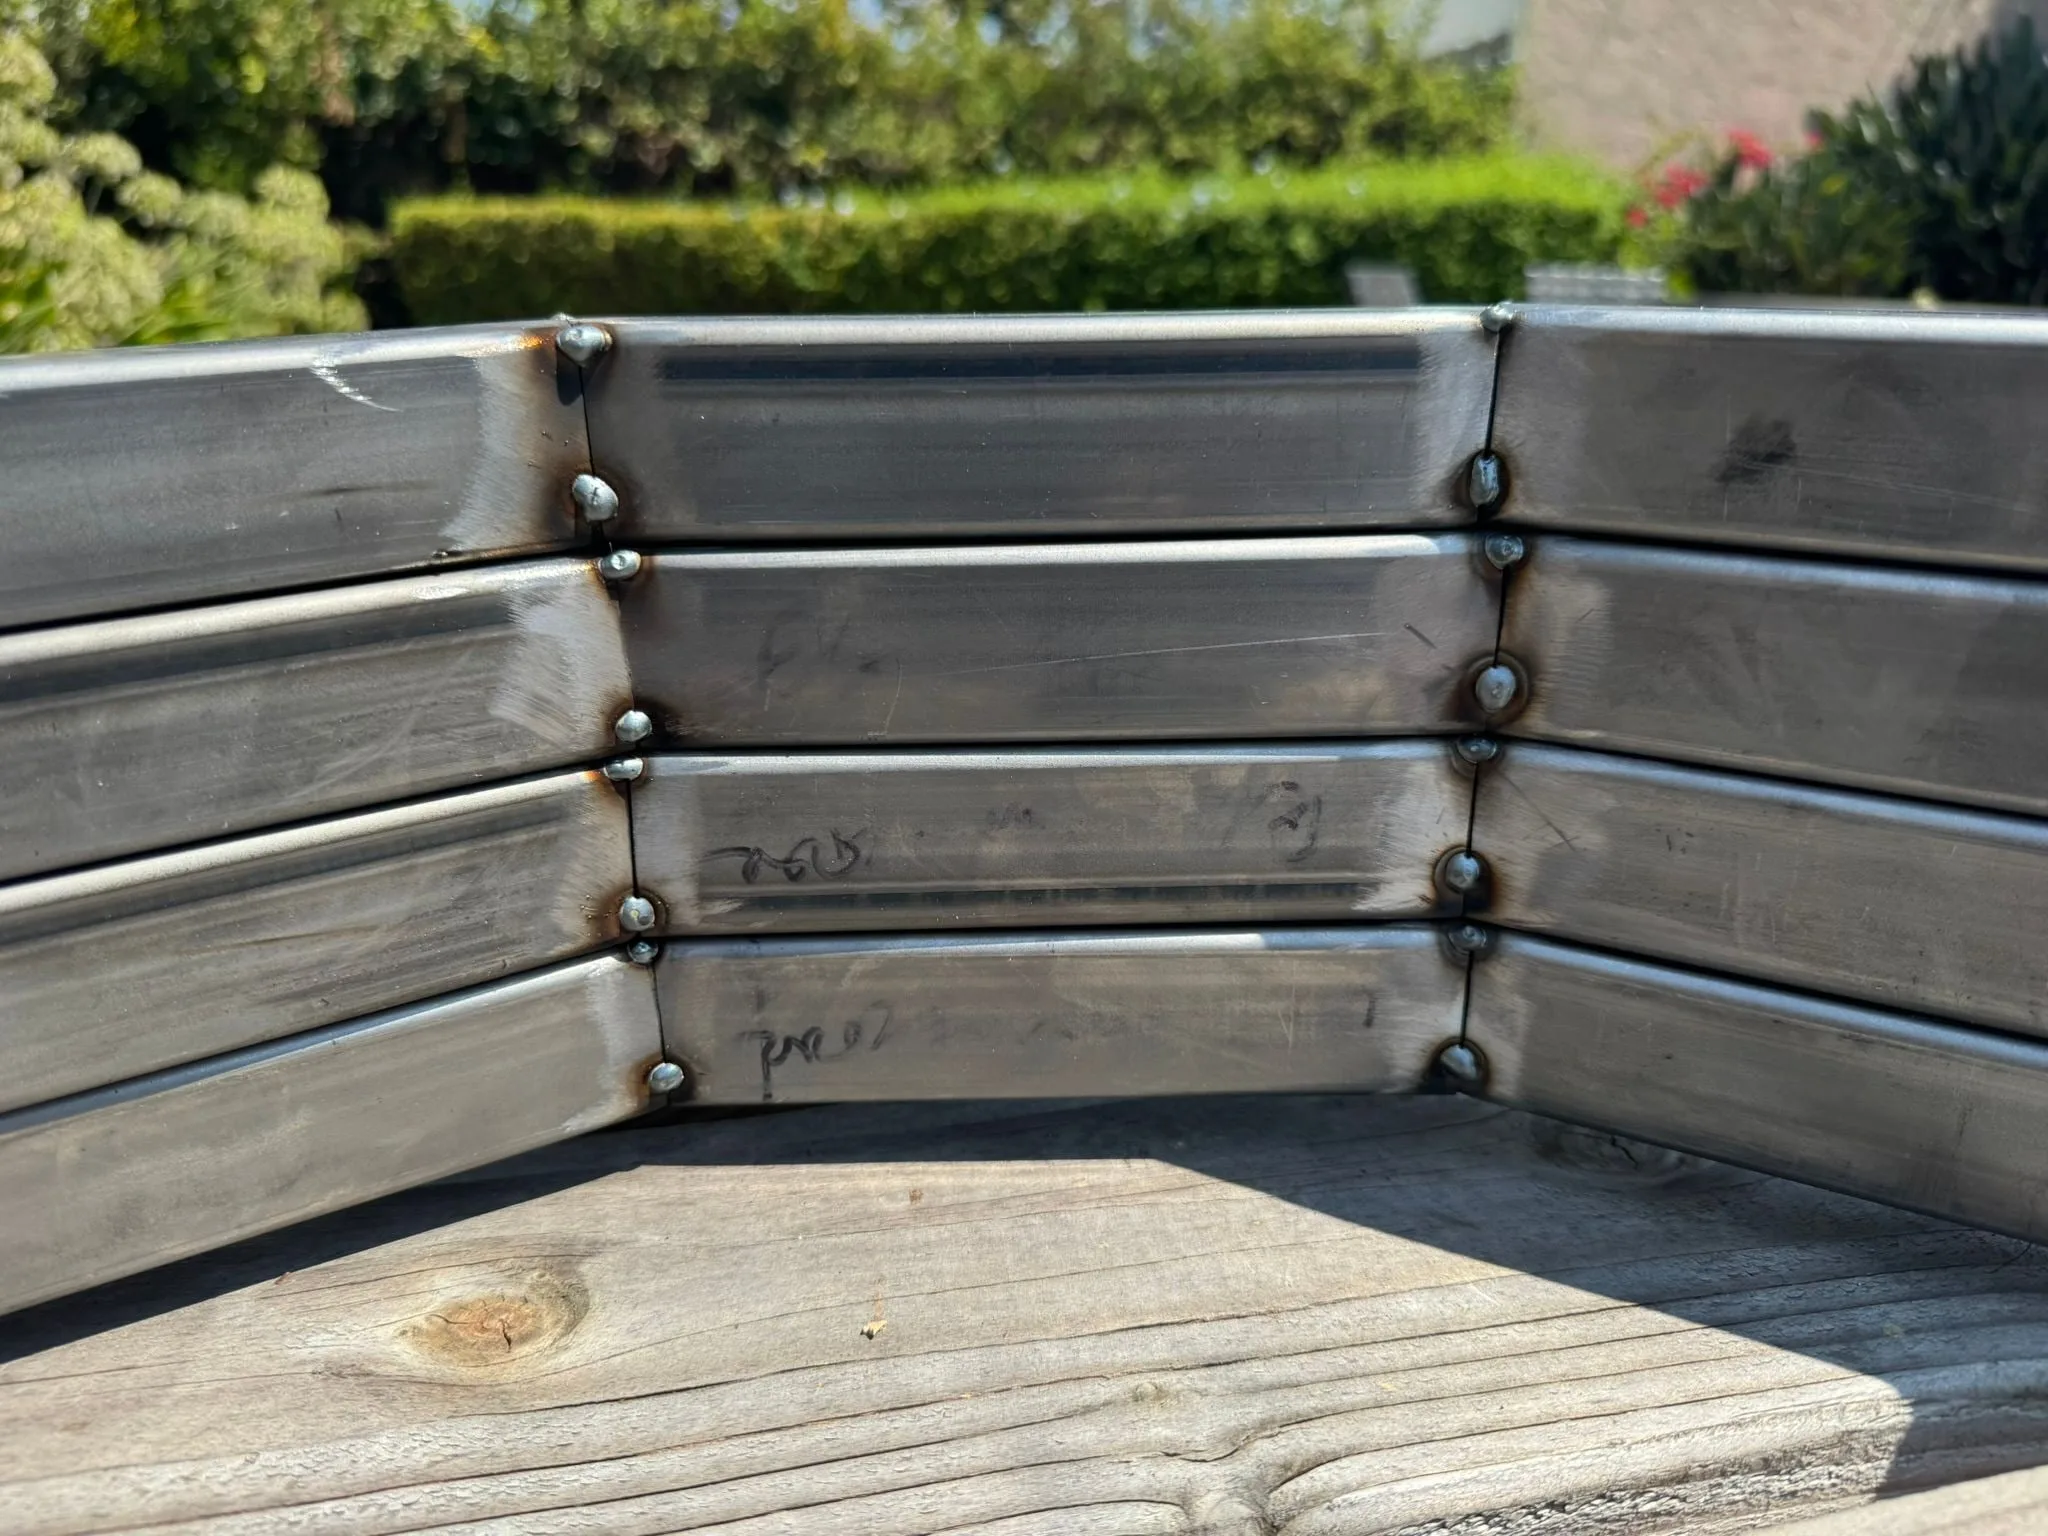
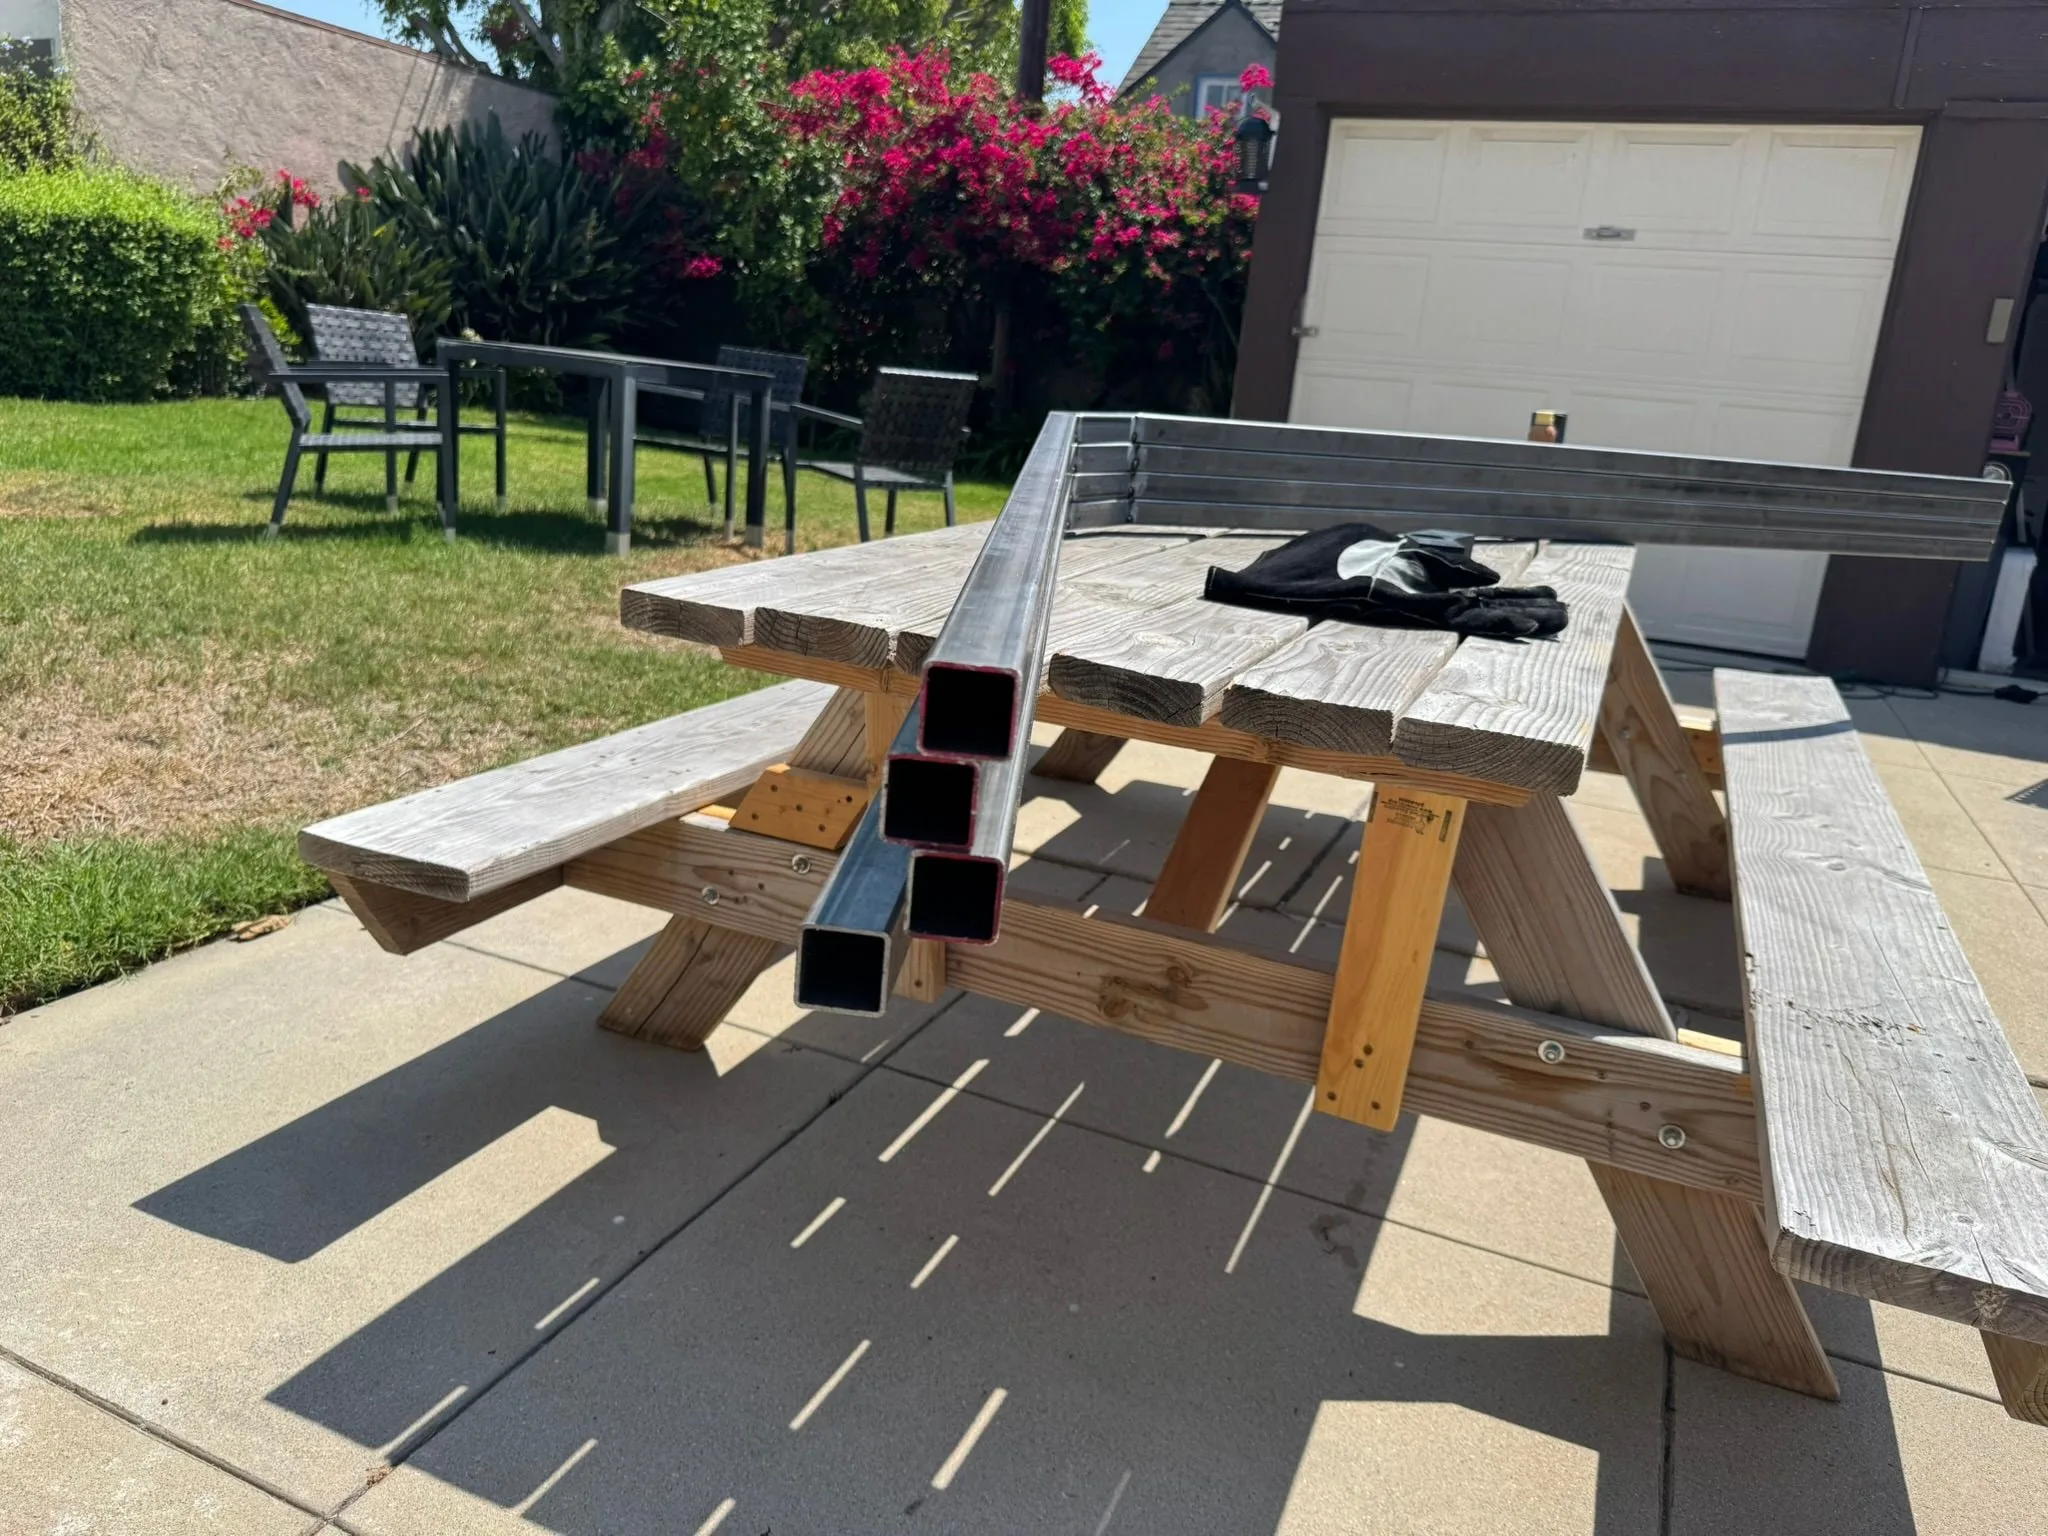
A few degrees of variation with the lower segments matched is good enough for this application. The tolerance stackup from the crown to leg fit combined with flex through the full leg will be more than enough to eat this variation. Honestly, a little tension through the structure when bolted down will make it more rigid.
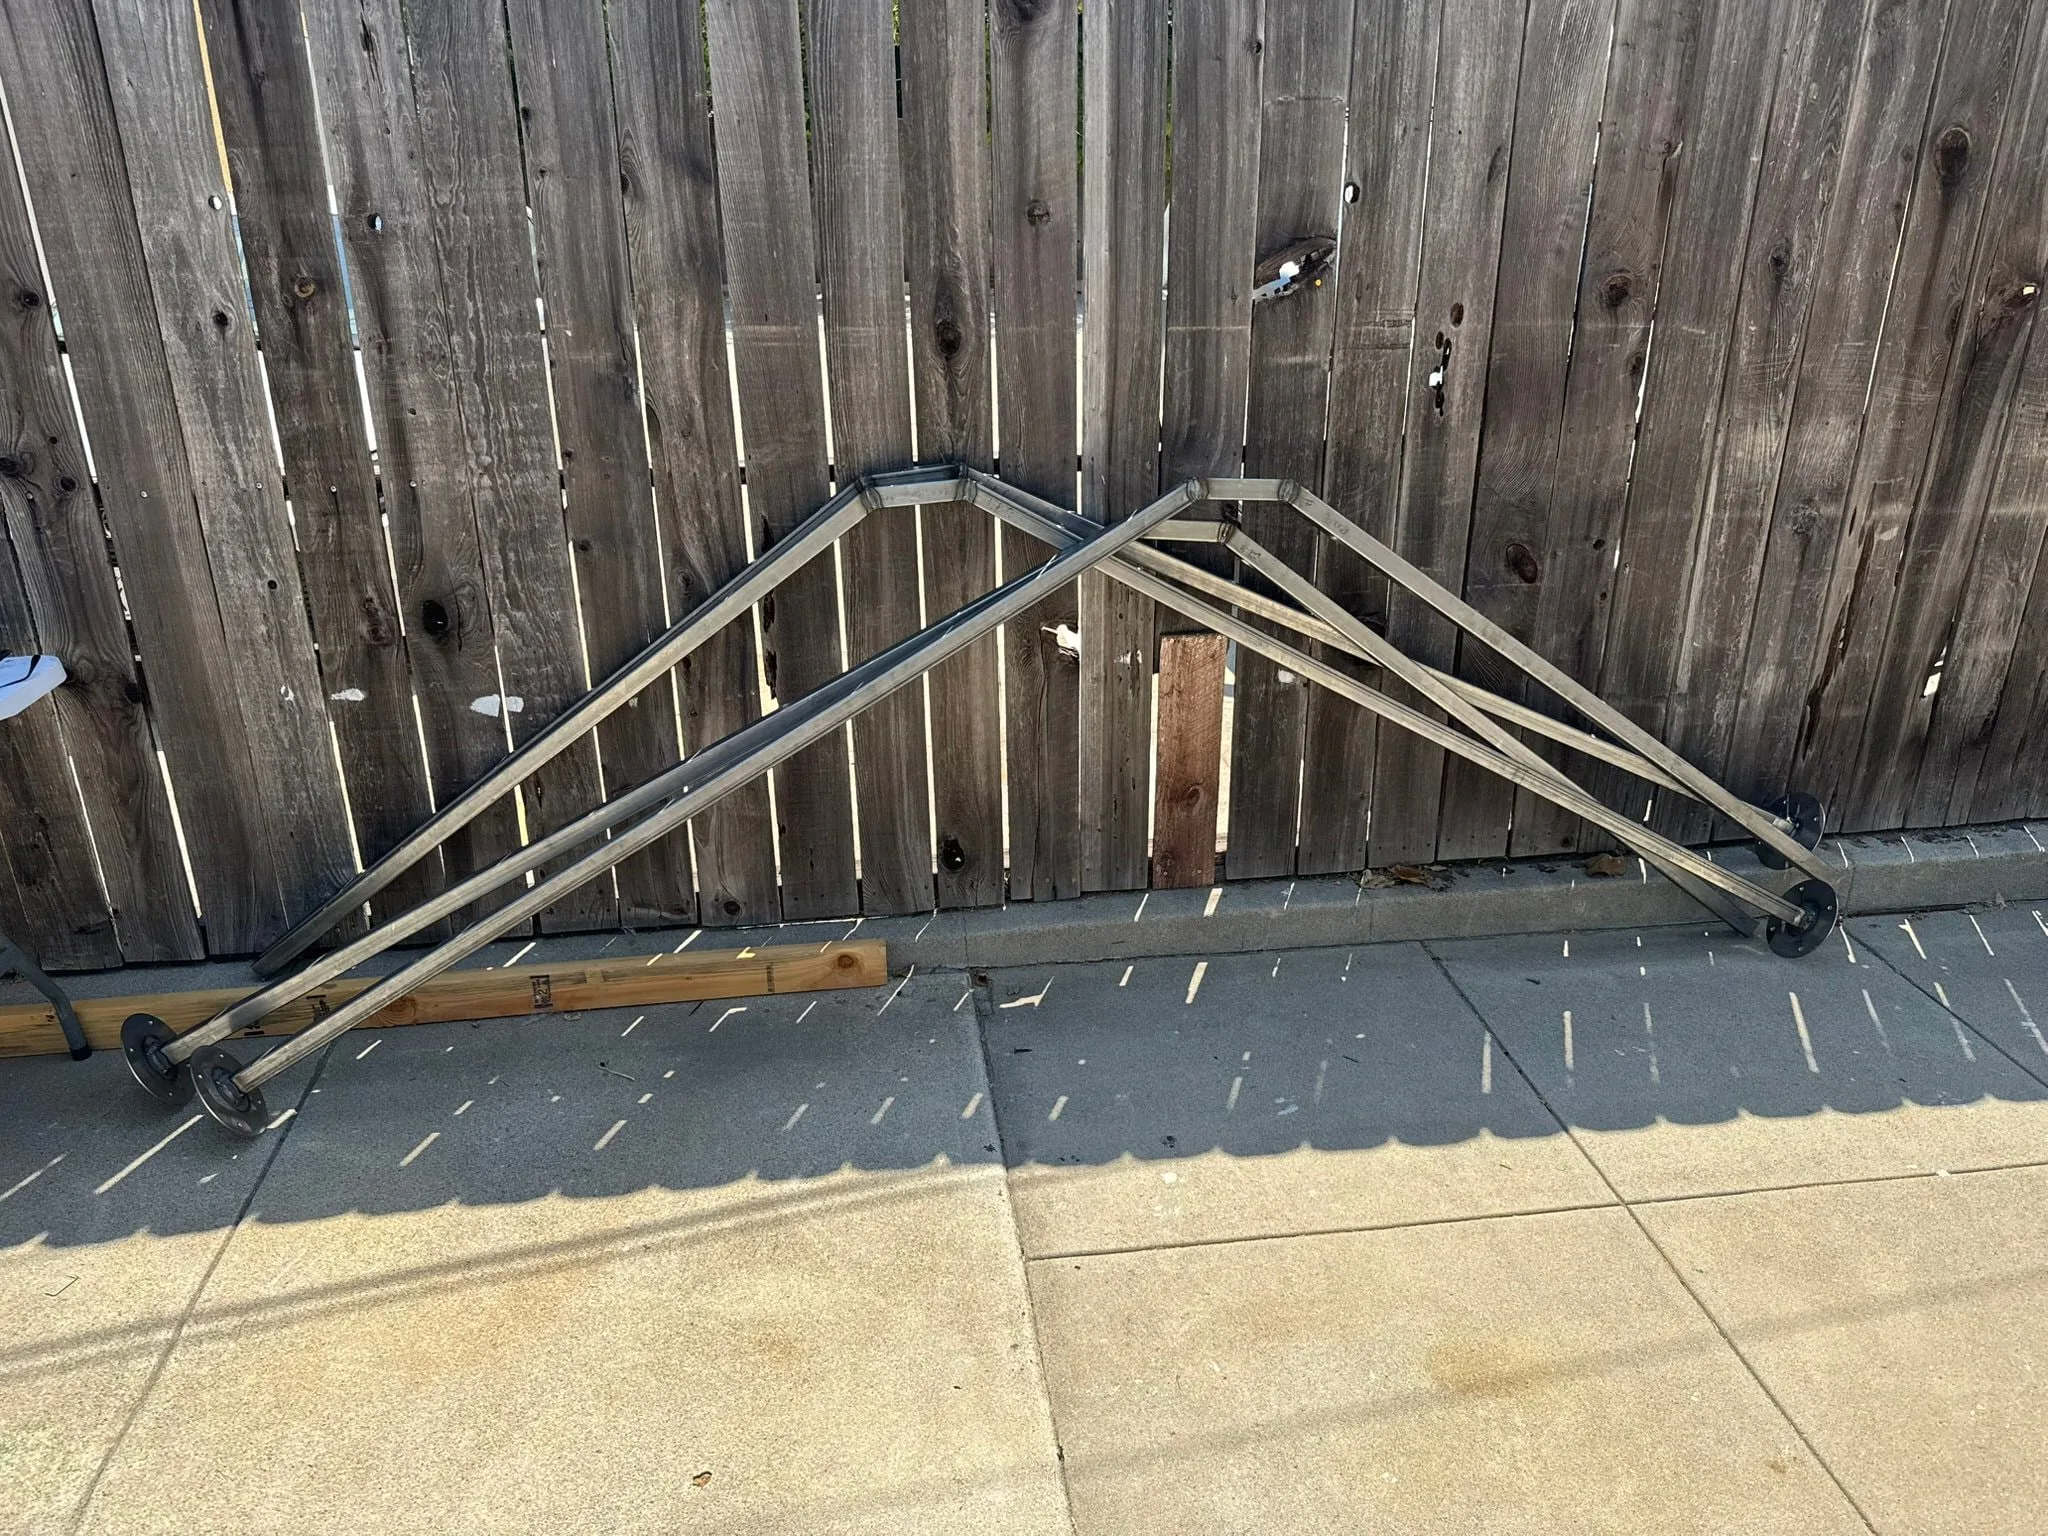
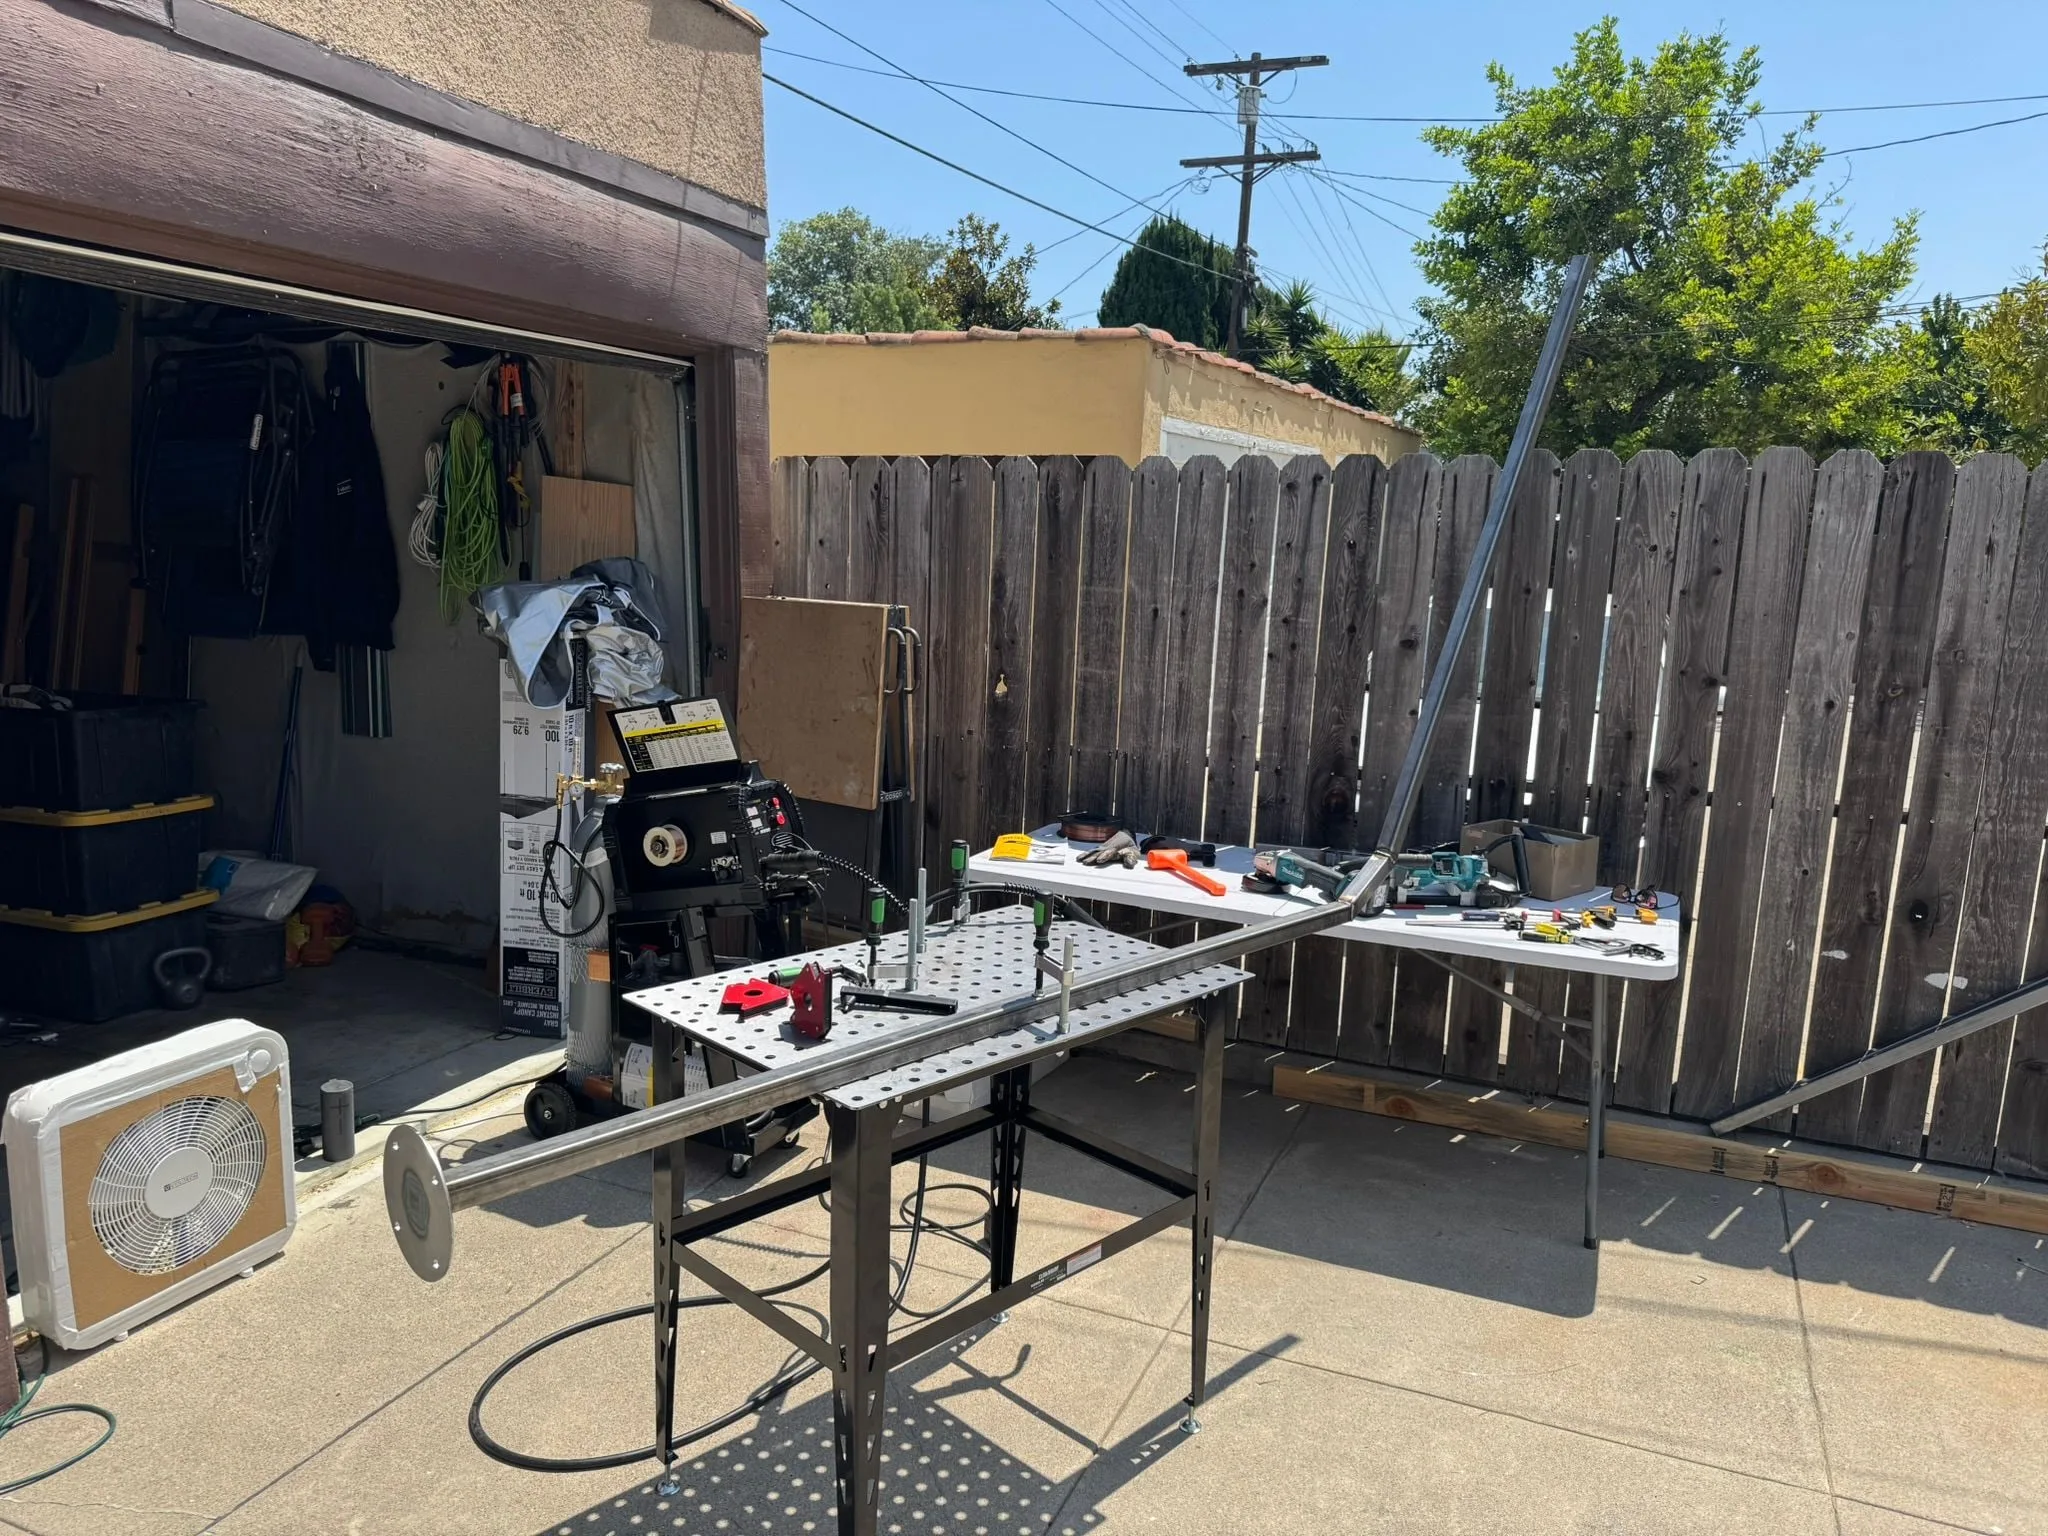
Not bad! Once I finished the leg butt joints I added the feet and the two sets of gussets. This required some creative setups but I’m pleased with how well this cheapo fixturing table worked out.
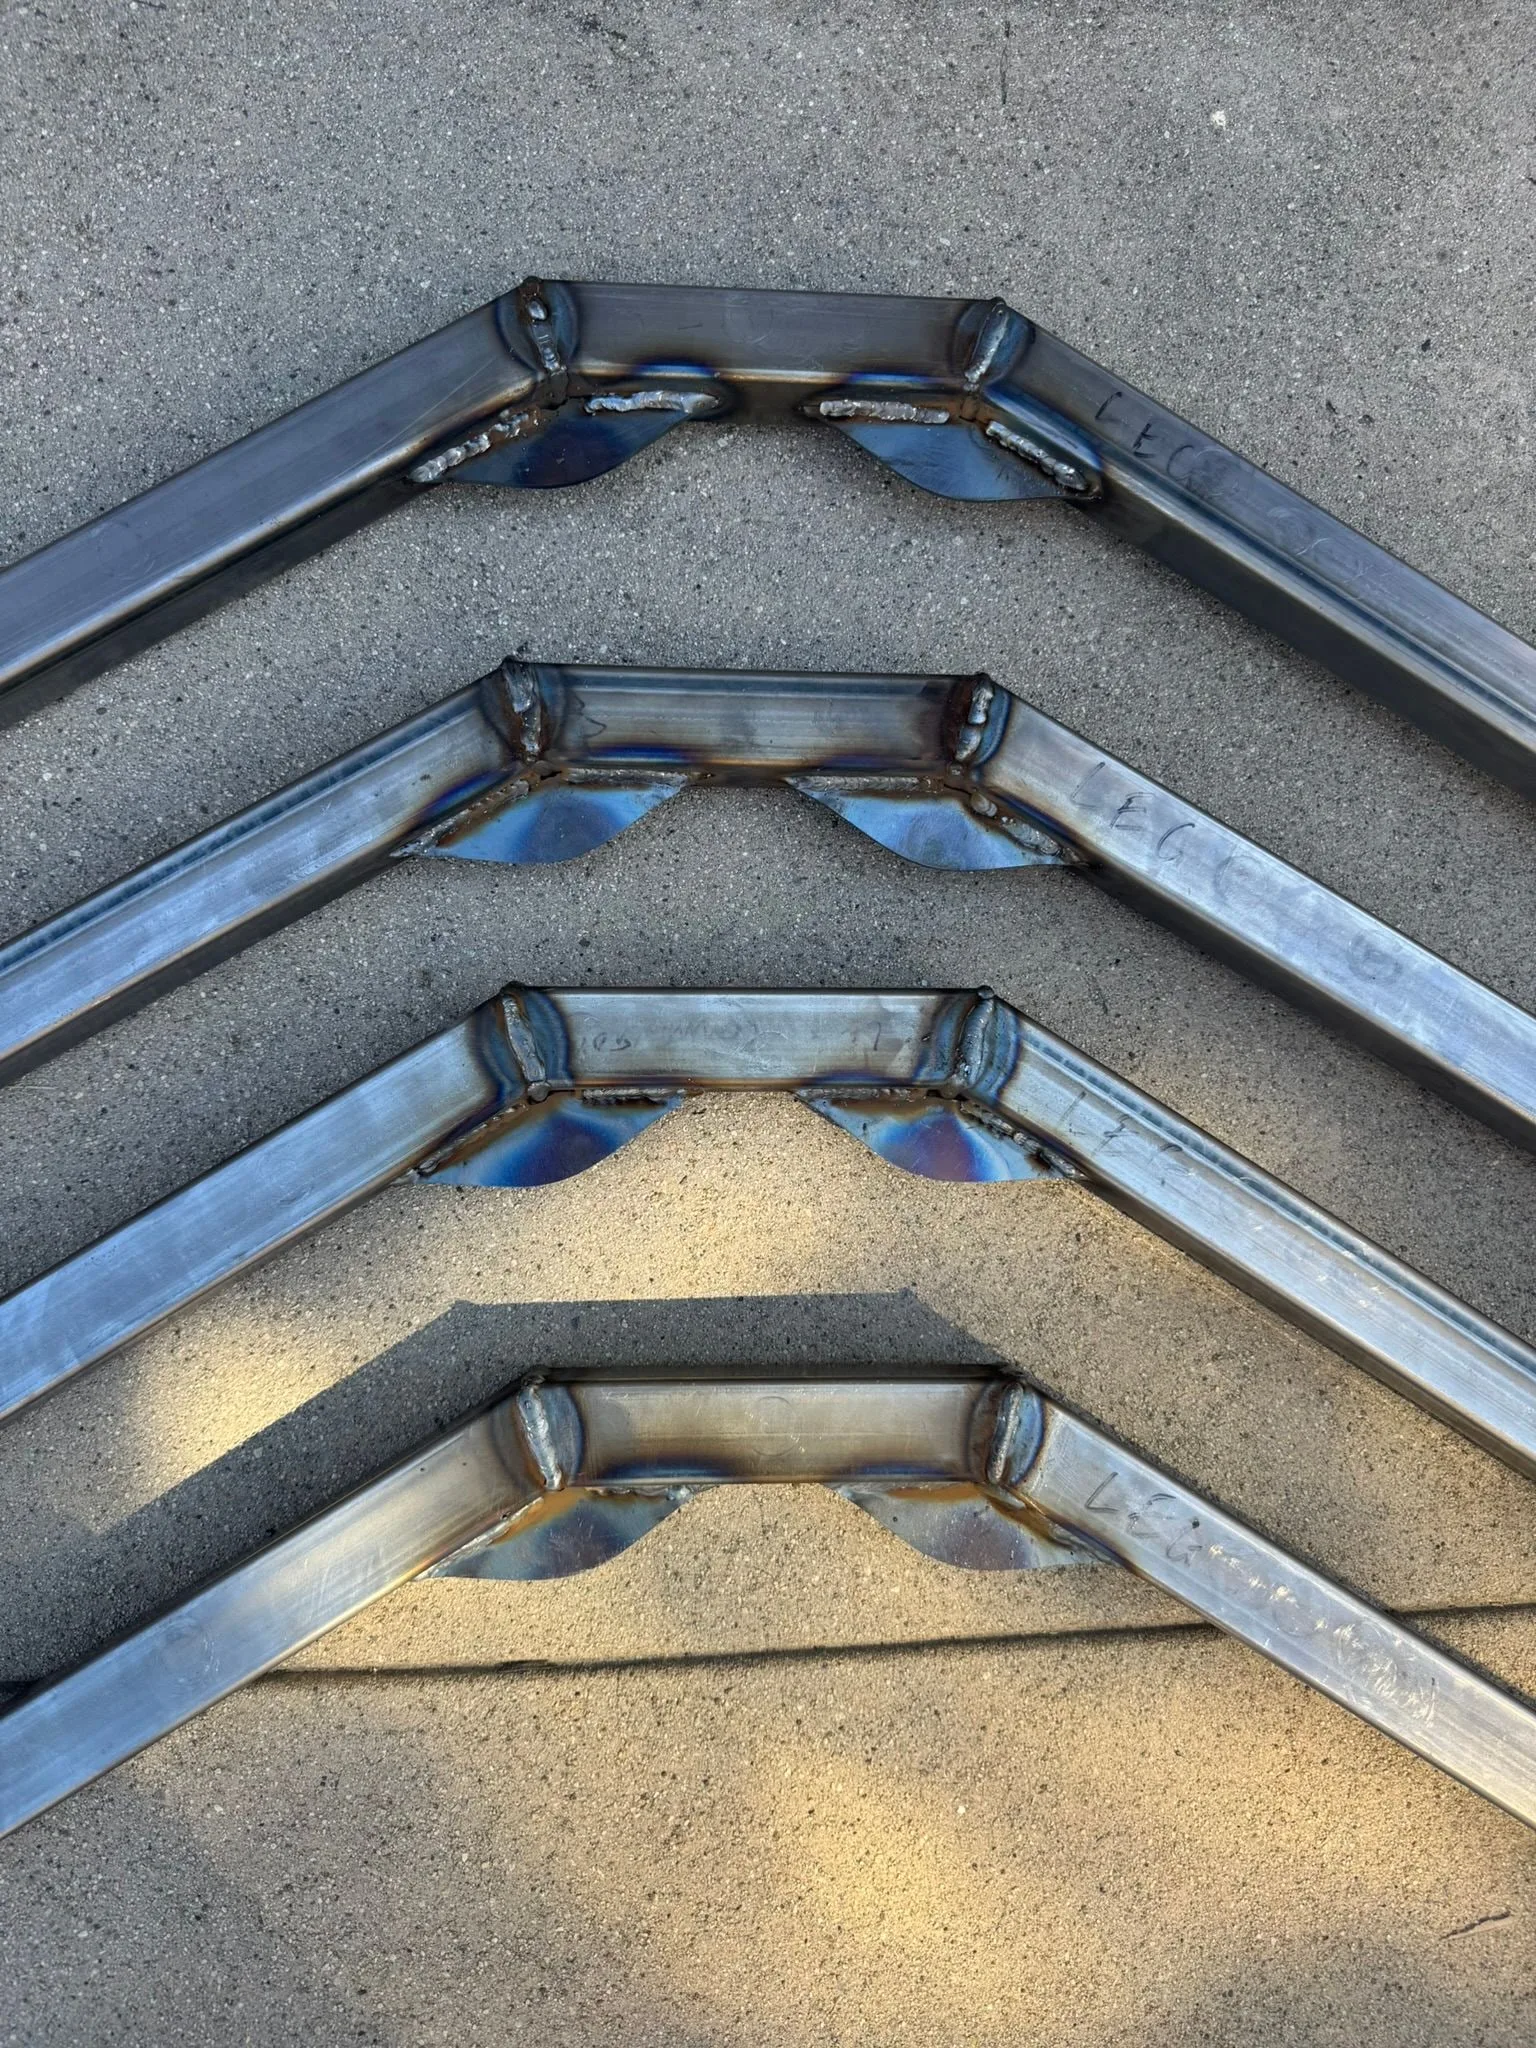
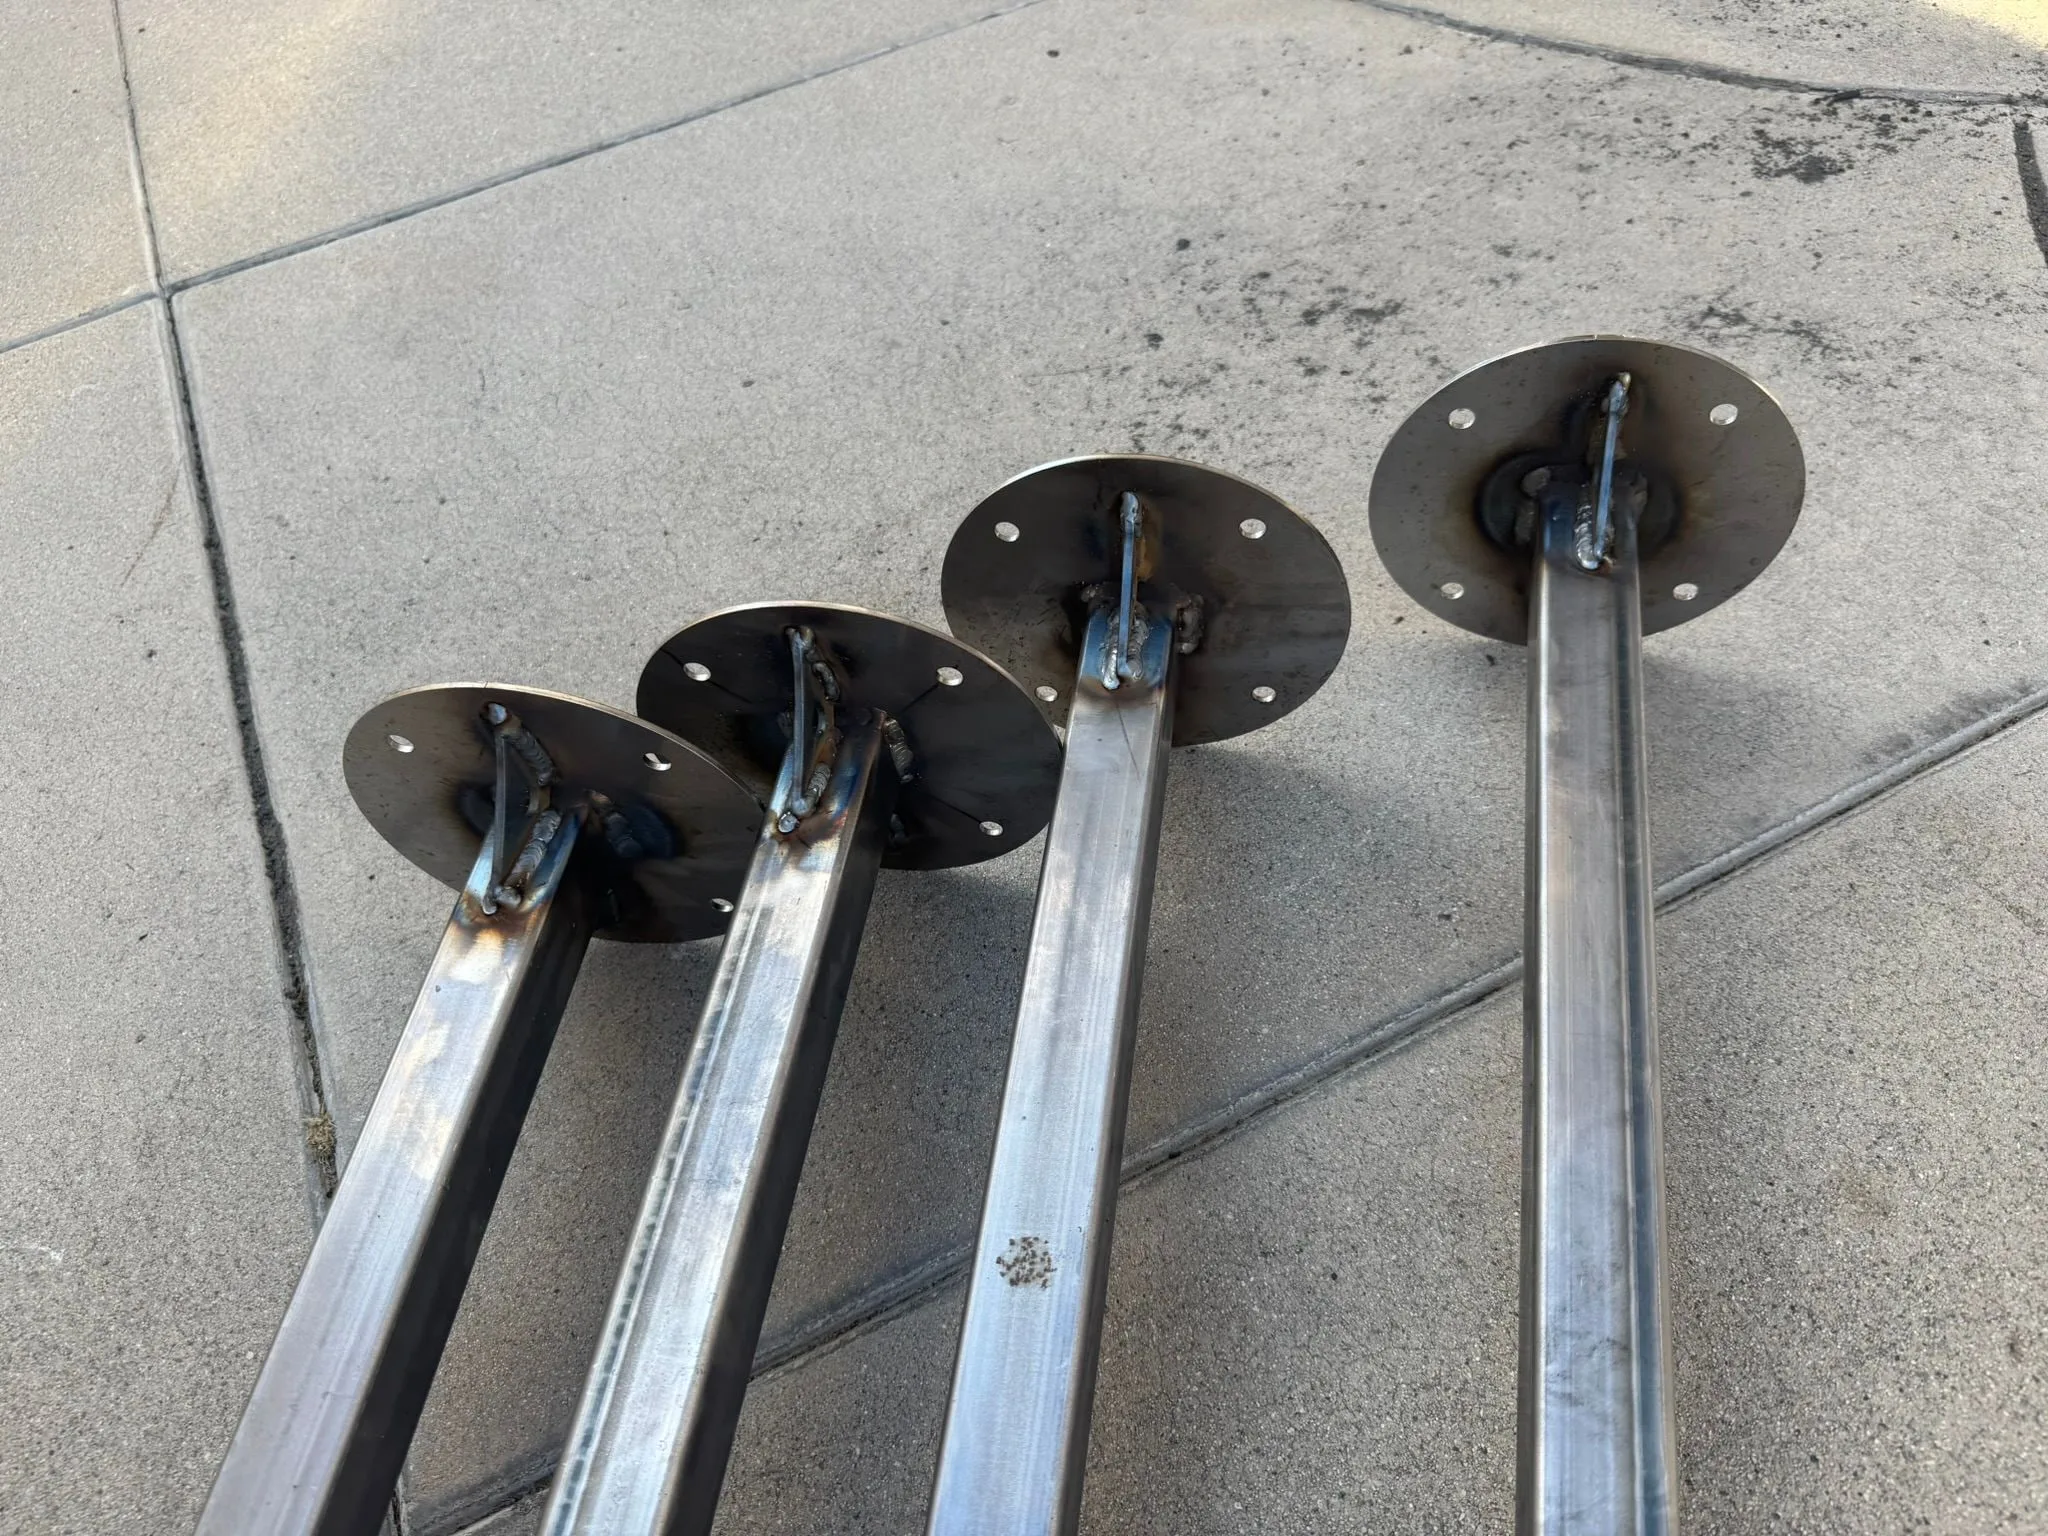
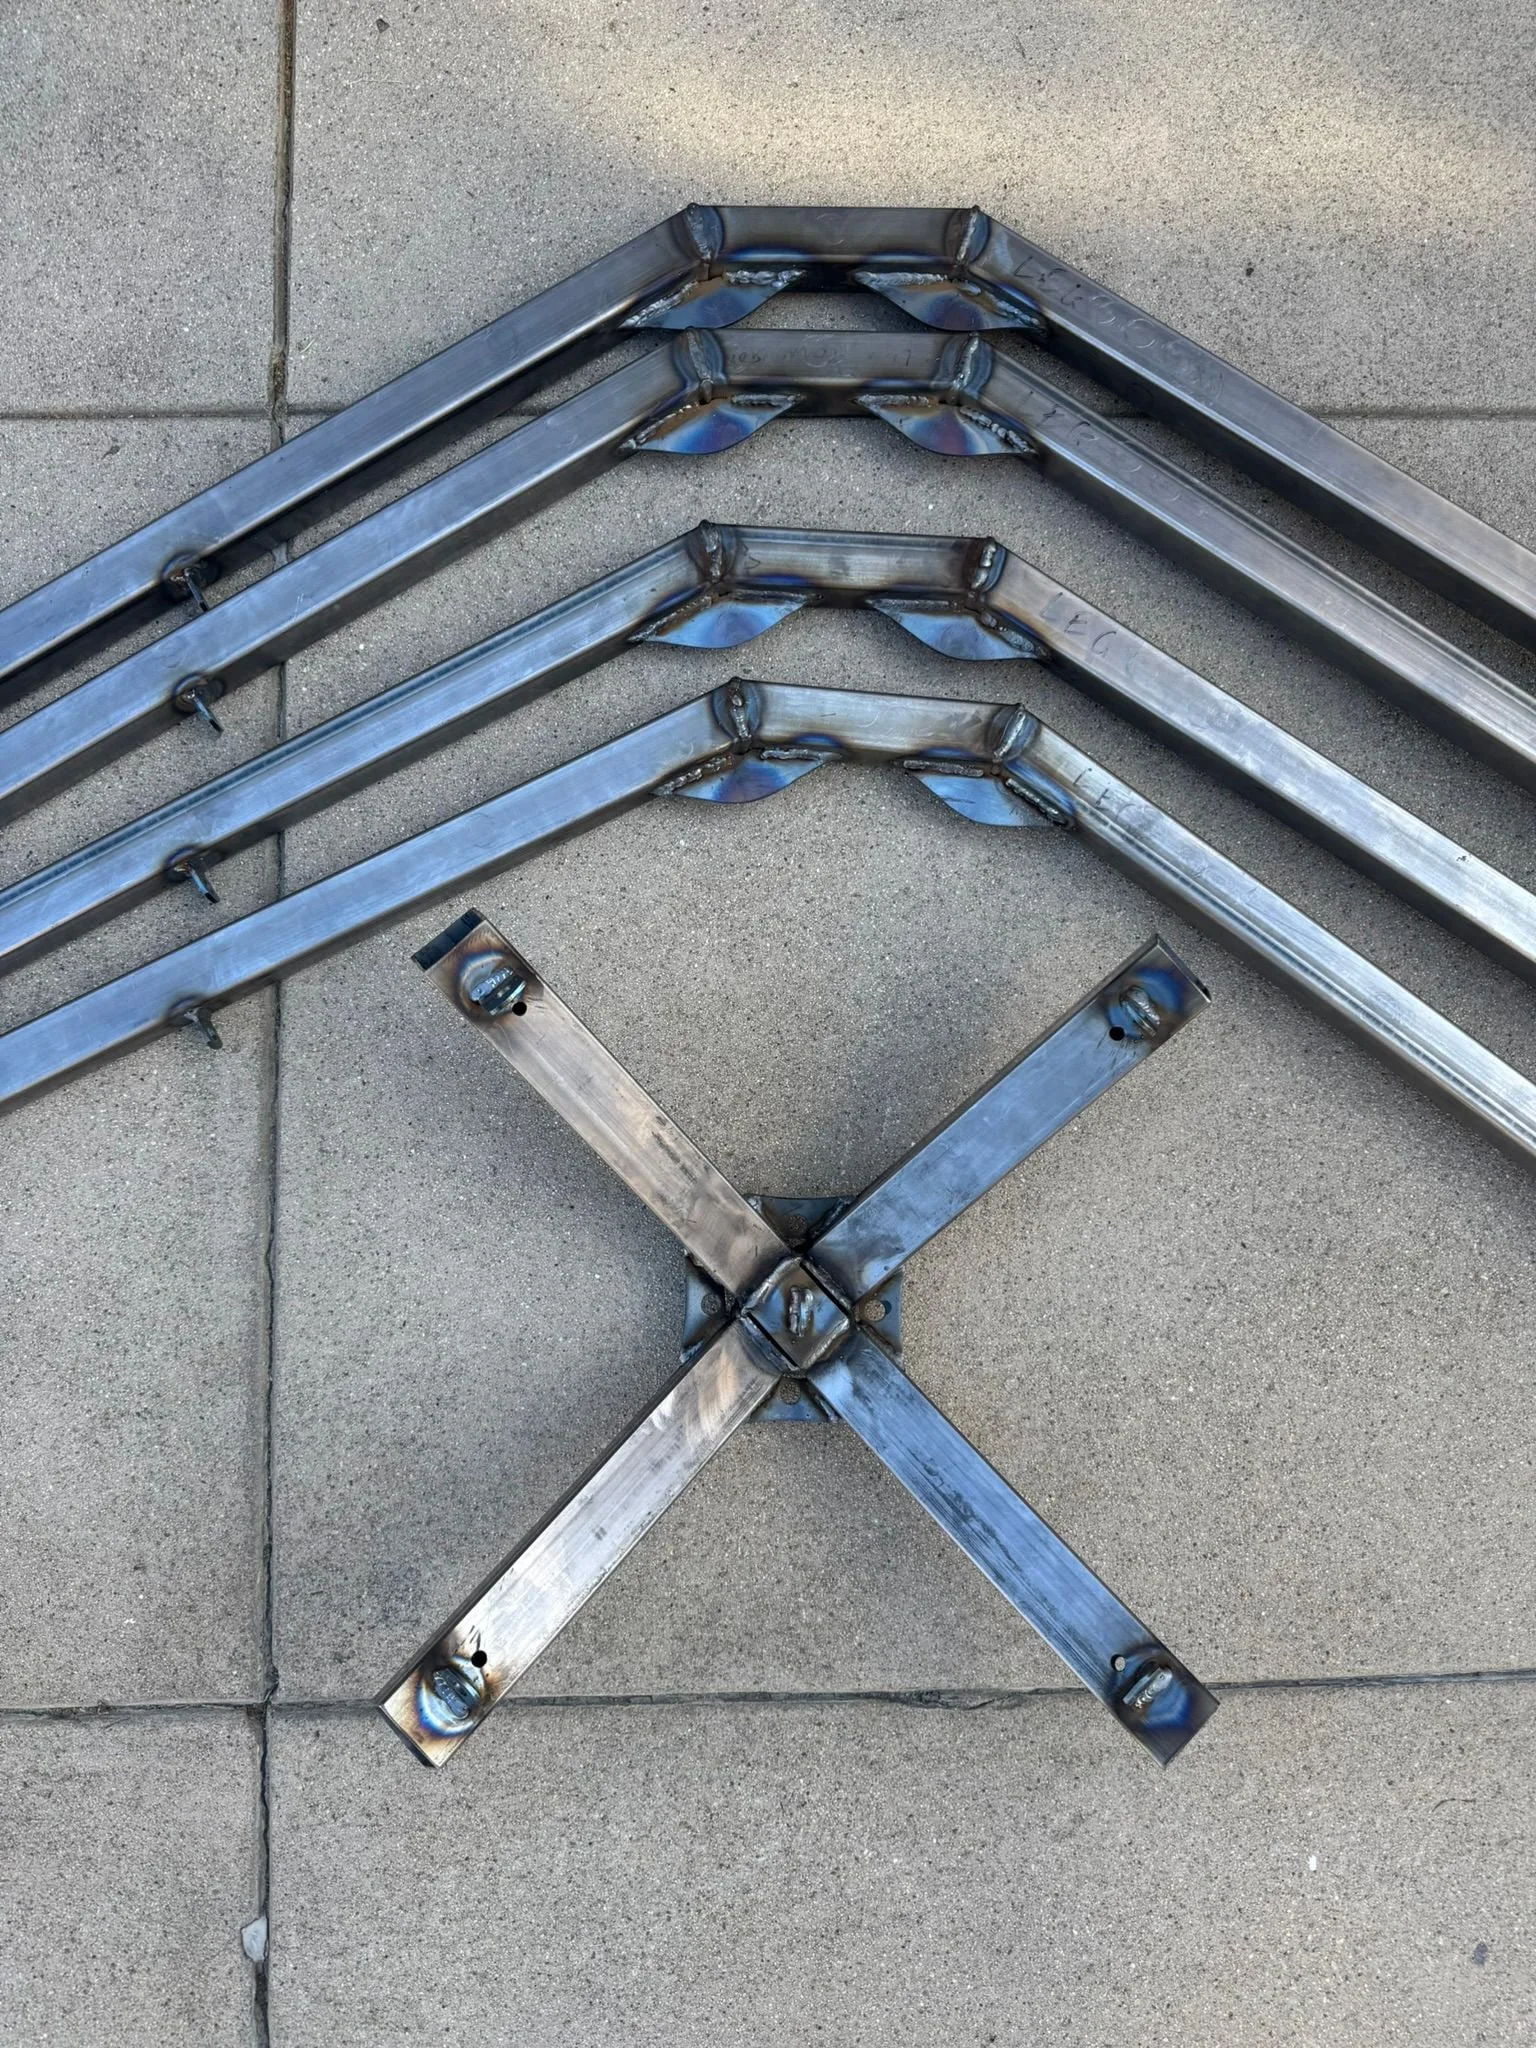
I then moved onto the central crown, this went quickly after dialing in my process on the legs. Some tight internal corners to deal with, but doable especially with the more forgiving thicker walled tube. I added all of the tabs to the legs and crown, and then welded on nuts to serve as threaded bosses for blacklight mounting later on.
No in-process photos here but I drilled thru-holes and tack welded two ¼-20” nuts to each leg to serve as mounting points for the blacklight panels. I wasn’t sure whether I’d need more than four panels to properly light the modules, and figured it would be nice to have some adjustability on playa.
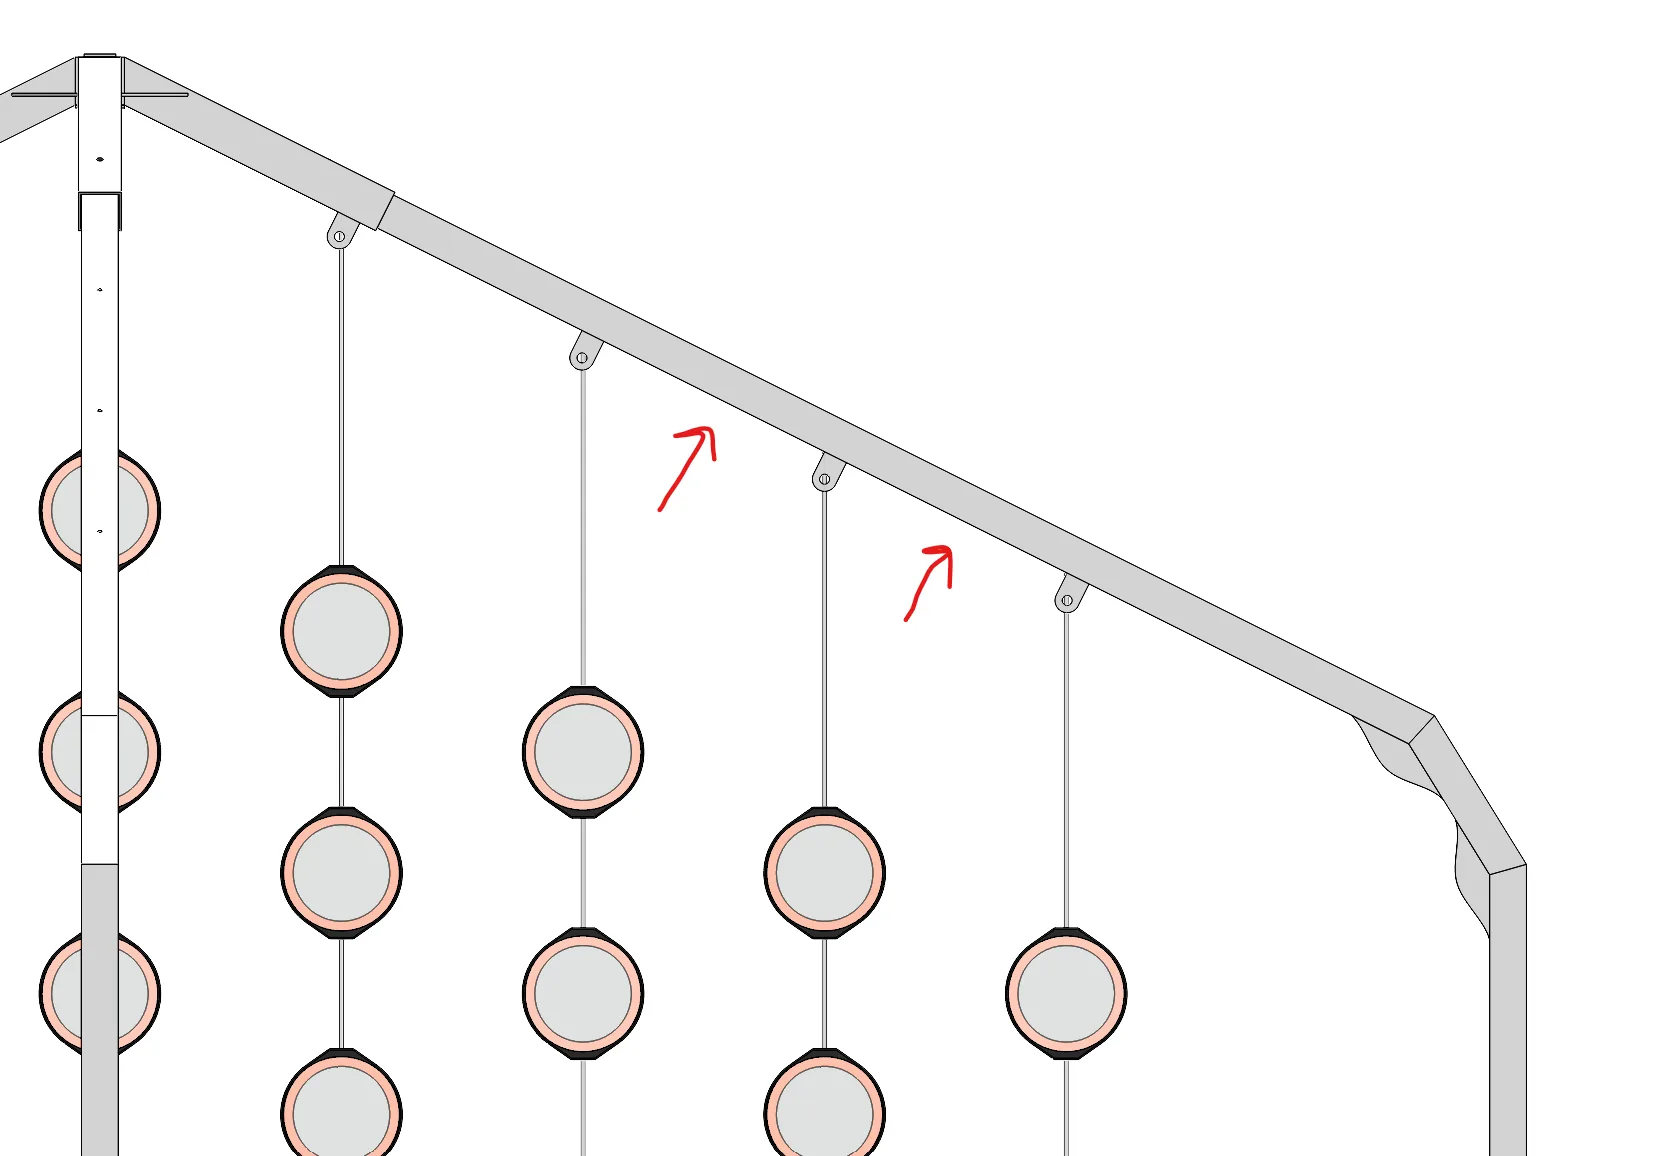
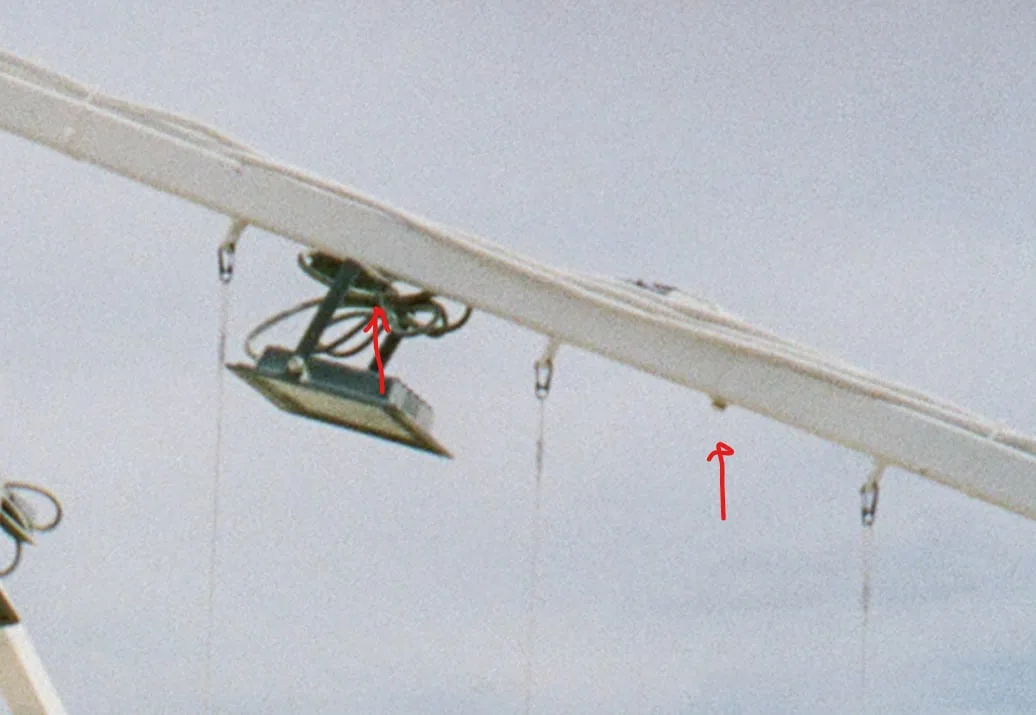
Lessons learned MIG welding small nuts: keeping a bolt inside the nut while welding seems like a good idea to keep the threads in shape, but it will in fact lock the bolt inside the nut and you’ll break off the head trying to remove it, requiring you to grind the nut off and redo the whole thing. I had much better success keeping tight control over the amount of heat into the nut, and then chasing the thread with a tap once cooled.
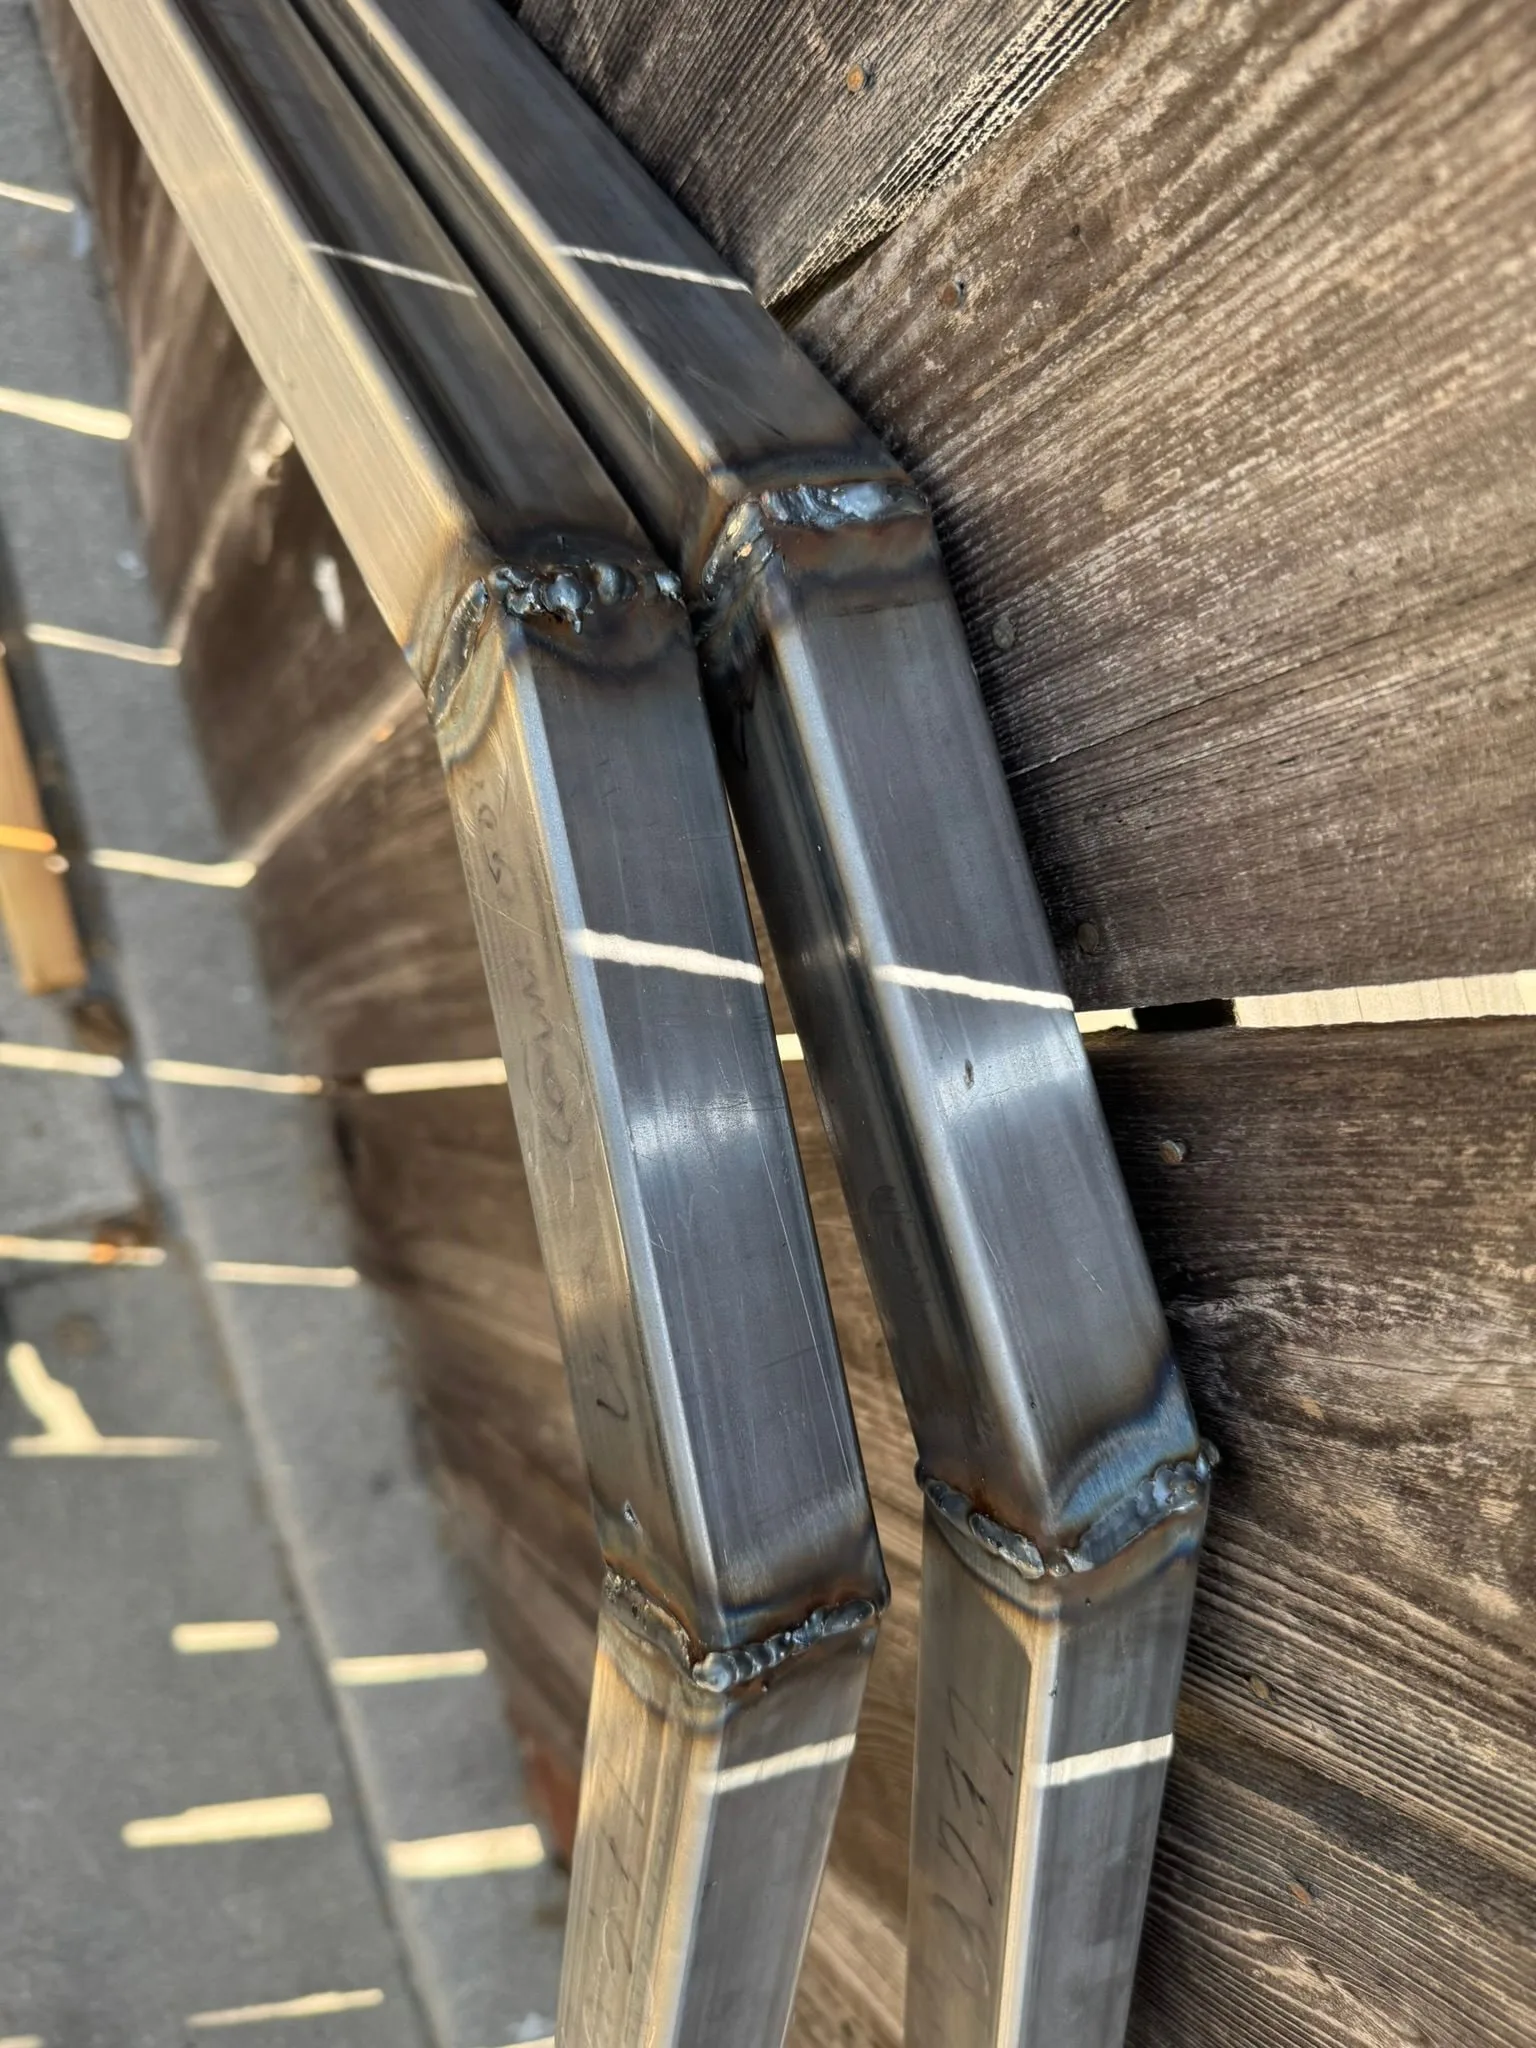
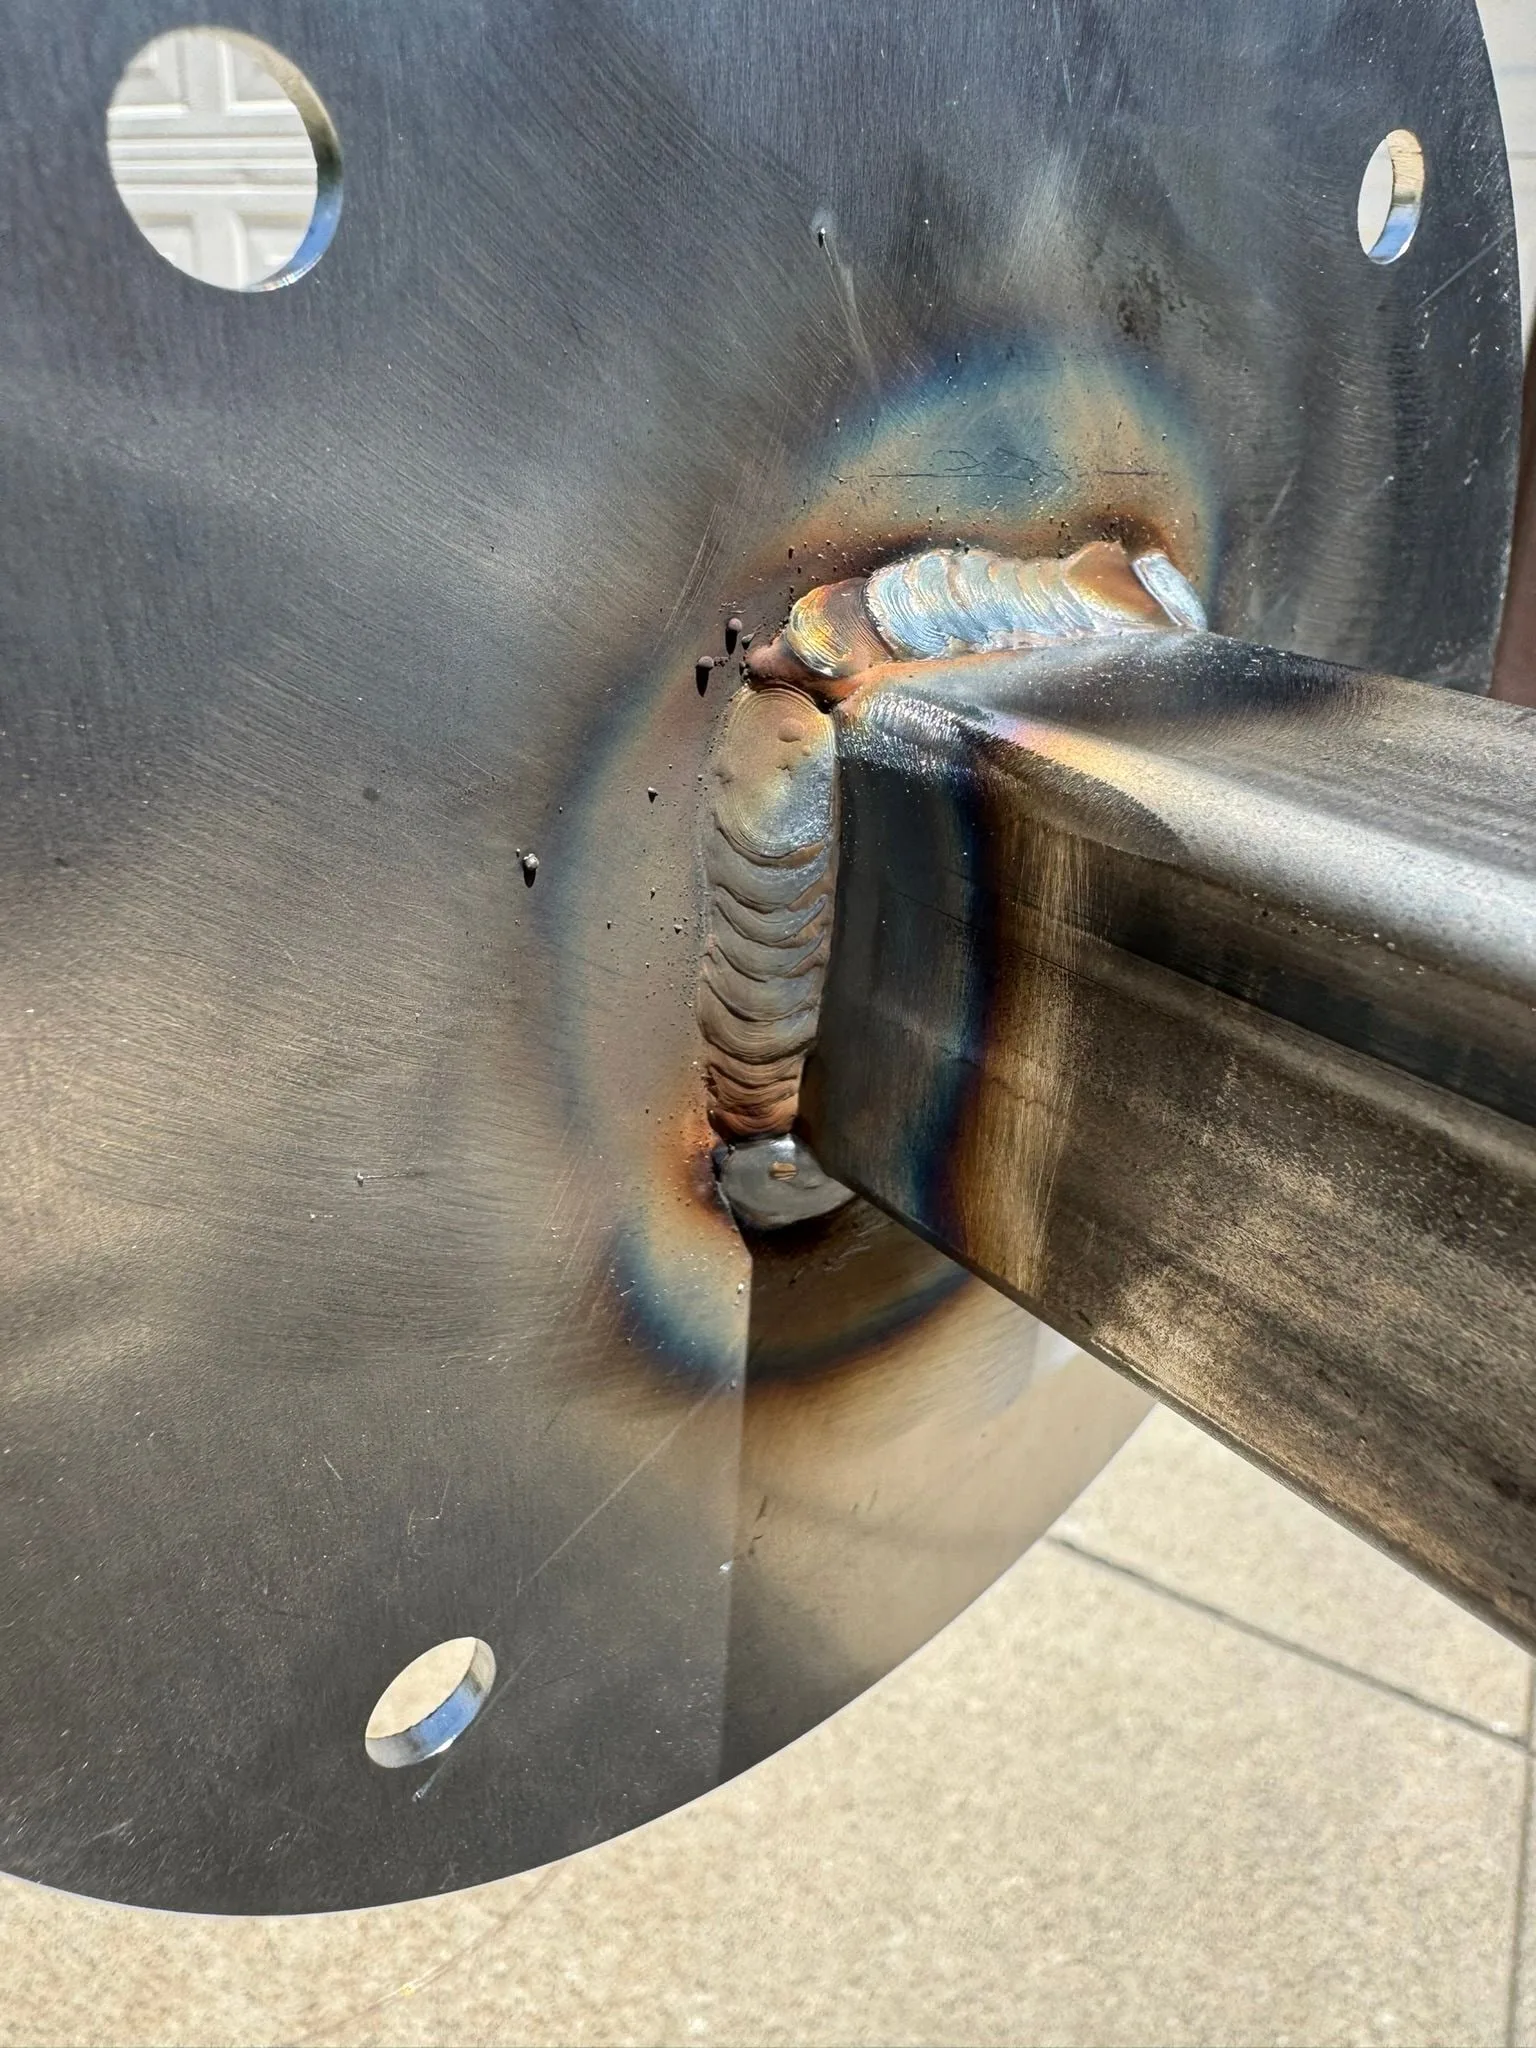
I did all the fabrication over a few weekends in my backyard, roughly 20-25 hrs work including cutting, grinding/weld prep, welding, drilling, and cleanup. I’ve welded before in my life and had some instruction, but this was my first real set of volume welds. I started with the hardest first (butt joints on relatively thin .083” steel) and ran through a half dozen sacrificial test pieces to dial it in. Moving down to a thinner .023” wire really helped there. The tees and corner joints in thicker material were a breeze after that.
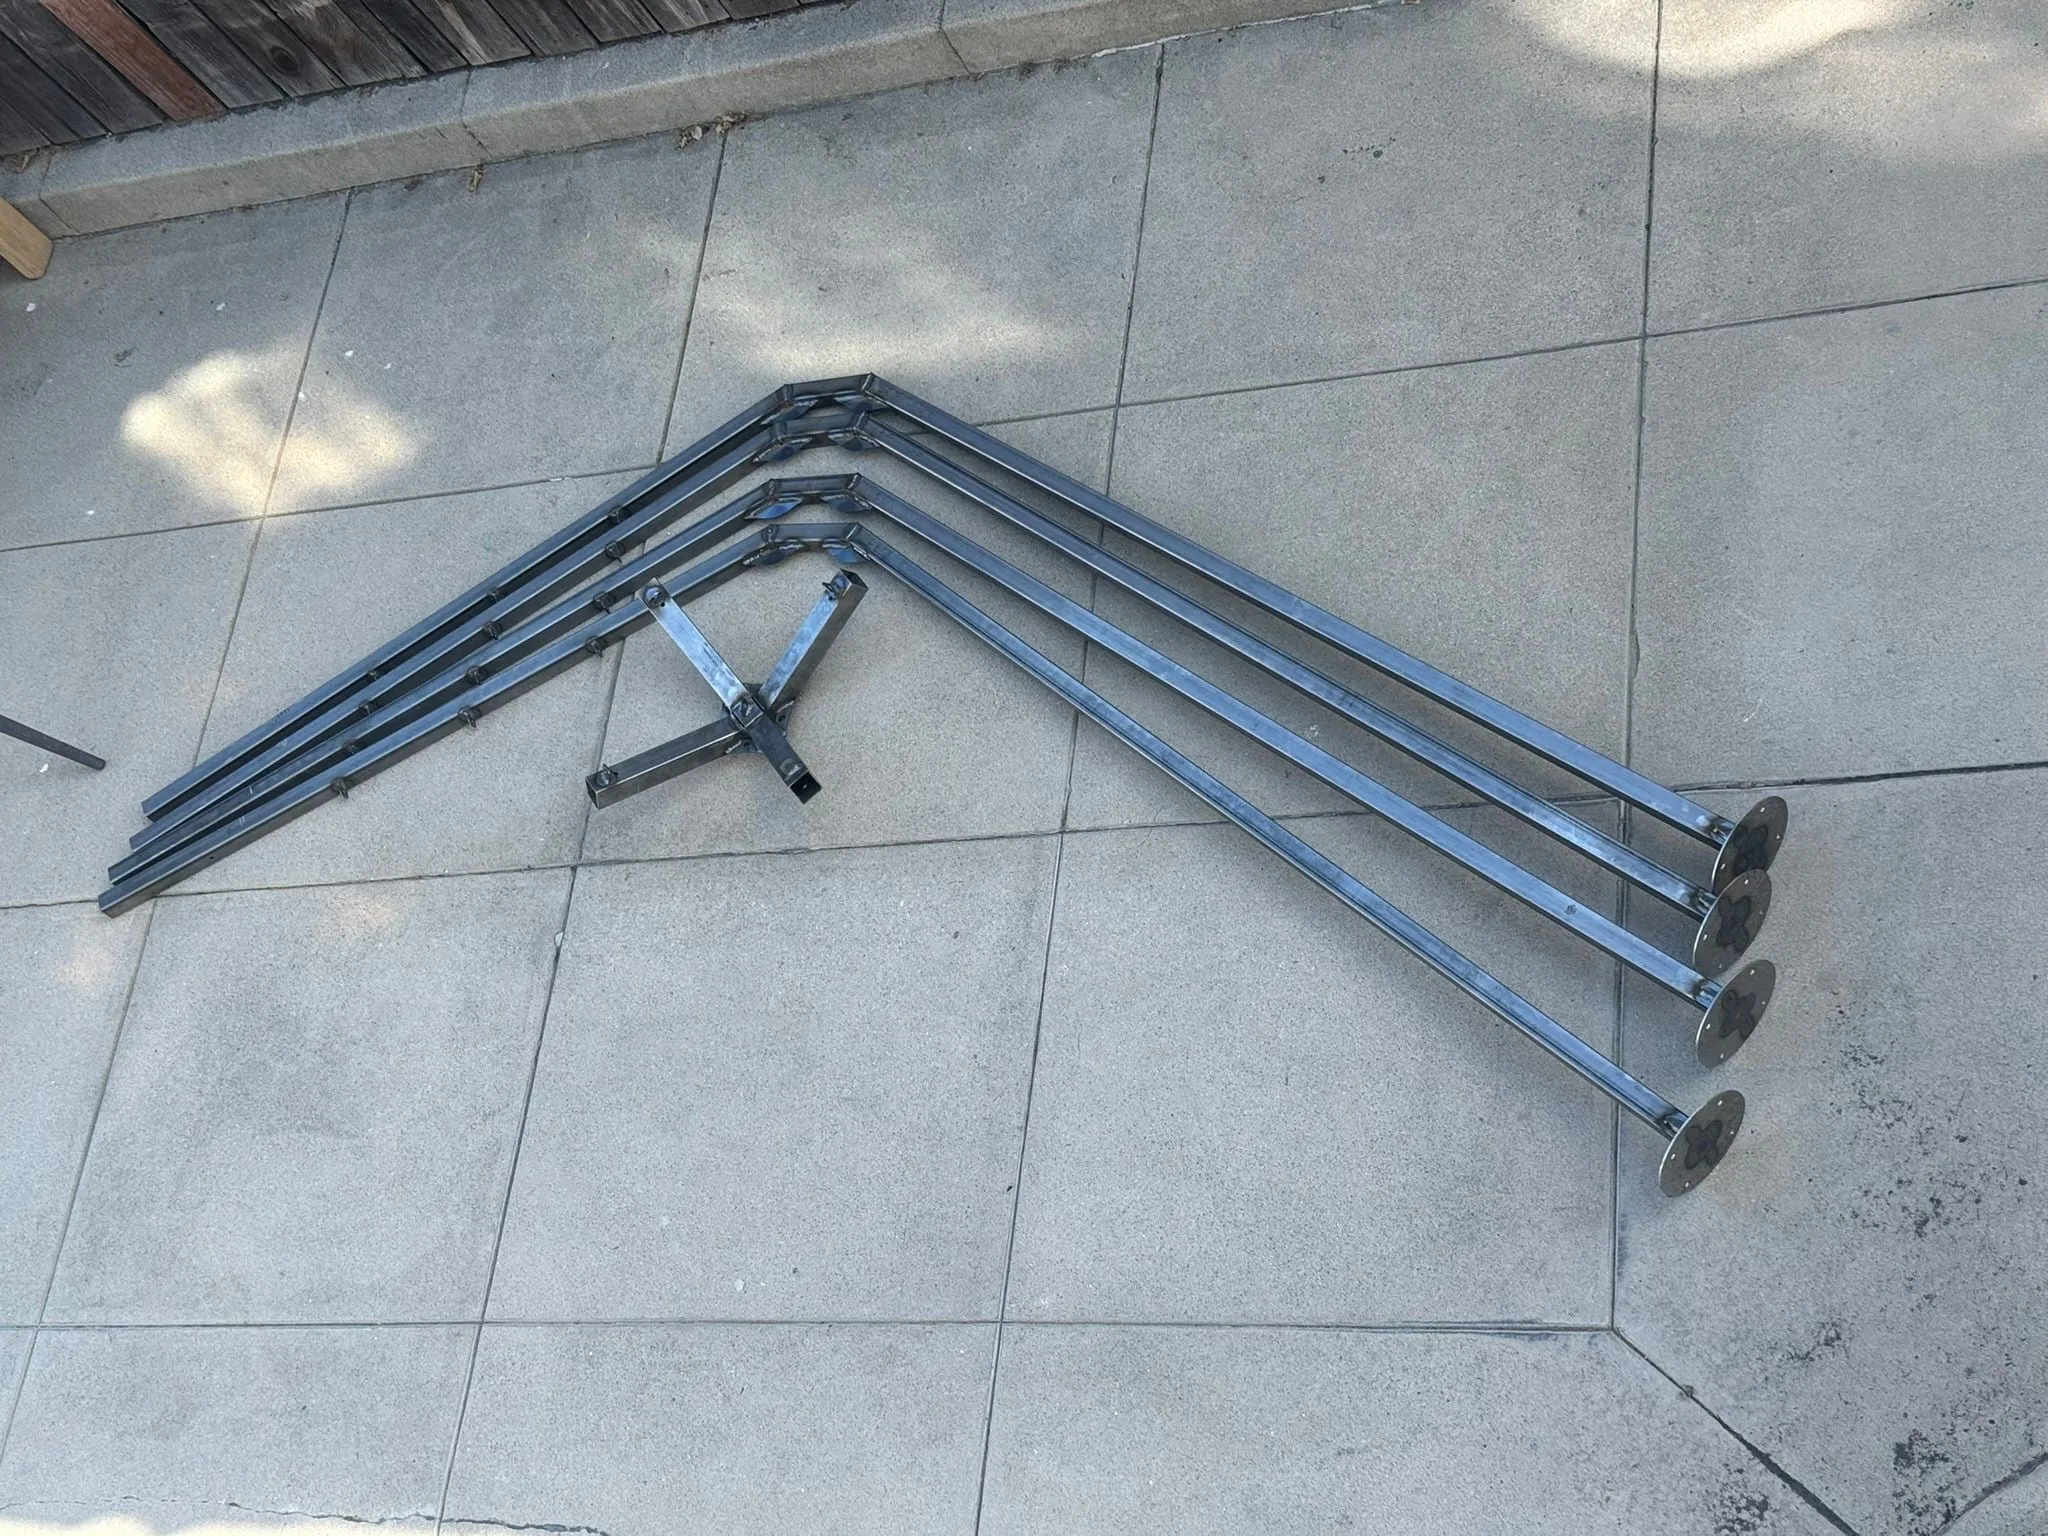
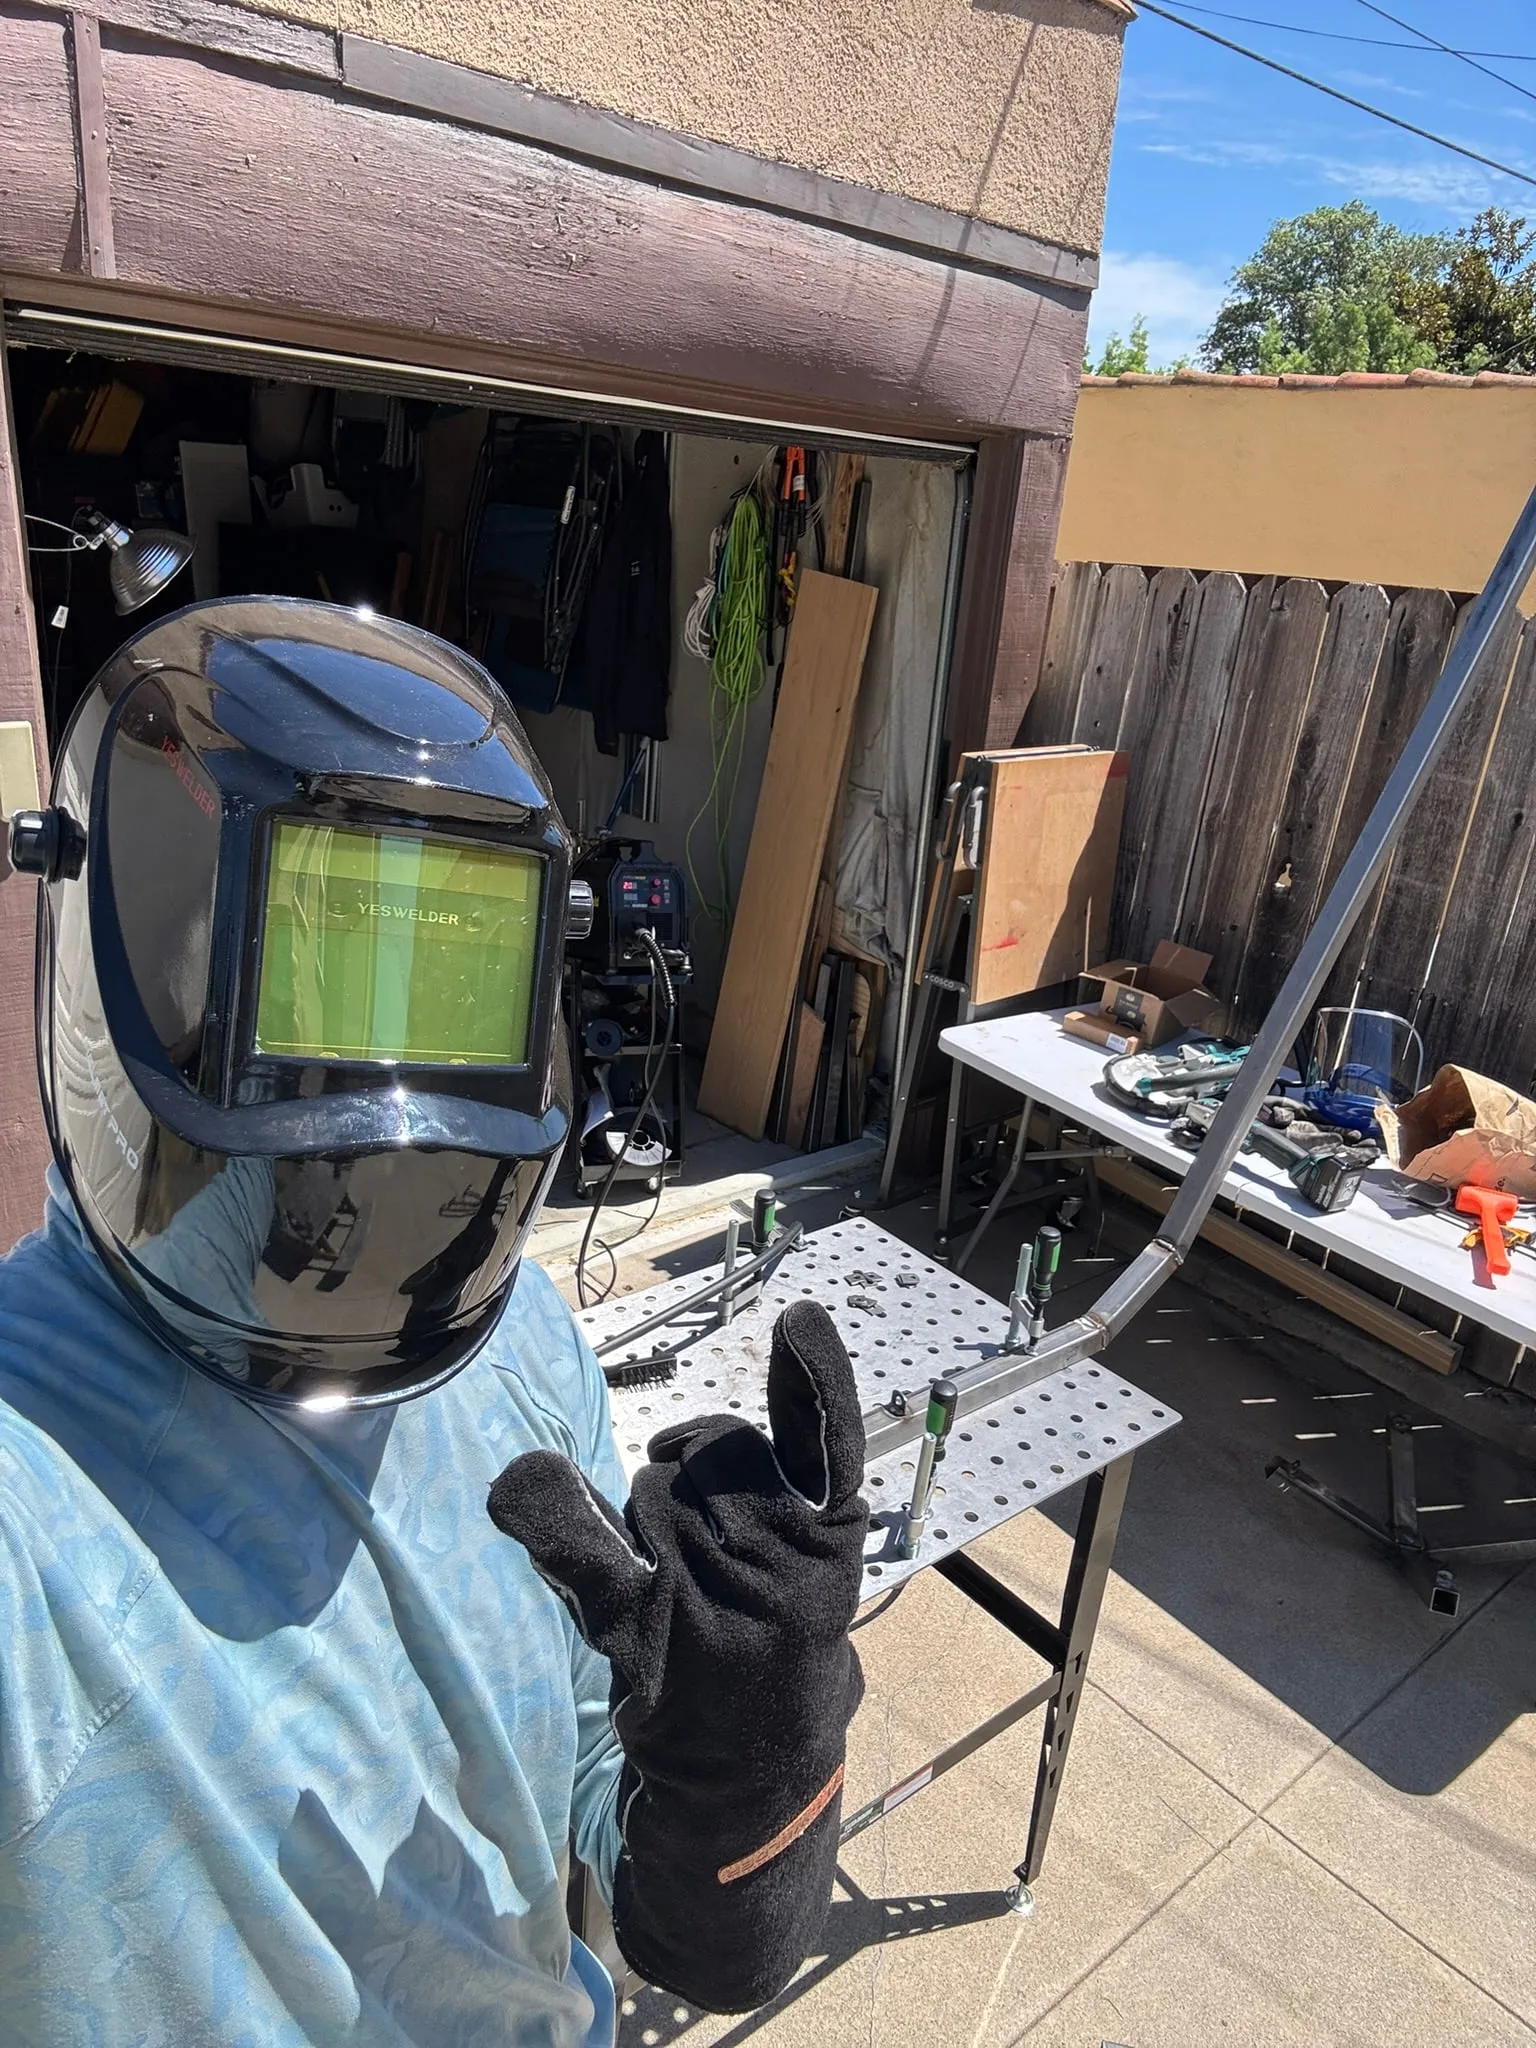
Ultimately I’m confident over 158 individual welds on the structure there are at least a few good ones. See: garbage butt joints and reasonably mediocre corner joints.
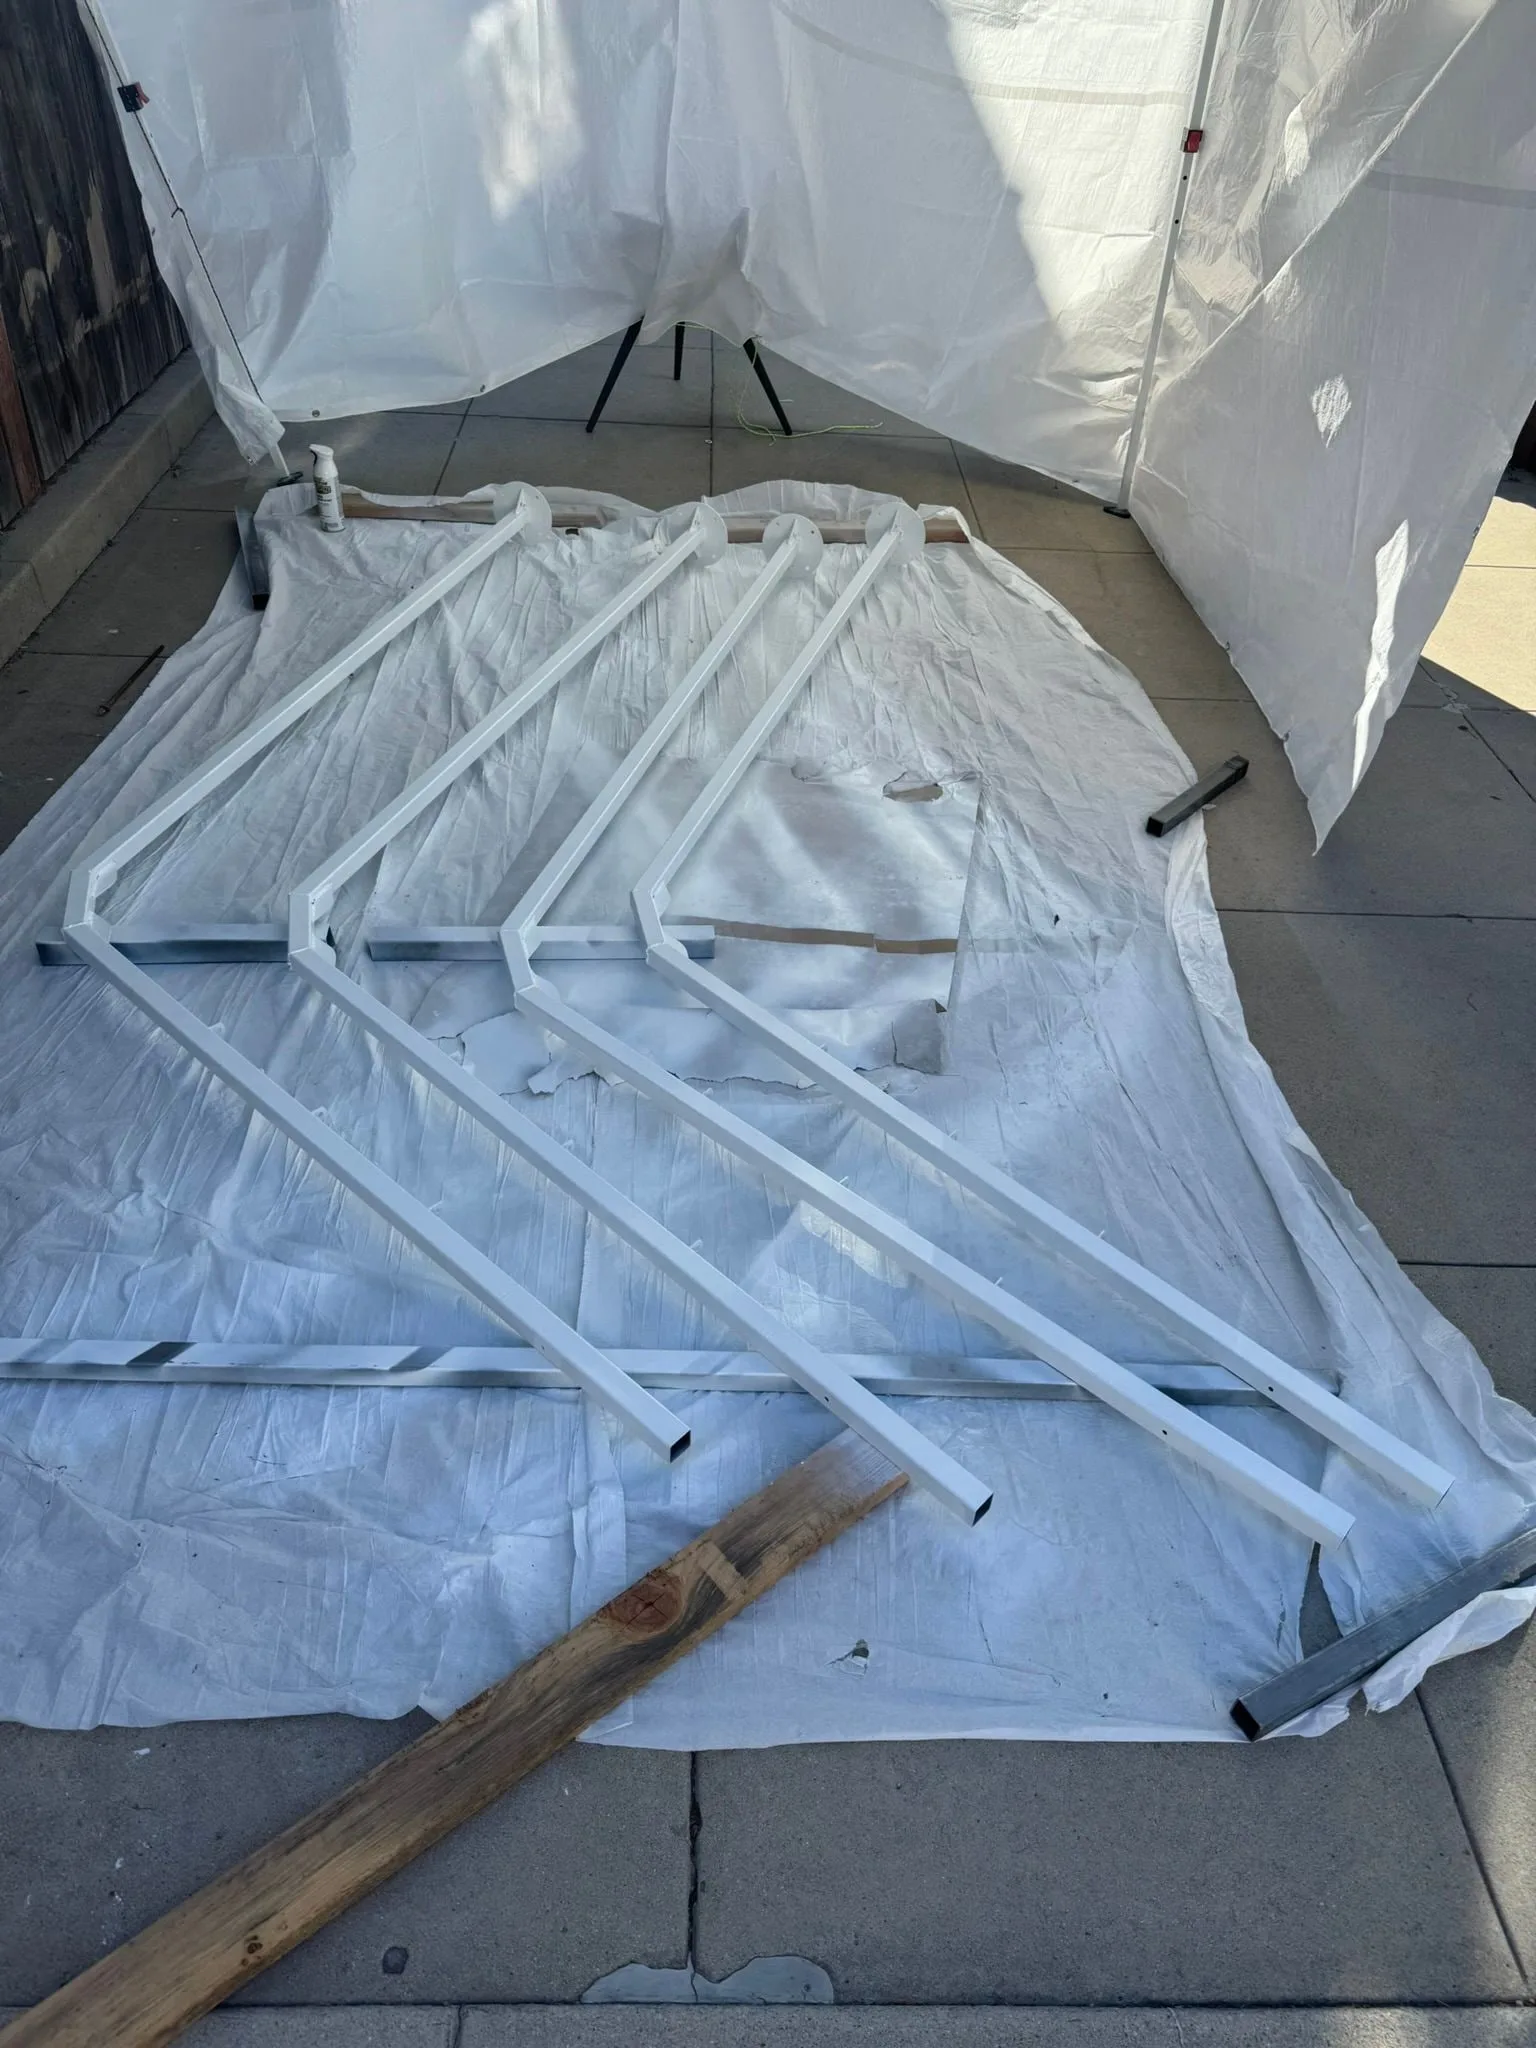
With the help of my incredible partner Dusty (on a VERY hot and humid LA afternoon), we surface prepped the steel by cleaning with acetone and then wire brushing the surface. Then spray painted the legs and crown with Rust-Oleum Universal gloss white.
I will put some respect on Claude Opus 5’s name here, it really nailed the required number of cans (8) for this structure including two coats and overspray. This would have been cheaper and easier with an air compressor and some proper primer+epoxy paint, but it worked out nicely.
Putting it all together
The initial plan was to suspend the modules on 4mm paracord and tie knots to retain each one, with a washer above the knot to reduce friction and let them spin more freely in the wind. Dusty’s feedback (extremely correct, per usual) was the lines should be transparent so the whole piece looks more like it’s floating in air vs. hanging on cord.
I researched a number of options but ultimately settled on high-test monofilament secured with crimped aluminum fittings. I went with the strongest easily available option I found at 200 Lb test and 1.7mm crimping sleeves. I was concerned these wouldn’t hold over the week, but this is what offshore fisherman use for tuna rigs and other big fish, and when properly crimped they’re extremely strong.
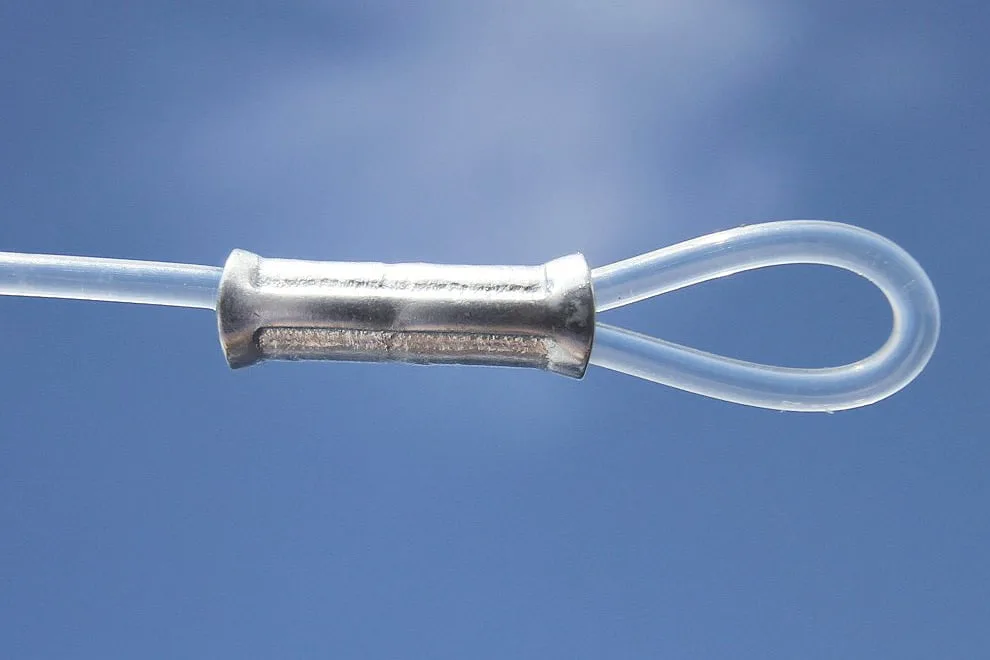
I drew out the required overall lengths and spacing, marked a quick jig to make crimping go faster, and went ahead and crimped the ~100 fittings, again with Dusty and John’s help, adding a mini carabiner to the top loop of each.
I certainly didn’t forget, on multiple occasions, to assemble the washer below the mirror module before crimping, requiring me to redo the whole line.
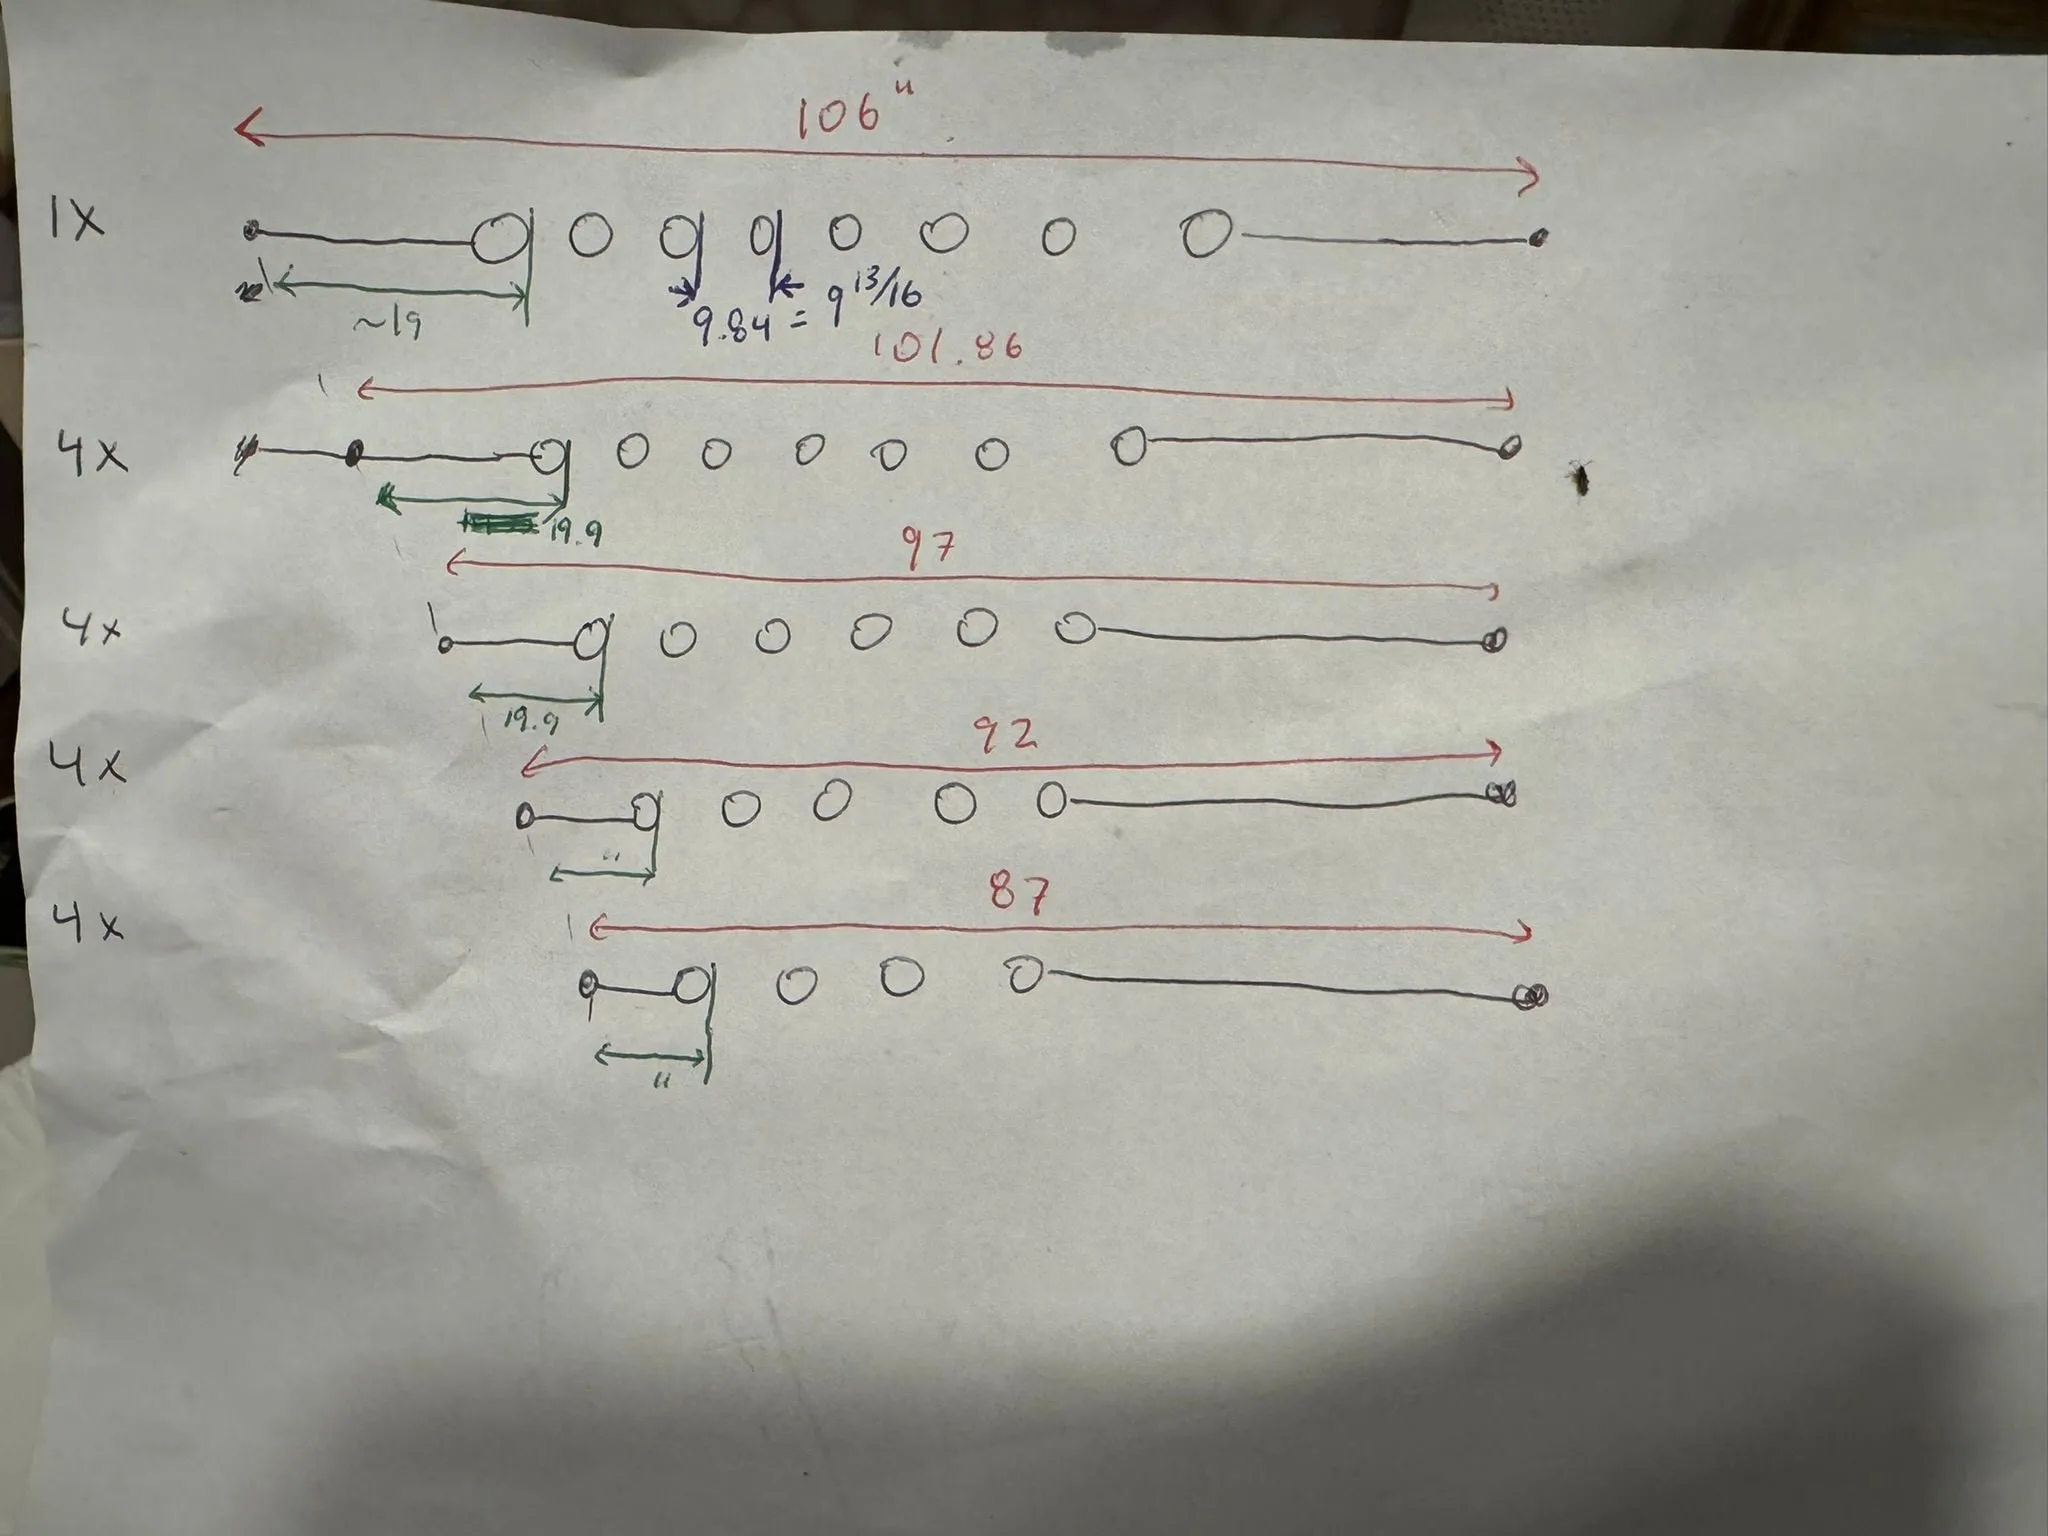
After each line was fully crimped, the pre-fab work was complete! You never want to do it, but you always need a full dry fit to catch stupid assembly issues. In this case, with tons of good design work and pre-planning, this came together super smoothly.
On-Playa Assembly
The intention here was to pre-fab everything and make life as easy as possible when setting up on playa, and it worked exactly as intended.
Frame setup is easy with two people: one person stands on a ladder and holds the crown while the other inserts the legs one by one. The frame is freestanding at this point, and then each leg is pinned to the crown sleeves with a ¼-20 bolt and a nylon locknut. The frame is moved to its final position and lag bolted into the playa with ⅜” 14” hex head lag bolts (frankly overkill for this structure, but SOP for securing structures out there).
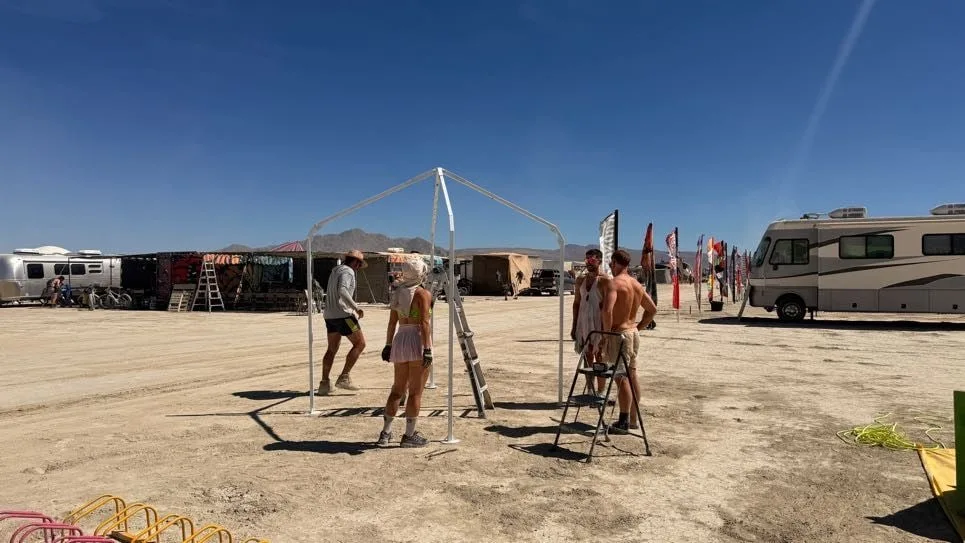
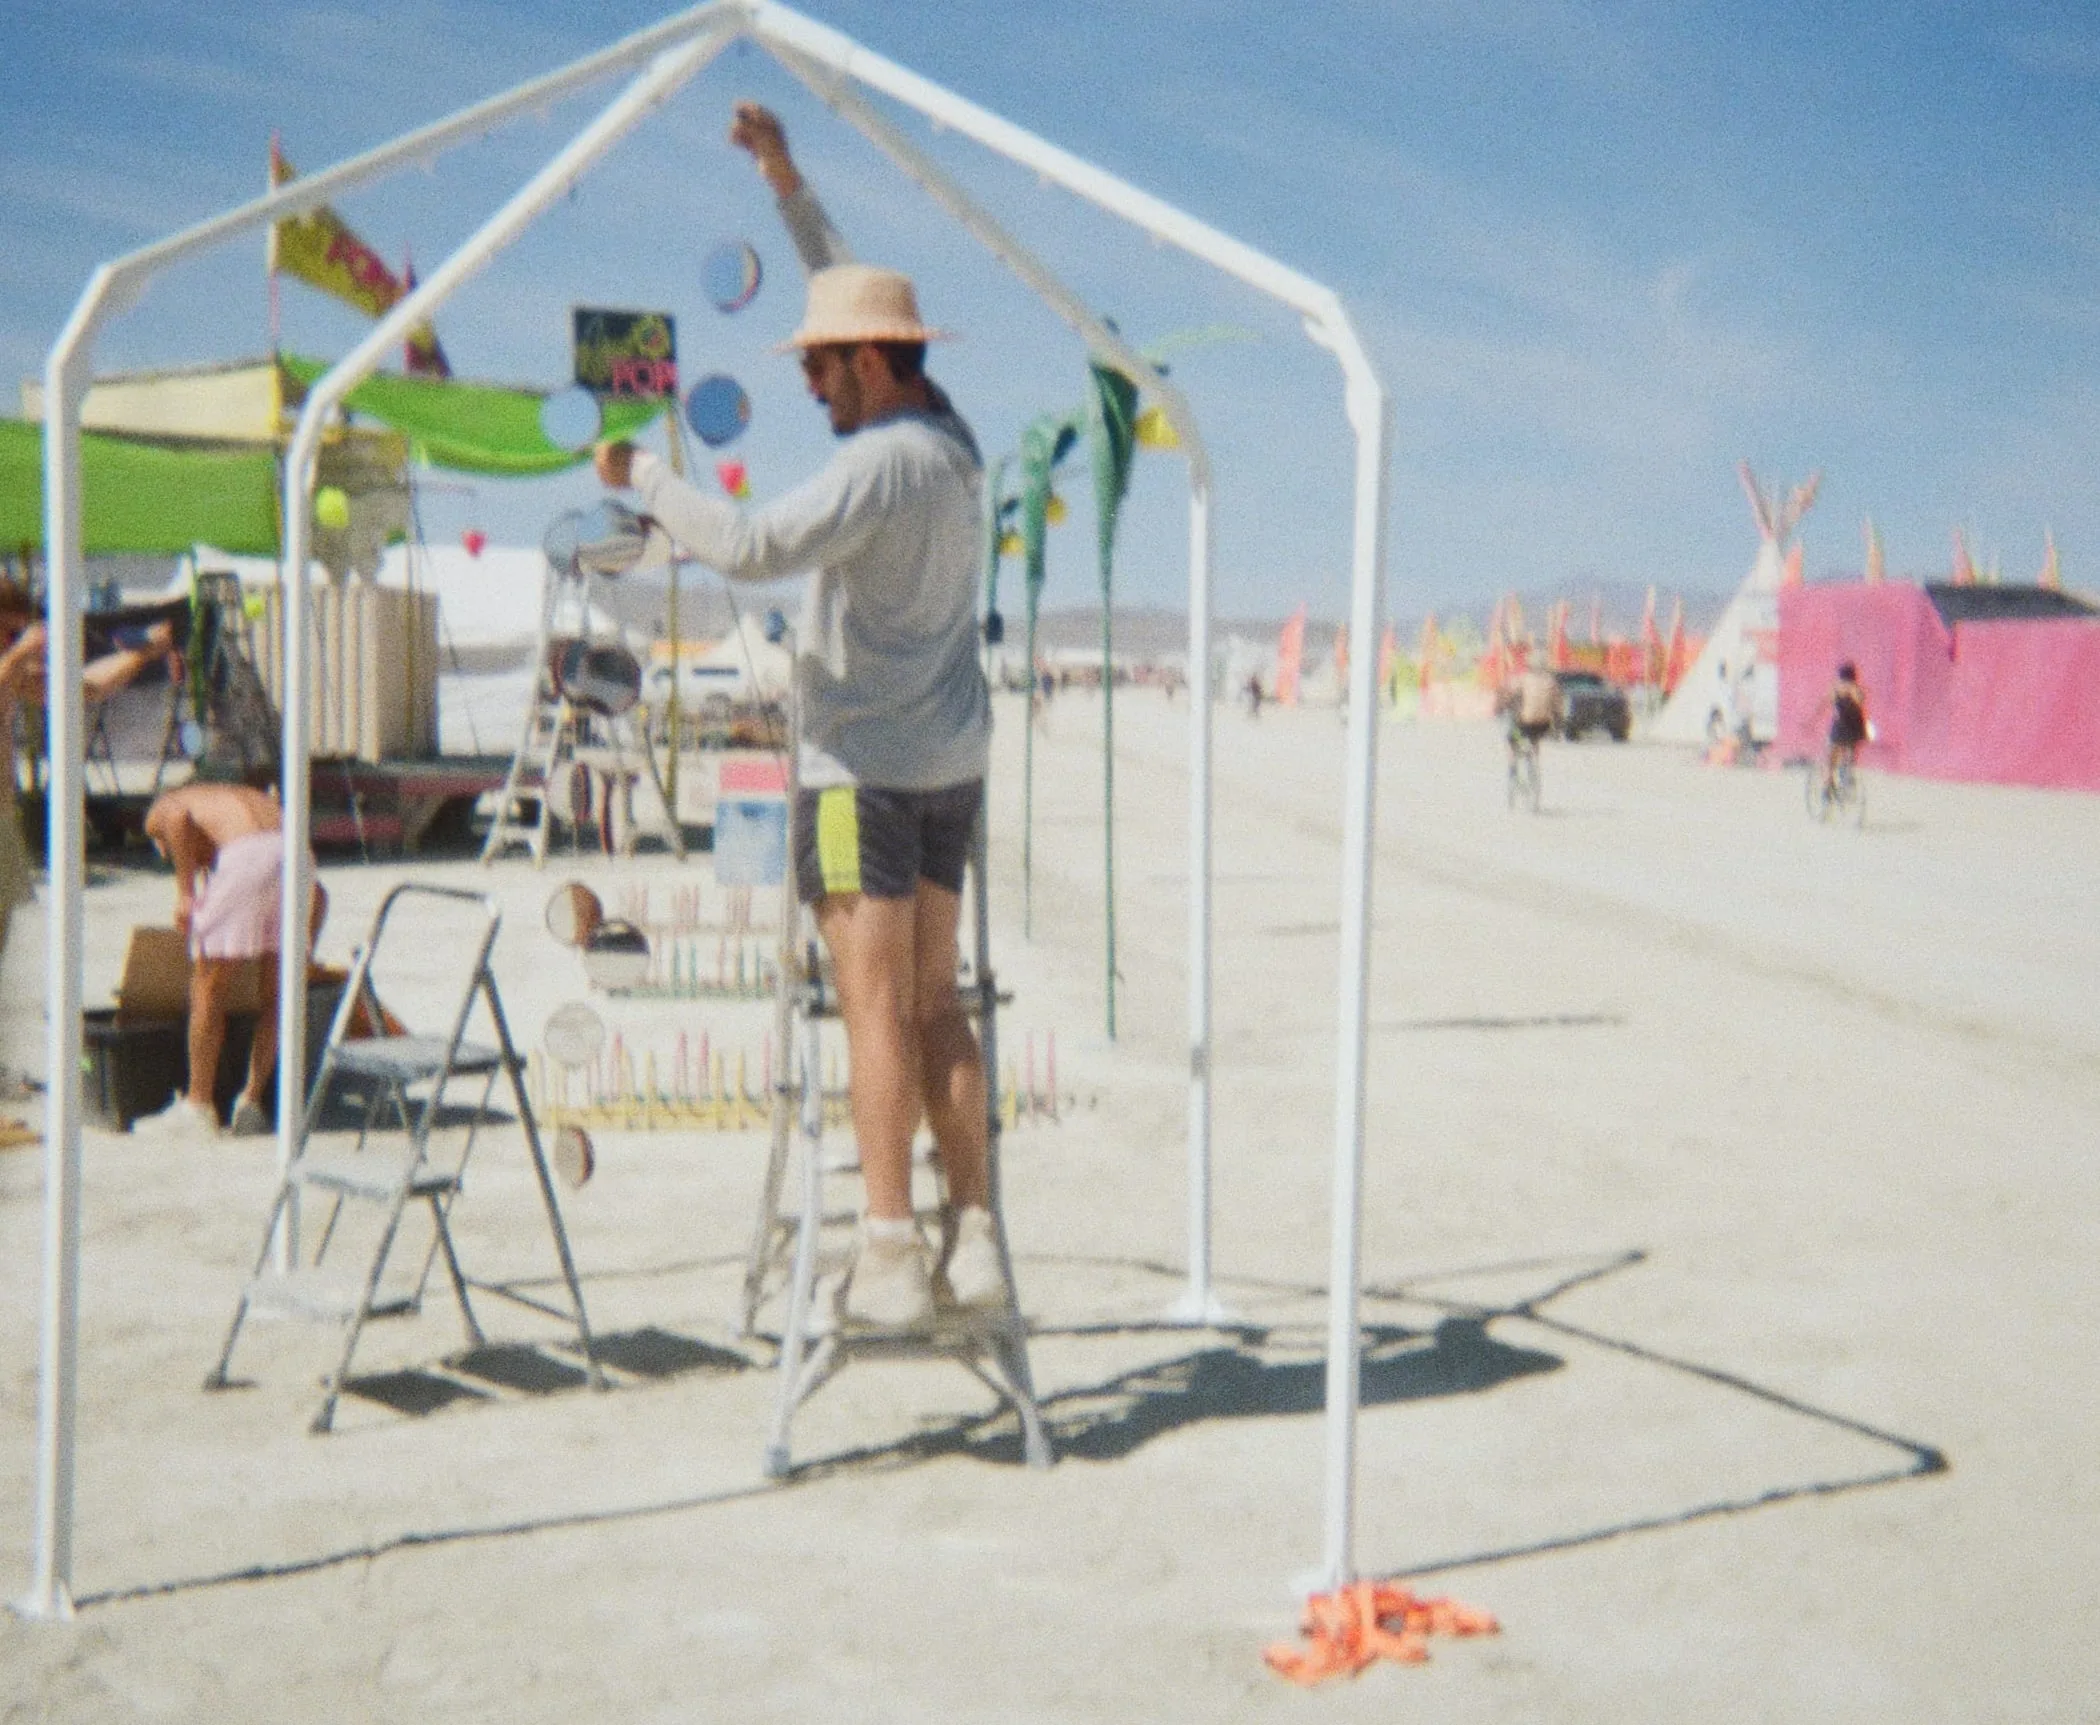
The 17 lines are clipped onto their respective tabs on the frame, 4x blacklight LED panels are attached to the integral nuts with a flanged bolt, and then white extension cords (2x 10ft, 2x 15ft) are run to each panel and secured neatly with zip ties, each terminating at the bottom of a single leg and run to a trenched junction box for power.
This whole process is complete in about an hour.
The only real work I didn’t do off-playa (but could have) was securing the bottoms of each monofilament line. Not strictly necessary under ordinary conditions, but I was worried about the modules banging into each other or the frame in high winds.
I had a few ideas for how to deal with this including putting 17 lag bolts directly below each line, but I wanted to allow some motion and ended up going with a simpler (and more pre-fabbed option for the future).
Each line (red) was terminated in a crimped loop 1-2” above the ground, and then I ran two tensioned lines horizontally between opposite footpads (green) through each loop. I put one lag bolt in the center with a chainlink holding both horizontal lines to control tension.
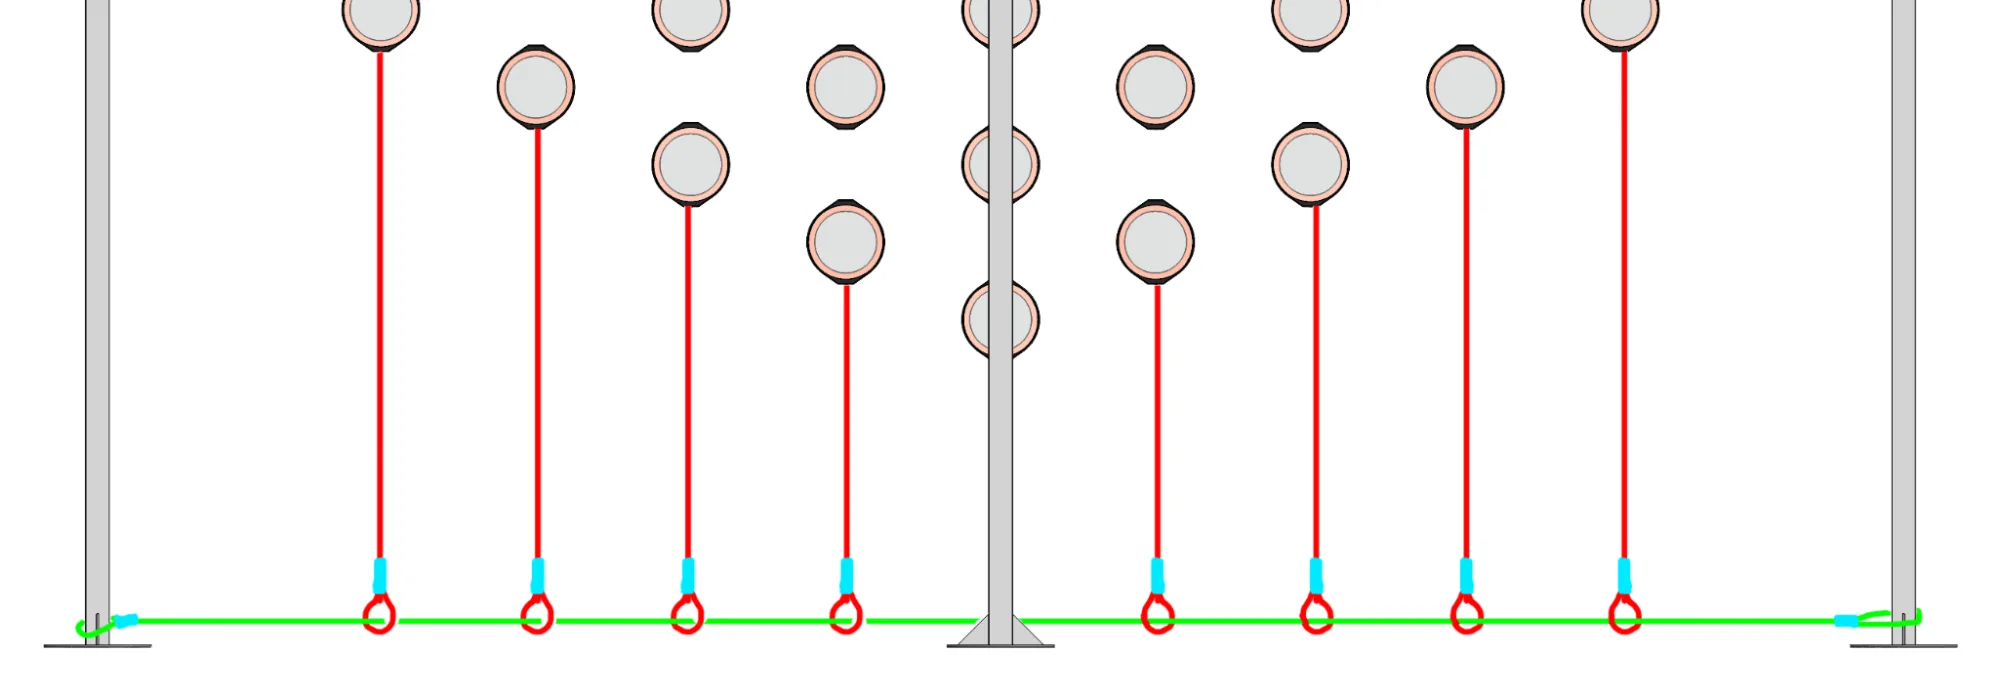
The green horizontal lines were scrapped after this burn, in the future I can fabricate those with 4x crimps on-site, or figure out something more reusable.
Lighting & Power
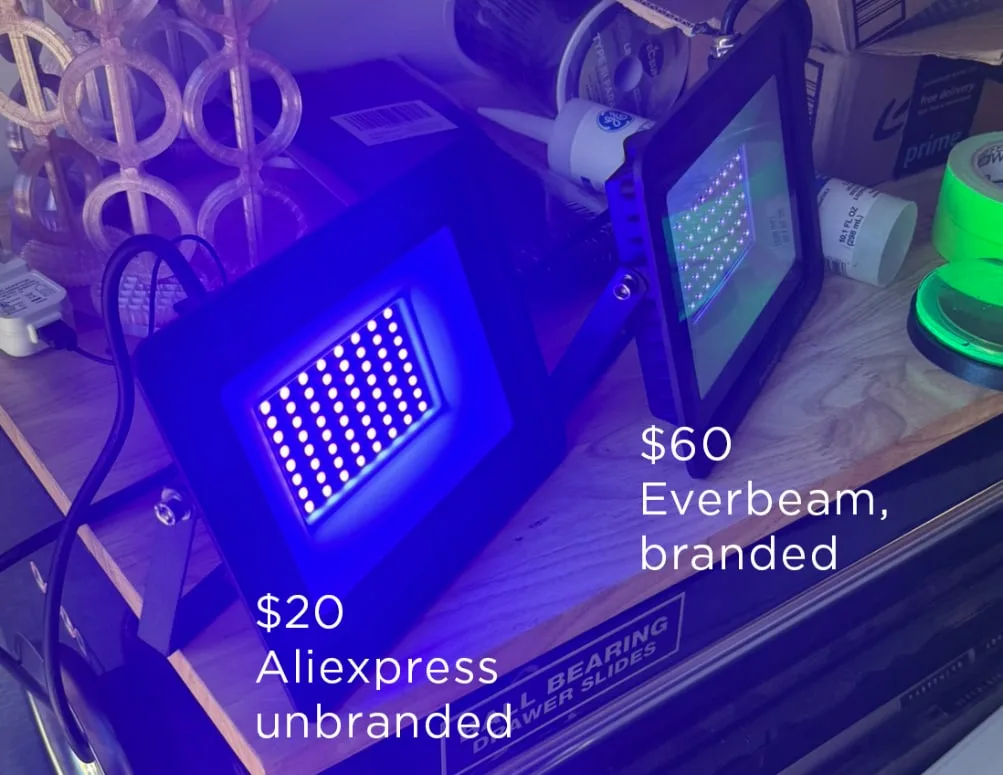
The whole concept here is “passive infinity mirror” which is accomplished by lighting the fluorescent acrylic with blacklights. Here I’m using 4x 50W 395nm UV LED panels, ordered on the cheap from Aliexpress for ~$20 per panel. Using 365nm panels would be more effective, but I wanted to err on the side of eye safety in case random people were staring into them in the middle of the night.
I thought I might need eight panels to fully fluoresce all 192 mirrors, but four did the trick at half the power draw.
Power is a non-issue if you have access to an electrical grid, but in this case we’re running under our own generator/solar + battery system. With a fully charged 2kWh battery I could run this piece for 9+ hours at 200W draw, and with some additional lighting/projection on the same circuit we had about ~350W draw, allowing us to run the battery down and keep the lights on for most of the night, usually through 4-5AM.
Interestingly these 50W cheapo panels do actually draw 49-50W continuous, while the Everbeam branded “50W” panel I got at 3x the price for early testing only pulls ~34W continuous and is notably dimmer. The Aliexpress panels also got way hotter, uncomfortably hot to the touch, and I assume they would burn out faster with long duration use…but no issues over a week which included high winds carrying abrasive dust and ~10hr/0.1” of rain.
Finished Installation
Bill of Materials
- Infinity pixels $752.09 45%
- Steel frame $469.81 28%
- Lighting & power $182.01 11%
- Rigging & hardware $161.31 10%
- Paint $104.47 6%
| Item | Qty | Unit | Total | Source |
|---|---|---|---|---|
| Infinity pixels | $752.09 | |||
| 2-way mirror acrylic - 48x96" sheet | 1 | $196.00 | $196.00 | Plastic Point |
| Mirror acrylic - 48x96" sheet | 1 | $191.00 | $191.00 | Plastic Point |
| Acrylic sheet cutting/processing/tax | 1 | $182.14 | $182.14 | Plastic Point |
| Fluorescent acrylic - 48x96" sheet | 1 | $113.00 | $113.00 | Plastic Point |
| Matte black PETG filament | 5 | $13.99 | $69.95 | Amazon |
| Steel frame | $469.81 | |||
| 1.5" x .083" square steel tube (24ft, cut to 8ft sections) | 2 | $97.30 | $194.60 | MK Metal |
| 1.75" x .095" square steel tube (2ft) | 4 | $25.53 | $102.12 | Online Metals |
| Custom cut .119" A36 feet (2 extras) | 5 | $15.88 | $79.41 | SendCutSend |
| 2"x2"x1/8" weld on steel gussets | 2 | $18.76 | $37.51 | eBay |
| Custom cut .119" A36 gussets (2 extras) | 10 | $2.45 | $24.50 | SendCutSend |
| Weld on steel tabs (20 pack) | 1 | $17.15 | $17.15 | Amazon |
| 2"x .120" square steel tube (1ft) | 1 | $12.00 | $12.00 | MK Metal |
| 1/4"-20 stainless steel nuts (for weld on) | 6 | $0.42 | $2.52 | Lowe's |
| Lighting & power | $182.01 | |||
| 50W 395nm IP66 LED UV panel | 6 | $20.71 | $124.26 | AliExpress |
| 15ft white extension cords (3 pack) | 1 | $35.96 | $35.96 | Amazon |
| 10ft white extension cords (3 pack) | 1 | $21.79 | $21.79 | Amazon |
| Rigging & hardware | $161.31 | |||
| 1.7mm aluminum crimp sleeves (500 pack) | 1 | $38.14 | $38.14 | Amazon |
| GE silicone adhesive | 3 | $11.43 | $34.30 | Amazon |
| 200LB monofilament | 1 | $16.34 | $16.34 | Amazon |
| Cheap crimping tool | 1 | $15.90 | $15.90 | Amazon |
| 1/4"-20 x 1/2" flanged bolts (bulk pack) | 1 | $15.25 | $15.25 | Amazon |
| Mini carabiners (20 pack) | 1 | $13.07 | $13.07 | Amazon |
| #8 stainless steel flat washers (36 pack) | 3 | $4.34 | $13.01 | Lowe's |
| 1/4-20 x 2-1/4" hex head bolts (10 pack) | 1 | $8.77 | $8.77 | Amazon |
| 1/4-20 nylon locking nuts (bulk pack) | 1 | $6.53 | $6.53 | Amazon |
| Paint | $104.47 | |||
| Rust-Oleum Universal Gloss White spraypaint | 8 | $13.06 | $104.47 | Lowe's |
| Total | $1,669.69 |